

Hepa vacuum for lead dust is the tool my downstairs neighbor Sam wishes he'd owned before he tried to repaint his 1962 kitchen. He didn't know the building was pre-1978. He didn't know the original paint was almost certainly lead-based. He didn't know that sanding the window frame without containment would put lead dust into his lungs and the building's HVAC system for three months afterward. His daughter's lead level came back elevated at her next well-child visit, and the pediatrician traced it to the apartment. Even low-level lead exposure in children can cause permanent neurological damage, learning disabilities, and behavioral problems. There is no safe blood lead level. The landlord paid for the professional remediation eventually. The pediatrician bills were his. The long-term effects may not be fully known for years. The lesson Sam learned is the one this article is built around: if you live in a pre-1978 apartment and you disturb any painted surface, even something as small as a nail hole or a window sill scuff, you need a real HEPA vacuum for lead dust and a cleanup protocol that meets EPA standards. Five filters tested below, three that capture lead dust, two that don't, plus the renter-safe protocol that meets EPA RRP (Renovation, Repair, and Painting) requirements without hiring a contractor.
Why "HEPA" Alone Is Not Enough
Every vacuum marketed as HEPA claims to filter 99.97 percent of particles at 0.3 microns. Lead dust particles are typically 0.5 to 5 microns. By the math, any HEPA filter should capture them. The problem is that "HEPA" is not a regulated certification in consumer vacuum marketing. Manufacturers can call any filter "HEPA-style" or "HEPA-type" without independent testing.
The five vacuum categories below separate the real HEPA filters that meet the standard from the marketing terms that don't. The split matters because lead dust exposure is cumulative. Each renovation project that uses the wrong vacuum adds to the total lead load in your body, and the body's lead burden doesn't decrease much over time. Children, pregnant women, and people with kidney conditions are at higher risk because their bodies process lead less efficiently.
For Sam's case, the trigger was a kitchen window frame that had been painted multiple times since 1962. He sanded it for repainting without containment. The lead dust spread through the kitchen, into the hallway, into the building's return air vents, and into his daughter's bedroom via the HVAC system. Three months of normal activity was enough to elevate her lead level. The cleanup that should have happened in three days took three months and required professional remediation.
Five Preventable Cases
The five cases below are composite patterns from common renter scenarios. They illustrate the warning signs that precede lead exposure incidents and the triggers that could have stopped each one.
Case 1: The window frame refinisher. A renter in a 1960s building sanded a wooden window frame for repainting. No containment, no HEPA vacuum, no mask. Lead dust spread through the apartment and into the HVAC system. The renter's child developed elevated lead levels within 2 months. The trigger that would have stopped this: testing the paint for lead before sanding, using a HEPA vacuum rated for lead, and containing the work area with plastic sheeting.
Case 2: The cabinet hardware installer. A renter drilled new holes in pre-1978 kitchen cabinets to install updated hardware. The drilling released lead dust from the original paint inside the cabinet doors. The renter wiped up with a wet rag but didn't use a HEPA vacuum. Lead dust remained in the cabinet crevices for months. The trigger that would have stopped this: HEPA vacuuming during and after drilling, plus wet wiping of all surfaces.
Case 3: The door hinge painter. A renter stripped and repainted a door hinge on a pre-1978 interior door. The heat from a heat gun released lead fumes and dust. The renter worked in a closed room with no ventilation. Symptoms appeared within weeks (headaches, fatigue). The trigger that would have stopped this: working outdoors or with proper HEPA ventilation, never using heat on suspected lead paint.
Case 4: The "small repair" tenant. A renter patched nail holes in a pre-1978 wall with spackle, then sanded smooth. The sanding released lead dust from the underlying paint layers. The renter cleaned with a regular shop vacuum. The shop vacuum's filter didn't capture lead particles, so they recirculated through the room. The trigger that would have stopped this: HEPA vacuum during and after sanding, plus wet wiping.
Case 5: The "landlord assured me" tenant. A renter asked the landlord if the paint contained lead, was told "no," and proceeded with renovations. The landlord was wrong or misled. The renter had no documentation of the conversation. When the renter's child developed elevated lead levels, neither party had clear legal standing. The trigger that would have stopped this: getting the landlord's answer in writing, plus independent lead paint testing ($30 to $50 per sample) before any disturbance.
These five cases share three patterns: pre-1978 construction, paint disturbance without containment, and HEPA vacuum use that was either absent or wrong. Every case was preventable with the protocol below.
The Warning Signs That Lead Paint Is Present
Before any paint disturbance, identify whether lead paint might be present. Four warning signs, in order of reliability.
Sign 1: Construction year. Buildings built before 1978 are highly likely to have lead paint. Lead paint was banned for residential use in 1978 by the Consumer Product Safety Commission. If your building was constructed before 1978, assume lead paint is present until you test otherwise. If constructed 1978 or later, lead paint is unlikely but not impossible (later renovations could have used old paint).
Sign 2: Paint condition. Older paint that is cracking, chipping, peeling, chalking, or showing alligator-pattern wear is more likely to be lead-based, both because older paint is more likely to contain lead and because deteriorating paint is more likely to release dust. New paint that is intact and well-bonded is unlikely to release lead dust even if it contains lead.
Sign 3: Location of the paint. Interior paint on trim, doors, windows, cabinets, and baseboards is more likely to be lead-based than wall paint, because these "high-friction" surfaces were often painted with more durable (and lead-containing) formulations. Exterior paint is also frequently lead-based in older buildings.
Sign 4: Color. Lead paint was most often used in whites and off-whites, but it came in every color. Color alone is not a reliable indicator.
If signs 1 and 2 are both positive (pre-1978 building + deteriorating paint), the assumption should be that lead paint is present until tested. Lead paint test kits are available at hardware stores for $10 to $30 and provide a yes/no answer within minutes. For more accurate results, a professional lead inspector can take paint chip samples and have them lab-analyzed for $30 to $50 per sample.
The HEPA Filter Standard That Actually Works
For lead dust, the relevant standard is not "HEPA-type" or "HEPA-style" but the specific certification that captures particles down to 0.3 microns at 99.97 percent efficiency or better. Three certifications meet this standard.
Standard 1: True HEPA. The filter has been independently tested and certified by a private testing company (not the EPA) to capture 99.97 percent of particles at 0.3 microns. This is the standard required by the EPA RRP rule for lead-safe renovation work. Look for the explicit "True HEPA" or "HEPA" label with the percentage claim.
Standard 2: ULPA (Ultra Low Penetration Air). The filter captures 99.9995% of particles at 0.12 microns. ULPA is more efficient than HEPA and also meets the EPA RRP standard. ULPA vacuums are typically more expensive than HEPA models.
Standard 3: HEPA H13 or H14. European classification grades. H13 captures ≥99.95% and H14 captures ≥99.995% at the Most Penetrating Particle Size (MPPS), which is typically between 0.1 and 0.2 microns. Both meet EPA RRP standards. H13/H14 ratings are common on European-made vacuums sold in the US.
Vacuum filters that don't meet these standards, including those labeled "HEPA-style," "HEPA-type," "Allergen," or "Anti-allergen," are not certified to capture lead dust at the EPA RRP level. They may capture some lead particles, but they let enough through to create exposure risk.
Three HEPA Vacuums That Work (and 2 That Don't)
The five vacuum categories below cover the range from rental-grade to professional-grade, with three that meet EPA RRP and two that don't.
Vacuum 1: True HEPA shop vacuum (works). A shop vacuum with a True HEPA rated filter and sealed collection bag captures lead dust effectively. Models like the Ridgid WD1451 or the Festool CT 36 are designed for construction dust and include sealed systems. The cost is $200 to $600. This is the most common choice for serious renter projects.
Vacuum 2: HEPA-rated consumer vacuum (works). Some consumer vacuums, particularly from brands like Miele, Dyson, and Sebo, use True HEPA filters as standard. Verify the filter is independently certified, not just branded "HEPA." The cost is $400 to $900.
Vacuum 3: HEPA H13/H14 European vacuum (works). Vacuums like the Bosch GAS 35 M AFC or the Metabo ASA 30 L PC come with H13 or H14 filters and meet EPA RRP standards. The cost is $300 to $800. Available through industrial supply retailers.
Vacuum 4: "HEPA-style" consumer vacuum (doesn't work). Vacuums labeled "HEPA-style" or "HEPA-type" without independent certification. The filters capture larger particles but let lead dust through. The cost is $100 to $300. Common at big-box retailers.
Vacuum 5: Standard shop vacuum without HEPA filter (doesn't work). A standard shop vac with a regular filter captures construction dust but not lead particles. Lead dust recirculates through the room. The cost is $50 to $150. Common at hardware stores.
For lead dust specifically, only the first three categories meet the EPA RRP standard. The fourth and fifth categories create exposure risk even when used carefully. The price difference is real ($200 to $900 versus $50 to $300) but reflects the actual capability of the filter.
The Renter-Safe Protocol That Meets EPA RRP
The protocol below is the minimum cleanup standard for any paint disturbance in a pre-1978 apartment. It meets EPA RRP requirements and is achievable for a renter without hiring a contractor.
Step 1: Test the paint for lead before any disturbance. Use a $10 to $30 home test kit or hire a professional inspector. Document the test result with photos.
Step 2: Contain the work area. Close all doors and windows in the work area. Cover floors with plastic sheeting taped at the edges. Cover any furniture that can't be moved. Cover HVAC vents in the work area with plastic and tape.
Step 3: Use proper PPE. For dry sanding or scraping (particulate lead dust), wear an N100 or P100 respirator. For any heat-based method (heat gun, torch), lead can vaporize—you must use a supplied-air respirator or a respirator with acid gas/organic vapor cartridges. Never use a heat gun above 1,100°F on lead paint; the EPA RRP rule prohibits it. Wear disposable coveralls or old clothes that can be washed separately. Wear gloves and safety glasses.
Step 4: Use wet methods where possible. Mist the paint with water before scraping or sanding to keep dust down. Use a spray bottle for small areas or a garden sprayer for larger ones. The water prevents dust from becoming airborne.
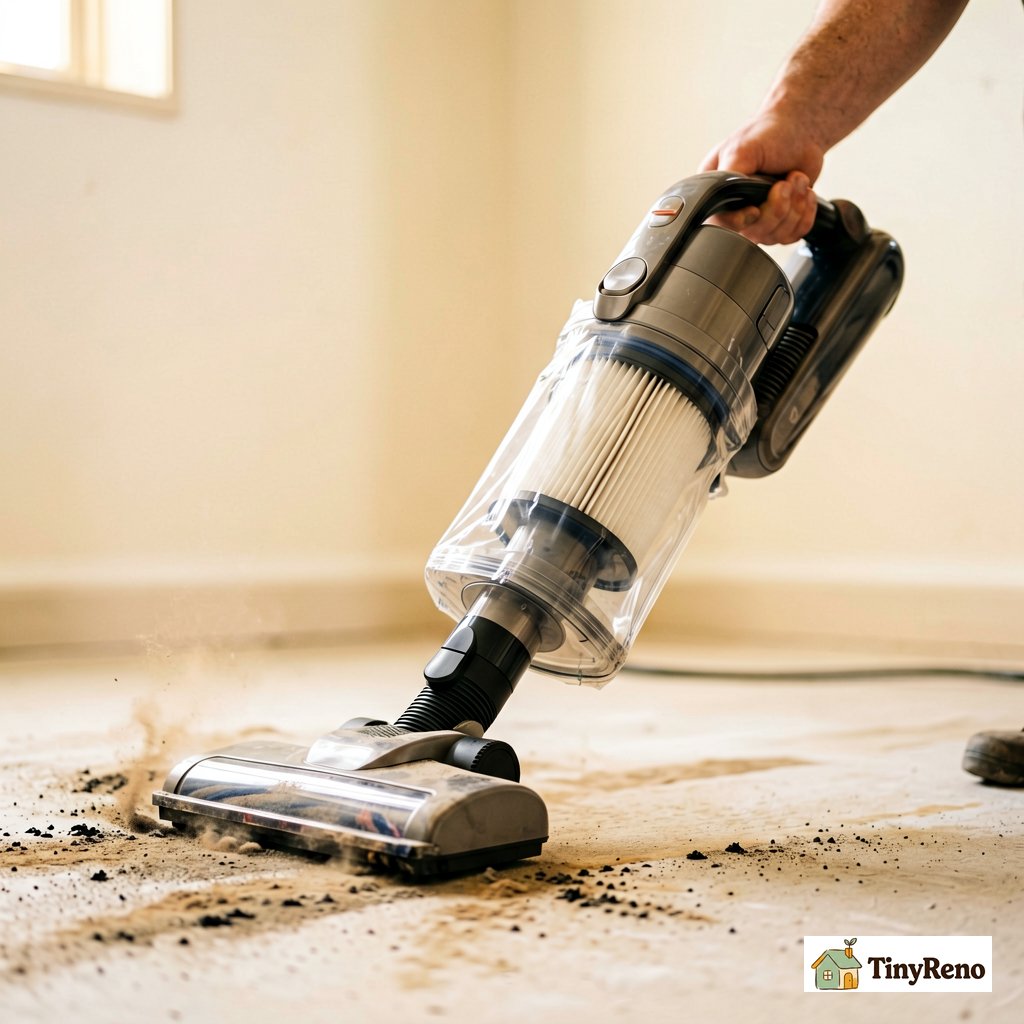
Step 5: HEPA vacuum during and after the work. Vacuum the work area continuously during the work with a True HEPA vacuum. After the work is complete, HEPA vacuum all surfaces in the work area, including walls, floors, window sills, and any horizontal surfaces where dust settles.
Step 6: Wet wipe all surfaces. Use wet wipes or damp rags to wipe down all surfaces after vacuuming. The wet wipes capture any remaining particles that the vacuum missed. Dispose of wipes in a sealed plastic bag.
Step 7: Clean up carefully. Remove the plastic sheeting by folding it inward to contain any dust on its surface. Place it in a sealed bag. Remove PPE last, place in a sealed bag, and wash separately.
Step 8: Verify the cleanup. After cleaning, the work area should be visually free of dust. For high-stakes situations (children, pregnant women, lead-poisoning history), hire a professional clearance examiner to verify lead dust levels are below EPA thresholds.
The whole protocol takes 30 to 60 minutes longer than a non-HEPA cleanup, but it eliminates the exposure risk that the cases above illustrate.
When You Should Just Hire a Pro
For most renter projects, the protocol above is enough. There are four cases where hiring a professional is the right call, regardless of how confident you are in the cleanup.
Case 1: The project disturbs more than 6 square feet of interior paint or more than 20 square feet of exterior paint. This is the EPA threshold for requiring a certified lead-safe contractor.
Case 2: The project involves window replacement, which generates large amounts of lead dust from the friction surfaces of the original sashes. Window replacement in pre-1978 buildings should always be done by certified contractors.
Case 3: A child under 6 or a pregnant woman lives in the apartment. The threshold for tolerable lead exposure is much lower for these groups, and the cost of professional work is justified by the medical risk.
Case 4: The landlord is doing the work and the lease requires it. The landlord's contractor should be RRP-certified. Ask for the certification before work begins.
For Sam's case, the kitchen window frame refinishing was below the 6-square-foot threshold, so he could have done the work himself with the right protocol. He didn't, because he didn't know the threshold existed. The lesson the cases above teach is that the threshold exists, the protocol works, and the protocol is achievable for most renters with a $200 to $400 investment in equipment.
The five cases above all shared the same warning signs in retrospect: pre-1978 construction, deteriorating paint, and disturbance without containment. They all shared the same fix in retrospect: HEPA vacuum, wet methods, containment, proper PPE. The tools are not expensive, the protocol is not complicated, and the alternative (Sam's daughter's elevated lead level) is not acceptable. If you live in a pre-1978 apartment and you disturb any painted surface, the HEPA vacuum and the protocol above are not optional. They are the cost of working on old paint, and the cost is much smaller than the cost of lead exposure.
A HEPA vacuum for lead dust is not a luxury. It is the minimum equipment required to do the work without creating exposure that can affect your family for years. The price of the vacuum is one afternoon of work. The cost of skipping it is something that doesn't go away.


Discussion (0)
Sign in to join the discussion