

How to get a fire detector to stop beeping is one of those questions that only matters at 2 AM, and only after the third chirp. My downstairs neighbor Priya learned this at exactly that hour, when her hallway unit started chirping every 30 seconds while she was in the middle of a Zoom call for work. The chirp isn't continuous, it isn't loud enough to wake a neighbor, but it's the kind of sound that grinds into your skull until you do something. Most renters do the wrong thing: pull the battery, slam it back in, and hope. Then the chirping starts again in a week. The right sequence takes 4 minutes and doesn't touch the battery. Before you do anything, run the 30-second test below. It tells you whether you can DIY this or whether you're calling your landlord in the morning.
The 30-Second Test That Tells You What to Fix
The chirp pattern tells you the cause before you touch anything. Stand under the alarm, listen, and count the gap between chirps. That gap is the entire diagnosis.
If the gap is exactly 30 to 60 seconds, the chirp is either a low-battery warning or an end-of-life signal. Both use the same 30-to-60-second interval. The way to tell them apart is to replace the battery first. If the chirp stops, it was low battery. If the chirp continues with a fresh battery, the unit is at end-of-life and needs replacement. This is the most common cause of chirping in apartments.
If the detector is giving false alarms—sounding continuously for no clear reason—and the battery is fresh, the cause is usually dust or humidity inside the sensing chamber. Smoke detectors have a chamber that holds a photoelectric sensor or an ionization source, and dust settles in there like it settles on every other surface. Humidity changes can cause condensation inside the chamber, which the detector reads as a buildup of particles. The fix isn't a battery. The fix is compressed air.
If the chirp happens immediately after the alarm went off from a real or false trigger, like you burned something on the stove and the alarm sounded for 30 seconds, the unit may need to be reset. Some models chirp or flash until you clear the alarm. The fix is the test button. Hold it for 5 to 15 seconds.
If the chirp happens randomly with no alarm having sounded and the battery is fresh, the cause is end-of-life. Most detectors are rated for 8 to 10 years, and after that, the sensor itself degrades. The chirp is the unit telling you it's time to replace it. In a rental, this is a landlord conversation, not a tenant fix. Most leases require landlords to maintain working smoke alarms, and a chirping unit past its 10-year mark is the landlord's responsibility.
The fifth and least common cause is a stuck relay from a power surge. This is rare in battery-only units but happens in hardwired interconnected systems. If the chirp started the same day your building had a power blip, and the unit is hardwired, that's the cause. Reset requires killing the breaker to that circuit for 60 seconds.
That diagnostic test takes 30 seconds and tells you which of the four fixes below to run. Don't skip it.
What You Need (and What You Don't)
Before you open anything, gather the right tool. For most apartment beeping fixes, you need exactly one of these: a 9-volt battery, a can of compressed air, or a step ladder. That's the full list.
The 9-volt battery is for the low-battery case. Buy a name-brand one: Duracell, Energizer, or a lithium 9-volt if you want to skip this exercise for the next 5 years. The off-brand batteries from gas stations work for a few months and then you're back to chirping at 2 AM. Don't reuse the battery that's in the unit; even if it tests fine on a multimeter, once a low-battery chirp has fired, the unit has flagged that battery and may continue to chirp until it's replaced with a fresh one.
Compressed air is for the dust case. The $4 cans from the cleaning aisle at Target or Walmart are fine. The key is to use short bursts, not a continuous spray, and to hold the can upright so the propellant doesn't come out as liquid. Three short bursts into the sensing slits on the side or top of the unit is usually enough.
A step ladder is for ceiling-mounted units that you can't reach from the floor. If you don't have one and your ceiling is high, a chair works, but put it against the wall so it doesn't roll. Don't stand on a stack of books.
Three things you don't need. First, you don't need a battery tester. If the unit is chirping on a low-battery code, the test is irrelevant; the unit's own diagnostic is more accurate than any external tester. Second, you don't need a vacuum cleaner. Vacuums pull dust around but don't reliably clean the sensor chamber. Third, you don't need to call your landlord before doing steps 1 through 3 below. The only case where you must call is end-of-life, and you'll know it from the diagnostic.
Step 1: The Battery Fix (If the Test Said Low Battery)
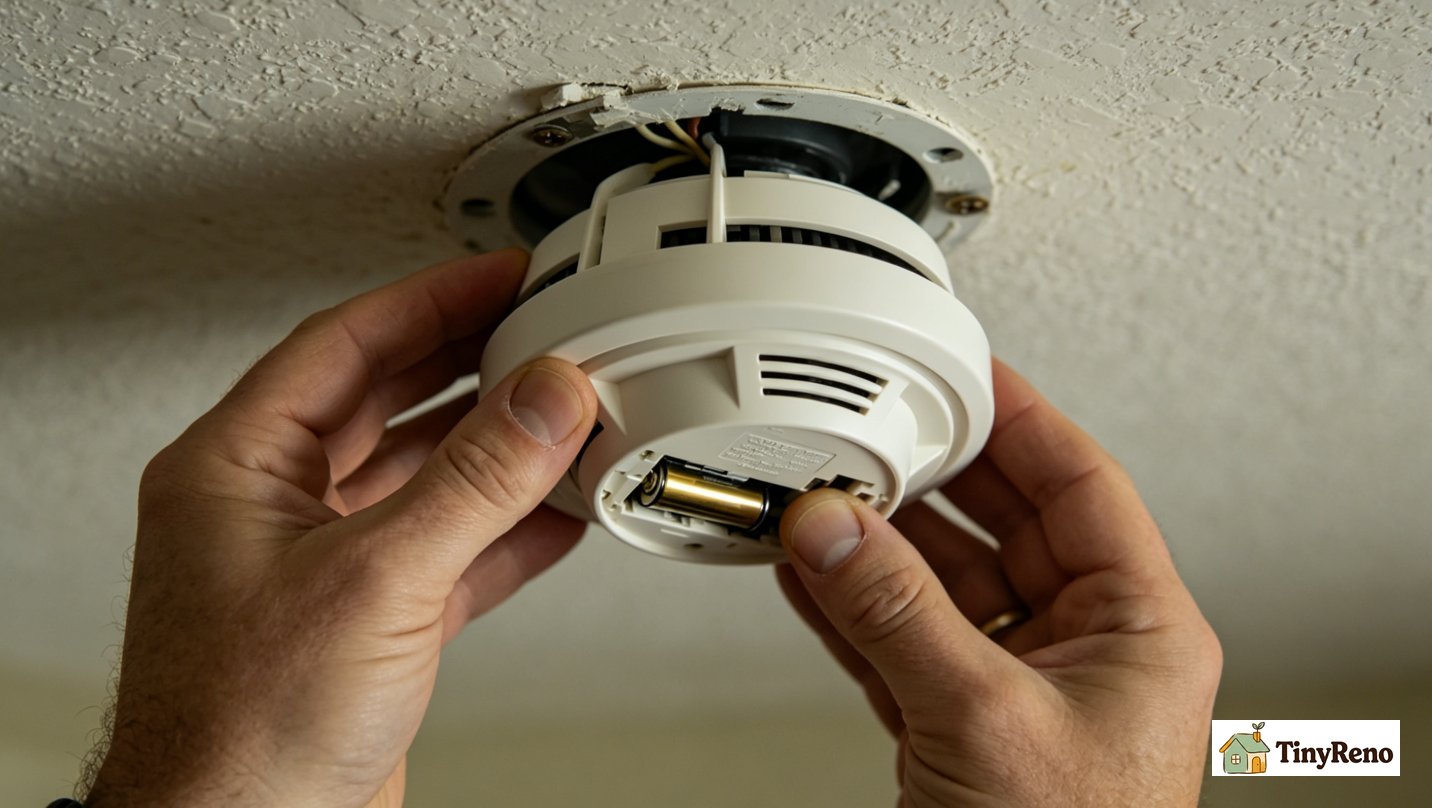
For the 30-to-60-second chirp, the fix is the battery. Twist the detector counterclockwise about a quarter turn and it should drop from the mounting bracket. Most apartment units are twist-mount, not clip-mount. Don't yank; if it doesn't twist, look for a small slide tab on the side and push it while rotating.
Once the unit is in your hand, flip it over and find the battery compartment. It's either a slide-off cover on the back or a small door held by a tab. Open it. Pull out the old 9-volt. Don't reuse it.
Put in the new battery, matching the polarity (+ and -) to the markings inside the compartment. Snap the cover back on. Hold the unit upright and press the test button. You should hear a loud, clear alarm tone for 2 to 5 seconds, then silence. If you hear nothing, the polarity is wrong or the battery is dead out of the package.
Now remount the unit by aligning the slots on the back with the bracket on the ceiling, twisting clockwise until it locks. The chirping stops immediately. If it doesn't, the diagnostic was wrong, and the next step applies.
The whole thing takes 3 minutes if you have the battery and the ladder ready. If you don't have a 9-volt, that's the first thing to buy, and most convenience stores stock them.
Step 2: The Compressed Air Fix (If the Test Said Dust)
For irregular chirps with a fresh battery, the fix is air. Take the unit down the same way as the battery fix: twist counterclockwise, drop from the bracket.
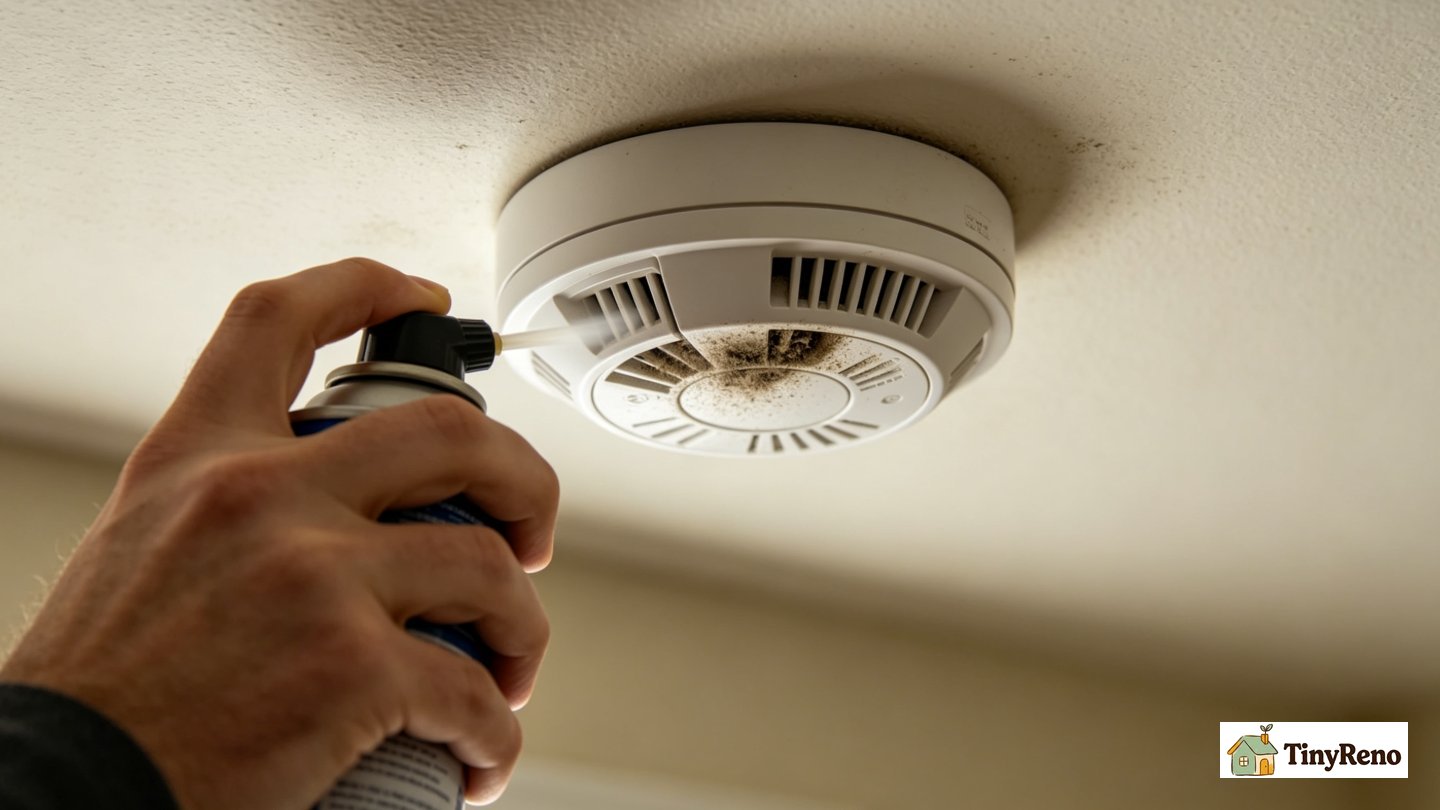
Once it's in your hand, hold it sideways so the sensing slits face you. They're usually a row of small holes on the side or a slot on the top. Take your compressed air, hold it 3 to 4 inches away, and give three short bursts into each slit. Don't spray continuously. Don't invert the can. Don't spray for more than 2 seconds per slit.
The compressed air blows out the dust that's settled in the chamber and on the sensor. You won't see anything dramatic come out, but the chamber is now clear. If you have a vacuum with a brush attachment, you can vacuum the outside and the sensing slits while the unit is down. It's not a substitute for compressed air, but it helps.
Remount and test the same way as the battery fix: press and hold the test button. A clear tone confirms the unit is working. The chirping should be gone.
This fix takes 4 minutes and doesn't cost anything if you already have compressed air. If you don't, it's a $4 can, and it solves the problem for 6 months to a year in most apartments. If the chirping returns in two weeks, the unit itself is degrading and you need to talk to your landlord.
Step 3: The Reset (If the Alarm Recently Tripped)
For residual error chirps after a real or false alarm, the fix is the reset sequence. The unit doesn't need a new battery. It needs to forget that it tripped.
Press and hold the test button for 5 to 15 seconds. Some models chirp once or twice during the hold, then go silent. Others beep continuously while held and then stop when released. Either way, the reset is the same: long press, then release, then listen. The unit should be silent after release.
If the unit is hardwired (not battery-only), the reset also involves clearing the residual charge from the circuit. After pressing the test button, flip the breaker for that circuit off, wait 60 seconds, flip it back on. The unit will chirp once as it re-initializes, then go silent.
This fix takes 1 minute and works for any model. If pressing and holding the test button doesn't clear the chirp, the unit has a different fault, and you should run the diagnostic again.
The reset is also the move you make after you change the battery or blow out dust. Treat it as the universal "all clear" command. Most renters skip it and then wonder why the unit chirps once after the new battery goes in. That's normal. The reset clears the once.
If the Test Said End-of-Life (Call Your Landlord)
The 10-year chirp is the only case where you should not DIY. The unit is doing its job by telling you it's reached the end of its certified life, but in most rentals, the landlord is responsible for replacement. Smoke alarms are part of the implied warranty of habitability in most states, and a non-functional alarm is a habitability defect.
Document the chirp with a short video or audio clip and the manufacture date on the back of the unit. The manufacture date is usually stamped into the plastic on the back, in a YY-YYYY format or with a specific month and year. If the unit is past 10 years from that date, you have a clear case.
Email or message your landlord with the clip, the date stamp, and a request for replacement. Most landlords will replace within a week. If yours doesn't, your local fire department's non-emergency line can sometimes expedite, and code enforcement in most cities will treat a non-functional smoke alarm as a violation.
Don't pull the battery while you wait. The chirp is annoying, but a non-functioning alarm with no battery is worse. Some renters stuff a towel over the unit or wrap it in plastic, both of which are terrible ideas. The chirp stops only when the unit is replaced or the battery dies completely.
If Nothing Works
If you've replaced the battery, blown out the dust, and done the reset, and the chirp is still there, you're in the rare cases. The cause is usually one of three things: a bad battery out of the package (yes, it happens), a unit that's past 10 years and you didn't realize, or a hardwired unit with a deeper electrical issue.
For the bad-battery case, swap in a different 9-volt, ideally a brand you trust, and run the reset again. If the chirp stops, you had a defective battery. If it doesn't, you have a deeper issue.
For the past-10-years case, the unit is end-of-life and you missed the manufacture date on the first inspection. Re-check the date stamp on the back of the unit. If it's 2014 or earlier on a unit chirping in 2026, that unit needs replacement.
For the hardwired electrical case, you need your landlord or an electrician. The chirp in this case is a relay issue that the reset sequence doesn't fix. The breaker-flip sequence sometimes works; if it doesn't, leave it for a professional.
The key thing in this case is not to escalate the fix by pulling wires, replacing the unit yourself, or removing the alarm entirely. All three are lease violations and code violations, and they put you at fault if there's an actual fire. Document, report to landlord, wait for the professional fix.
How to get a fire detector to stop beeping is rarely a one-size answer, but for 95 percent of apartment chirps, the diagnostic test plus the battery, dust, or reset fix does it in under 5 minutes. The other 5 percent are landlord conversations. Either way, the chirp doesn't have to be a 2 AM mystery. It's a code, and once you know how to read it, the fix is mechanical and quick.


Discussion (0)
Sign in to join the discussion