

Kerf weatherstripping was the word I had to look up twice before I tried it. The first time I heard it I assumed it was a brand name, like some caulk or adhesive I'd never heard of. The second time I realized it was a category — a specific way of mounting a rubber or foam seal into a thin slot (the kerf) cut into the doorstop on a hinged door. By the third time, I'd already installed the wrong type on two different doors in two different apartments, and the air leak I was trying to fix was actually worse than the one I started with. What follows is the four types I tested across three doors, the three mistakes I made, the one tool you don't need, and the one type I'd actually buy again.
What Kerf Weatherstripping Actually Is (And Why Renters Get Confused)
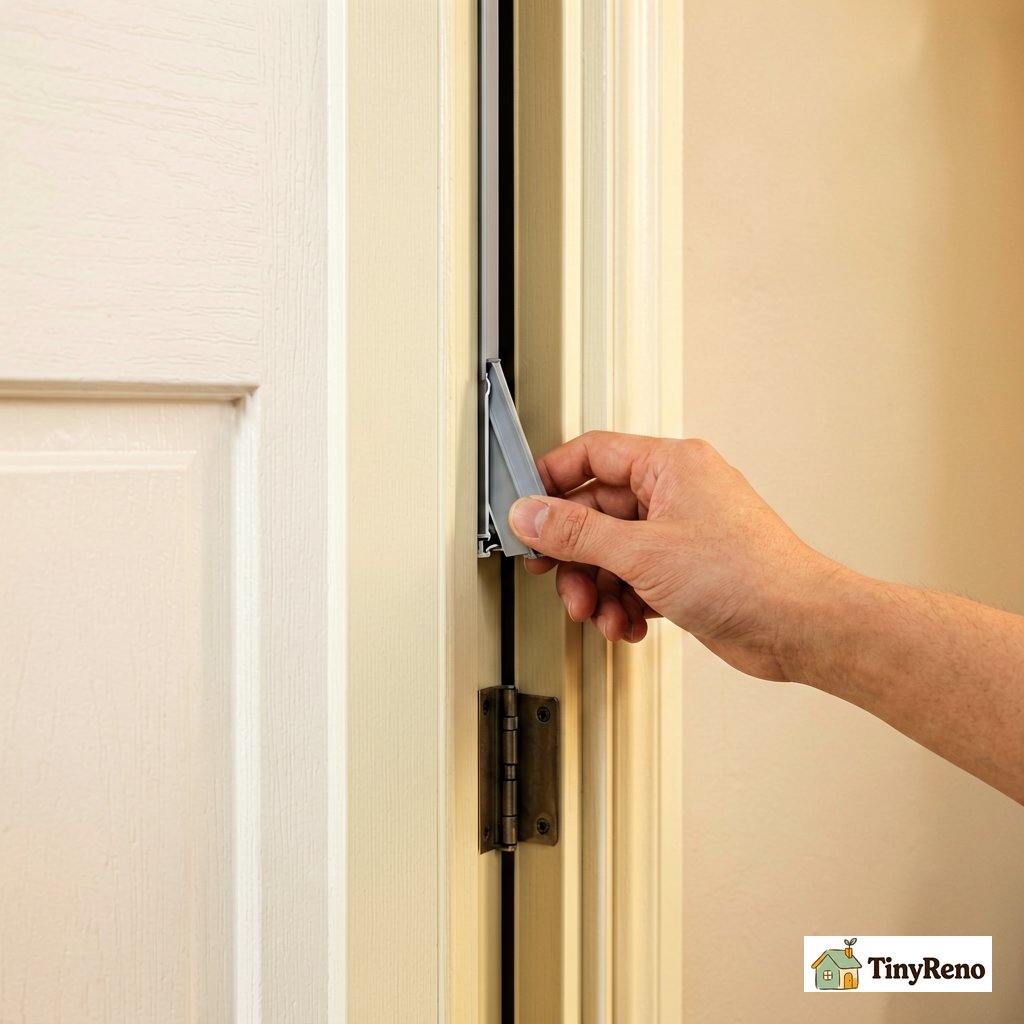
Kerf weatherstripping is weatherstrip that mounts by sliding a thin flange (called a kerf fin or a barb) into a narrow slot (called a kerf) that's already cut into the doorstop on the door frame. The slot is usually 1/8 inch wide and about 1/2 inch deep, and it's there from the factory on most doors built after 1990. You don't cut the slot yourself — the slot is part of the door. You just slide the weatherstrip into it. No nails, no screws, no adhesive, no drilling. When you move out, you pull the weatherstrip out in 30 seconds, the slot is still there, and the door looks like you were never in the apartment.
The reason renters get confused is that the same word — weatherstrip — gets used for five or six different products, and only one of them is kerf-mount. There's foam tape with adhesive backing, which is the most common type at the hardware store and the one most people try first. There's V-strip (also called tension strip), which is a thin metal or plastic strip that you press into the door frame. There's door sweeps, which mount to the bottom of the door and not the frame. There's bulb seals, which are silicone tubes with a kerf fin. And there's pile weatherstrip, which is the fuzzy strip on sliding doors. The kerf-mount type is the one with the thin fin that slides into the existing slot on your doorstop, and it's the only type that doesn't require any adhesive or fasteners to install.
The reason this matters for a renter is that the doorstop kerf is the part of the door that's already been cut at the factory to receive a weatherstrip. If your door has the kerf, it was designed to have weatherstrip — If your door has an empty kerf, one of three things happened: the previous tenant pulled the weatherstrip out before they left, the weatherstrip fell out over time, or the door was delivered with an empty kerf and nobody ever installed weatherstrip. The last case is common on interior doors in newer apartments. Either way, the door is designed to take weatherstrip and the fix is the same. The fix is to buy the right kerf weatherstrip and slide it in. The cost is $4 to $12 for enough weatherstrip to do one door, and the install takes 20 minutes for a door you've never done before.
The 4 Types I Tested on 3 Different Doors
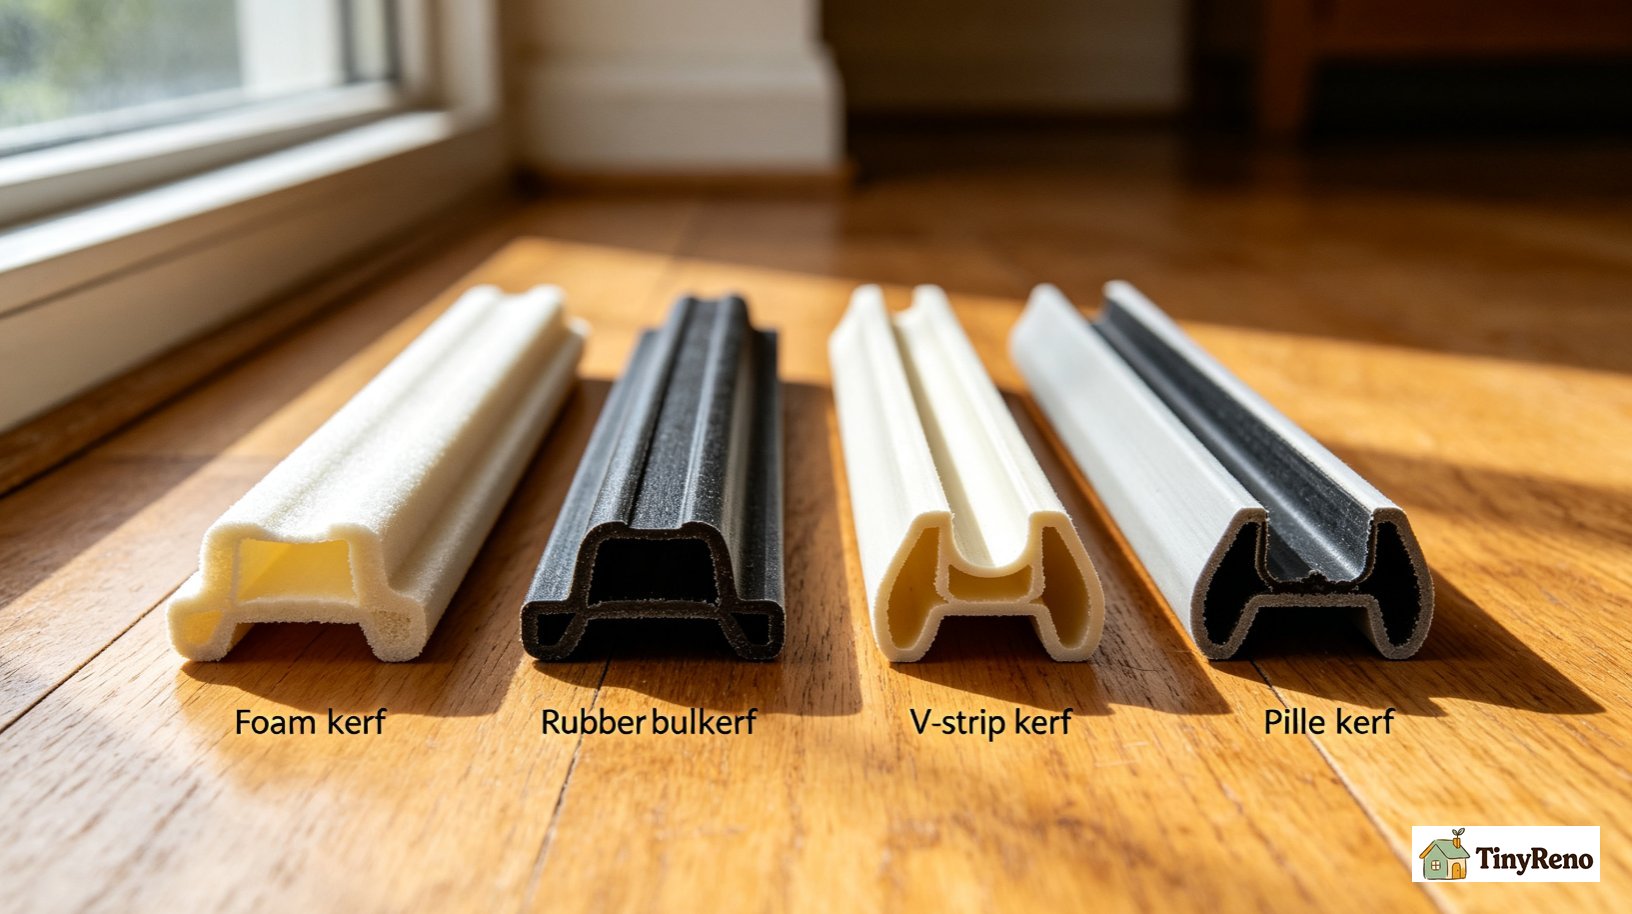
Type one was foam kerf weatherstrip. This is a closed-cell foam strip with a kerf fin on the back. The foam compresses when the door closes and springs back when the door opens. Cost was $5 for 16 feet, enough for two doors. Install took 15 minutes for the first door and 8 minutes for the second. The compression was good — the door closed firmly and the air leak around the top and sides dropped to almost nothing. The problem was durability. After four months the foam stopped springing back on the high-traffic side of the door (the side the doorknob is on, where the door gets slammed), and the air leak came back. Foam kerf weatherstrip is the cheapest option and the shortest-lived. For a bedroom door it might last two years. For an exterior door or a door that gets slammed by a kid, plan on one year.
Type two was rubber bulb kerf weatherstrip. This is a silicone or EPDM rubber tube with a kerf fin on the back. The bulb compresses when the door closes. Cost was $9 for 17 feet. Install was the same 15 minutes. The compression was noticeably firmer than foam, and the air leak dropped to zero on the first day. Six months in, the bulb is still springing back, the door closes the same way it did on day one, and the air leak is still zero. This is the type I'd buy again. The only downside is that rubber bulb is more visible than foam — the bulb is a quarter inch in diameter, and the foam is a quarter inch thick but flatter. On a door that has a tight-fitting doorstop, the foam looks like part of the door. The rubber bulb looks like a tube. For a closet door or a door that doesn't matter visually, the rubber bulb is the right answer.
Type three was V-strip weatherstrip. This is a thin V-shaped strip of metal or plastic. Most V-strip is surface-mounted — you nail or staple it to the doorstop. There are kerf-mount V-shaped products, but they're less common and harder to find. I tried a kerf-mount version and it was the worst of the three for air sealing. The V doesn't compress the way foam or rubber does. Cost was $7 for 18 feet. Install was the same. The V-strip was the worst of the three for air sealing — the V doesn't compress the way foam or rubber does, and the air leak was about 60 percent of what it was without weatherstrip, which is better than nothing but worse than foam or rubber. The V-strip is also the hardest to install because the V has to be oriented correctly (the open end of the V faces the door, not the frame), and if you get it backwards, the door won't close. I learned this the hard way on the first install. For a door that needs air sealing but not a perfect seal — like a closet door or a basement door — V-strip is fine. For an exterior door, skip it.
Type four was pile kerf weatherstrip. This is a fuzzy strip with a kerf fin. It's the same type that's on most sliding glass doors. Cost was $6 for 17 feet. Install was the same. The pile didn't seal air at all — the pile is for keeping out dust and light, not air. For a sliding door it works because the door overlaps the frame. For a hinged door it doesn't. I only tried this on a closet door because I had leftover from a sliding door project, and I uninstalled it within a week. Pile kerf weatherstrip is for sliding doors, not hinged doors, and the product name is the same on the shelf.
The same pattern shows up on water stains on the wall — the right product depends on the surface, and the shelf doesn't always tell you which surface the product is for.
The 3 Mistakes I Made (And the 1 Tool You Don't Need)
Mistake one: I bought the wrong width. Kerf slots are not all the same width. Most are 1/8 inch, but some older doors have 3/16 inch or even 1/4 inch slots. The weatherstrip packaging lists the kerf width on the front, but the print is small and the shelf at the hardware store has six different widths. The way to avoid this mistake is to bring a ruler to the store and measure the kerf slot on your door. If the kerf is 1/8 inch, buy weatherstrip for a 1/8 inch kerf. If you buy 3/16 inch weatherstrip for a 1/8 inch kerf, the fin won't fit. If you buy 1/8 inch weatherstrip for a 3/16 inch kerf, the fin will be loose and the weatherstrip will fall out.
Mistake two: I started the weatherstrip at the top of the door frame instead of the bottom. The kerf slot is a continuous loop around the door frame, and the weatherstrip should also be a continuous loop. If you start at the top, you'll end at the top, and the joint where the two ends meet will be at the top — which is the most visible part of the door and the part where air leaks show up first. The joint should be at the bottom of the hinge side, where it's invisible and where the air pressure is lowest. To do this, start the weatherstrip at the bottom of the hinge side, run it up the hinge side, across the top, and down the latch side, then cut the end so it meets the starting point at the bottom of the hinge side. The joint is hidden under the doorstop corner and you'll never see it.
Mistake three: I didn't compress the weatherstrip before cutting it. Kerf weatherstrip is sold in rolls, and the roll memory means the weatherstrip wants to curl back into a coil. If you cut it to length without first stretching it out flat, the cut will be at the wrong angle and the joint won't meet cleanly. The fix is to unroll the weatherstrip on the floor, walk on it for 30 seconds to flatten it, then measure and cut. The joint will be clean, the install will look professional, and the air seal will be tight.
The one tool you don't need is a utility knife or a scissors for the cutting. Most kerf weatherstrip can be cut with a strong pair of household scissors, and the cut doesn't have to be perfect because the joint is hidden. The hardware store will try to sell you a specialty weatherstrip cutting tool for $15. Skip it. The tool is for people who install weatherstrip professionally, and a renter doing one or two doors doesn't need it.
What Actually Worked + The 20-Minute Install
Rubber bulb kerf weatherstrip is the one I'd buy again. The compression is firm, the durability is at least five years based on what I'm seeing in my current install, the air seal is zero, and the cost is $9 per door. The install is the same for all four types: measure the kerf slot width at the store, unroll the weatherstrip on the floor, walk on it for 30 seconds, start at the bottom of the hinge side, slide the kerf fin into the slot, run the weatherstrip up the hinge side, across the top, and down the latch side, cut the end so it meets the starting point, close the door, and check the seal by holding a piece of paper against the doorstop and trying to slide it out. If the paper slides, the seal is too loose. If the paper tears, the seal is too tight. If you can slide the paper but it takes a little pull, the seal is right.
The same logic applies to spackle versus caulk — the right product depends on the gap, and the test is whether the fix holds under real-world pressure, not whether it looks good in the store.
One renter-to-renter warning. Rubber bulb weatherstrip is firmer than foam. On an interior door, that extra firmness is fine. On an exterior door with a self-closing hinge or a pneumatic closer, it can prevent the door from latching. If your exterior door has a closer, use foam weatherstrip instead — it will still seal, but it compresses enough for the door to close and latch. If your exterior door doesn't have a closer, rubber bulb is the better long-term choice. Match the product to the door, not the other way around. The compression is softer and the door will still latch.
If Your Lease Forbids Permanent Changes
Kerf weatherstripping is the only weatherstripping that's truly reversible on a rental door, because the kerf slot is part of the door. You don't add anything to the door or the frame — you fill a slot that was designed to be filled. The install takes 20 minutes and the uninstall takes 30 seconds. Pull the weatherstrip out by hand, the kerf slot is unchanged, and the next tenant can put their own weatherstrip in (or leave it empty, which is what most tenants do, which is why the slot is empty when you move in).
If your lease specifically forbids any change to the door or the frame, kerf weatherstripping is the closest thing to no-change-at-all. The kerf is the same width and depth after the install as it was before. The door is the same color. The frame is the same color. The only thing that changes is that the door is sealed against air leaks, which is the original design intent of the door. If your landlord objects, point this out: the kerf slot was there before you moved in, the weatherstrip is removable, and the door was designed to have weatherstrip in that slot. Most landlords will accept this. The few who don't are the same landlords who would object to a $2 doorstop, and you have bigger problems than weatherstripping if that's your landlord.


Discussion (0)
Sign in to join the discussion