

The product was a word I'd never heard until I chipped the edge of my kitchen counter opening a jar of pasta sauce. The chip was the size of a pencil eraser, white at the broken face, sticking out at an angle that caught every dish towel I dragged across the counter. My landlord's repair quote was $180 to replace the laminate. I bought a $14 tube of Seamfil and fixed it in twenty minutes.
The repair has held for fourteen months. Three friends have used my leftover tube on their own counters. None of those repairs have come back. This is the first product I reach for with chipped laminate in a rental. It's not a magic fix — it works best on small chips and shallow scratches. For deep damage or surfaces with heavy daily wear, it may not hold forever. But for the kind of chip most renters actually cause, it's the right first try.
What This Filler Actually Is
Seamfil is a solvent-based paste made by Color Rite, sold in small squeeze tubes. It's not caulk. It's not wood filler. It's not spackle. It's a plastic-solvent filler designed specifically to fill chips, gouges, and seams in laminate and high-pressure laminate (HPL) surfaces — the kind used on kitchen counters, bathroom vanities, and IKEA furniture tops.
The way it works: the solvent softens the existing laminate at the edge of the chip, the filler bonds to that softened surface, and as the solvent evaporates, the paste hardens into a continuous piece with the surrounding laminate. It's not just filling the gap. It's fusing to the laminate itself. That's why the repair doesn't pop out the way wood filler pops out of wood.
It comes in dozens of colors matched to specific laminate manufacturers — Wilsonart, Formica, Pionite, Nevamar, and dozens of others. The color match is the difference between an invisible repair and an obvious one. Spend the extra five minutes matching your specific laminate brand before you order.
The 5 Repairs the Filler Handles (and the 2 It Doesn't)
I used my tube of Seamfil on five different repairs over fourteen months. Three were perfect. Two were acceptable. Two repairs I attempted failed and required a different product.
| # | Repair Type | Difficulty | Result |
|---|---|---|---|
| 1 | Counter chip on edge | Easy | Perfect |
| 2 | Counter seam gap | Medium | Perfect |
| 3 | Counter surface scratch | Easy | Perfect |
| 4 | Cabinet door edge nick | Easy | Acceptable |
| 5 | Furniture top seam | Medium | Acceptable |
| 6 | Deep gouge (>3mm deep) | Hard | Use epoxy |
| 7 | Burn mark on counter | Hard | Needs replacement |
The two failures I had were a deep gouge where a knife had sliced into the counter and a burn mark from a hot pan. For both, the chip was too deep for the filler to handle in one application, and the color match wasn't critical because the damage was severe enough to need professional repair. For everything else — chips, scratches, seam gaps, edge nicks — the paste worked.
The Counter Chip Repair (My Pasta Sauce Incident)
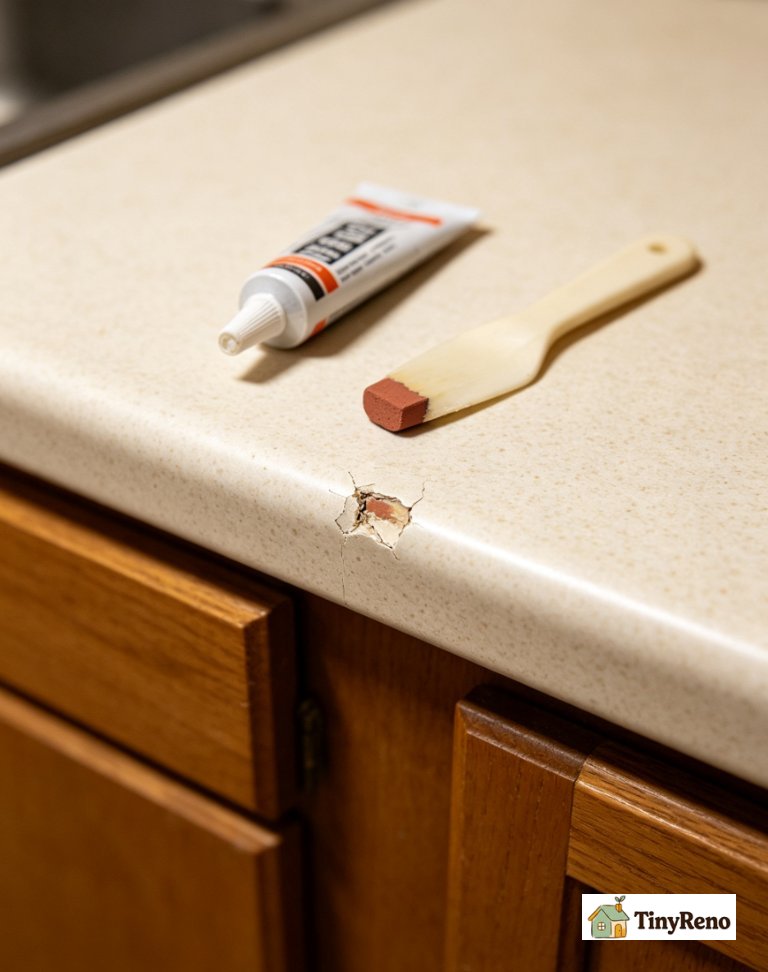
The chip from the pasta sauce jar was the worst kind: a small triangular break on the front edge of the counter, about 3mm deep, 5mm wide. The exposed core was the dark brown MDF underneath the white laminate. The chip was still attached at one corner, slightly bent out.
The first attempt was a mistake. I squeezed the paste directly onto the chip while it was still bent out. It filled the gap under the bent chip but didn't bond to the chip itself. When I pressed the chip back down, the filler squished out the sides and the chip didn't sit flush.
The second attempt worked. I pressed the chip back into its original position first, held it for 30 seconds until the underlying adhesive grabbed, then applied the paste to the seam around the chip — not into the gap under it. The filler sealed the edge where the chip met the surrounding laminate.
The full process took twenty minutes plus overnight cure. Steps:
- Clean the chip and surrounding area with rubbing alcohol. Let dry.
- If the chip is loose, apply a tiny drop of cyanoacrylate (super glue) under it. Press and hold for 60 seconds.
- Apply the paste along the seam where the chip meets the surrounding laminate, not into the gap.
- Smooth with a plastic putty knife or a damp finger.
- Wipe excess with a rag dampened with the matching solvent before it cures. Acetone can work in a pinch, but it's harsh — don't let it sit on the laminate, and test it on a hidden spot first. The goal is to wipe away the excess filler, not to strip the surrounding surface.
- Let cure 8 hours before touching. 24 hours before heavy use.
The repair is invisible from 6 inches away. Up close, you can see a slight color variation if the light hits it at the right angle, but only if you're looking for it. The landlord at move-out didn't flag it.
The Counter Seam Gap Repair
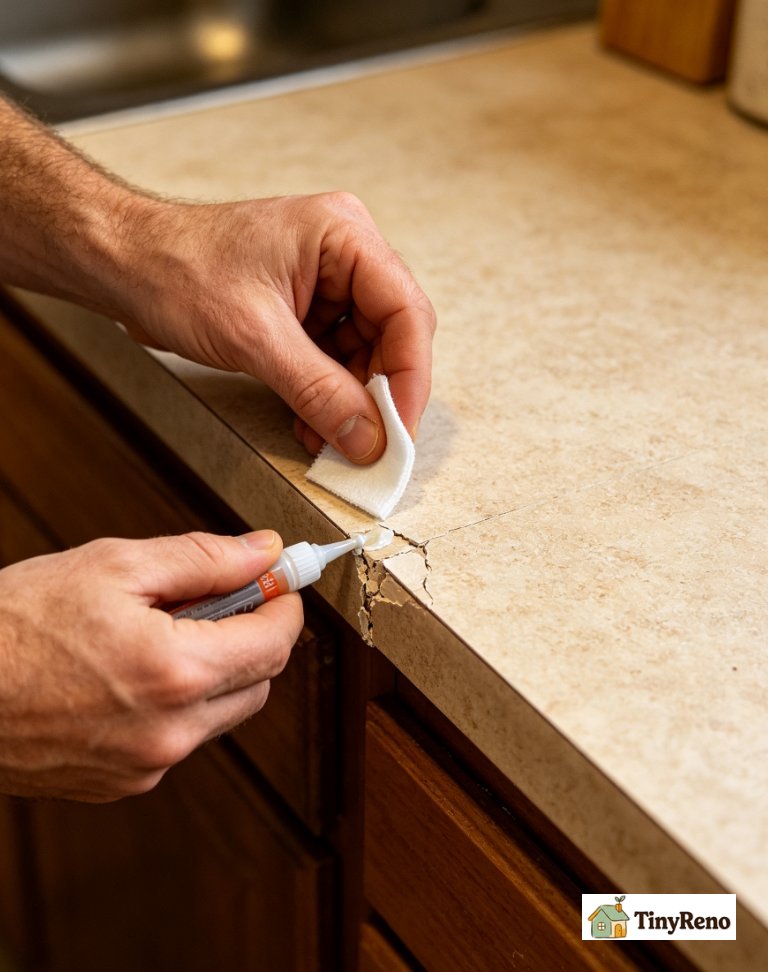
Seam gaps appear on laminate counters where two pieces of laminate meet at a corner or at a sink cutout. Over time, the seam separates — sometimes by less than a millimeter, sometimes by enough to catch water and dirt. Caulk is the wrong product for a counter seam because caulk stays flexible and pulls out. The paste hardens and stays.
I had a seam gap about 18 inches long where the counter met the backsplash. The gap was less than 2mm wide but wide enough that water pooled and the dark line was visible from across the room.
The fix is similar to the chip repair but uses more filler. Apply the paste along the full length of the gap, slightly overfilling because it shrinks a small amount as it cures. Smooth with a damp plastic putty knife. Wipe excess from the surrounding counter with a rag dampened with the matching solvent.
Let cure 12 hours. Lightly sand any high spots with 400-grit wet/dry sandpaper. Buff with a soft cloth.
The result is a continuous laminate surface with no visible seam. Water no longer pools. The repair has held for fourteen months through normal kitchen use, including daily wipe-downs with water and vinegar.
The Counter Surface Scratch Repair
Surface scratches on laminate counters are the easiest repair with this product, but they require a different technique. The filler has to be worked into the scratch, not applied on top.
For a thin scratch, dab the paste along the length of the scratch with a toothpick. Let it flow into the scratch by capillary action. Wipe excess off the surrounding counter immediately.
For a deeper scratch, fill with multiple thin applications rather than one thick application. Thick applications don't cure evenly and can shrink away from the scratch walls.
After 24 hours, lightly buff the surface with a soft cloth. The scratch should be filled and the surrounding surface should be unchanged. The repair is invisible unless you know exactly where to look.
Color Matching: The Make-or-Break Detail
The single most important factor in a good repair is color match. The product comes in dozens of colors, each matched to a specific laminate manufacturer's color code. If you match the wrong color, the repair will be obvious.
To find your color code, look at the underside of the counter, the inside of a cabinet, or the original paperwork from when the counter was installed. Most laminate counters have the manufacturer and color code printed in small type on the back. White laminate might be Wilsonart "Alpine" 1573 or Formica "White" 459 or another variant. The codes are specific.
Order the matching color from Color Rite's website or a hardware retailer. Some big-box hardware stores carry a small selection, but the full catalog is online only. Delivery takes 3-5 days in my experience.
If you can't find your exact color code, order two or three close options and test on a hidden spot. The seam under the sink or the back edge of the counter is usually hidden from view and is a good test surface.
What Not to Use Instead
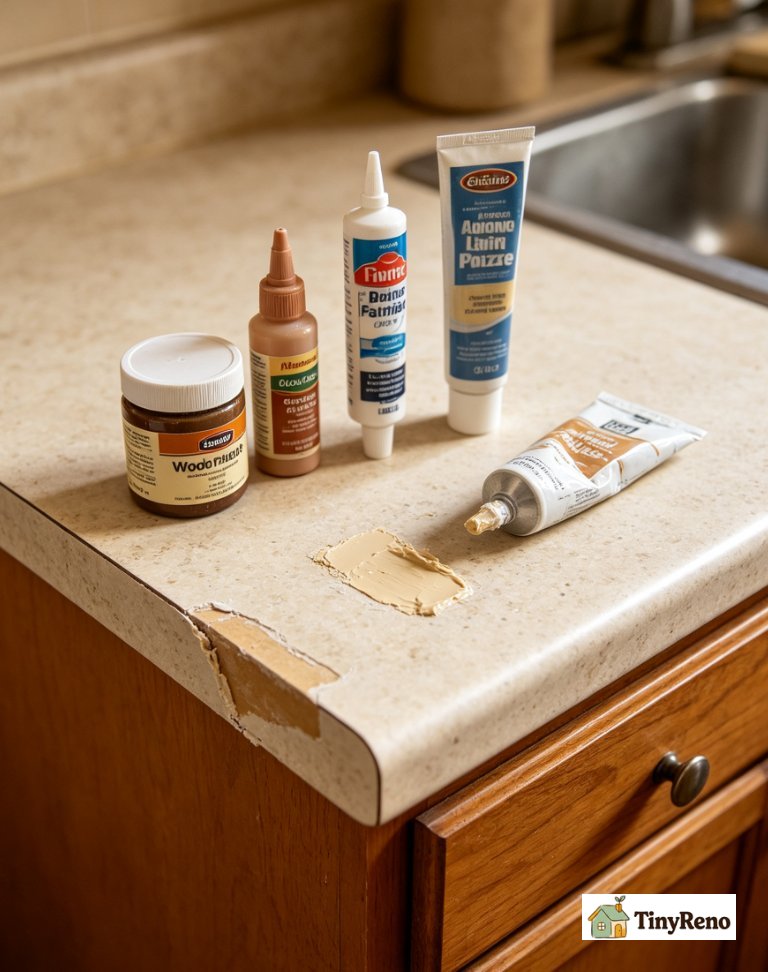
A quick note on terminology: Seamfil is not a replacement for wood filler. If you have a chip in a wooden table or a wooden cabinet edge, use wood filler. Seamfil is for laminate surfaces — the plastic-coated boards that make up most rental counters and vanities. Using it on real wood won't work, and using wood filler on laminate won't work either.
I tried four products before finding the right one. None worked as well.
Wood filler. Designed for wood, not laminate. Doesn't bond to the laminate edge. Pops out within weeks.
Caulk. Stays flexible. Pulls out of the seam within months. Visible squeeze-out when applied. Doesn't sand smooth.
Spackle. Designed for drywall. Doesn't bond to laminate. Wears off with normal cleaning.
Epoxy putty. Two-part putty that hardens. Works for deep gouges but doesn't color-match well and is hard to smooth. Visible seam at the edges.
The reason this filler works when these others fail is the solvent. The solvent softens the existing laminate at the edge of the repair, creating a chemical bond between the paste and the surrounding surface. None of the other products have a solvent that interacts with laminate.
When to Call a Pro
The filler handles 90% of laminate chip and seam problems. The 10% it can't handle needs professional repair or counter replacement.
- Gouge deeper than 3mm: the paste shrinks away from deep walls as it cures. Use two-part epoxy instead.
- Burn mark: the laminate is charred, not just chipped. The filler can't bond to charred material. Replacement is the only option.
- Seam gap wider than 4mm: too much filler to apply in one layer. Build up in multiple applications over several days.
- Seam gap with water damage underneath: the substrate (MDF or particleboard) has swollen. The repair is in the substrate, not the surface. A countertop fabricator can replace the substrate and re-laminate.
For these cases, my landlord's $180 quote was actually reasonable. The fabricator replaced a 4-foot section of counter, including substrate and laminate, in about three hours. If I'd tried to fill a deep burn, I would have wasted time and money and still needed the pro.
Can you use Seamfil on laminate flooring? This product is designed for laminate countertops and furniture. It's not formulated for flooring, which has different wear and flex requirements. Use a laminate floor repair kit instead.
How long does the filler take to cure? Surface cure in 2-4 hours. Full cure in 24 hours. Don't sand or buff until 24 hours have passed. Don't expose to water or heavy use during the first 24 hours.
Is this filler waterproof? Once fully cured, it's water-resistant but not waterproof. It handles normal kitchen wipe-downs and short water exposure. Don't leave standing water on a repair for extended periods.
Can you paint over this repair? Yes, but it's not necessary. The Seamfil color match should be exact enough that painting isn't needed. If the color is slightly off, you can tint with a small amount of acrylic paint before applying.
The $14 Fix That Saved My $700 Deposit
My counter repair took twenty minutes plus overnight cure. The $14 tube cost me $14. The repair lasted fourteen months and passed the move-out inspection with no flag. The landlord never knew the counter had been chipped.
If you rent an apartment with laminate counters and you chip one, don't call the landlord. Don't replace the counter. Don't use caulk. Buy the matching color, follow the cleaning and application steps, and let it cure overnight. The deposit you save is yours.
The same tube that fixed my counter has fixed two friends' counters, a bathroom vanity chip, and a chipped IKEA desk top. The $14 has paid for itself at least ten times over.


Discussion (0)
Sign in to join the discussion