

I learned about drywall screws for nail pops the hard way — by hammering the original nail back into my ceiling four times over six months. Each time, the nail would stay put for a few weeks, then work its way back out. The visible bump would reappear. The paint would crack around it again. I'd hammer it back in. The cycle would repeat.
The cycle stopped when a friend who's a contractor looked at the fourth nail pop and said "you're hammering the nail back into the same loose hole. The wood around the original nail has gotten soft from being wiggled in and out. Every time you hammer it back, you make the hole looser. The nail will pop again in a month."
His advice was to leave the original nail where it was and drive a drywall screw about an inch and a half away from it, into fresh wood. The screw would hold because the wood around it was undisturbed. The original nail could stay buried under the surface where it wasn't doing any harm.
This is the guide I wish I'd had — a drywall screws for nail pops checklist that walks through the right screw, the right placement, and the wrong things that look right but make the problem worse. The screws themselves are cheap. The trick is using them correctly.
Why the original nail pops in the first place
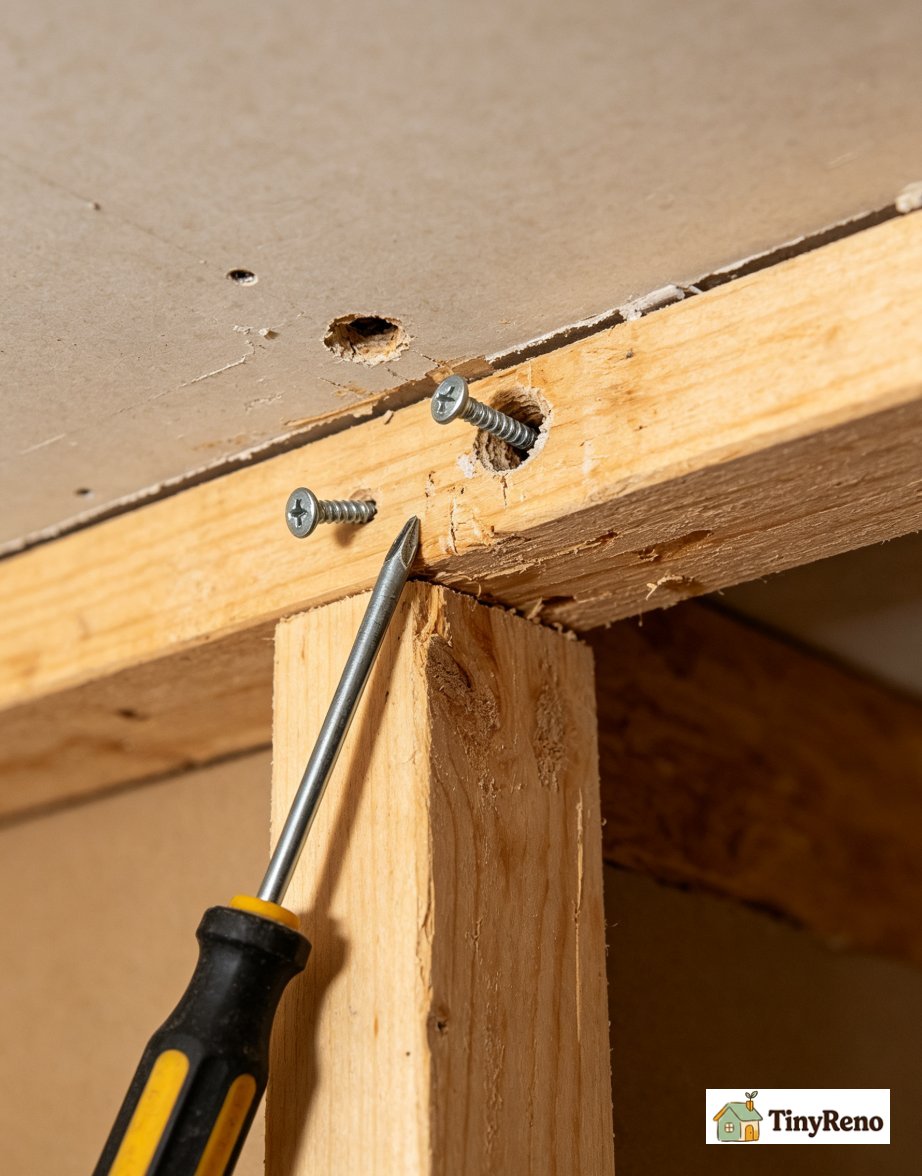
Drywall is hung on wood or metal framing with drywall screws for nail pops alongside nails. The fastener holds the drywall tight against the framing while the joint compound and paint dry. The fastener can be a nail, a screw, or — in older construction — a combination of both.
Nails were the standard fastener for drywall through the 1970s. They're cheap and fast to install. The catch is that nails hold by friction, not by threading. The wood around the nail can compress or shrink slightly as the building settles, and the friction that was holding the nail in place drops. The nail works its way out a sixteenth of an inch at a time. Over months, the nail has popped out far enough to push the paint off the ceiling.
Screws were the standard fastener for drywall starting in the 1980s. For the move-out documentation that protects you from being charged for damage you didn't cause, the deposit protection walkthrough covers the photo-and-email chain. They hold by threading into the wood, which means the wood has to actually tear for the screw to back out. Wood doesn't tear under the light loads that drywall puts on a fastener, so screws don't back out the way nails do. So screws don't pop the way nails the.
The fix for an old nail pop, then, is not to use a better nail. It's to use a screw. The drywall screws for nail pops hold where the nail didn't. The old nail stays where it is, buried under the surface. The screw takes over the job.
The right screw for drywall
Drywall screws come in a few standard sizes. The most common for ceiling drywall is one-and-a-quarter inch, coarse thread, Phillips head, black phosphate coating. The one-and-a-quarter inch length is enough to go through the half-inch drywall and bite about three-quarters of an inch into the wood framing behind it. The coarse thread bites into the wood fibers and holds.
The Phillips head is what most drywall screws use. Some newer screws use a square drive or a Torx drive, which give better bit engagement and less chance of the bit slipping out of the screw head. For a renter repair, any of the three drives work. The Phillips head is the easiest to find and the cheapest.
The black phosphate coating is what most drywall screws come with. Phosphate is a mild corrosion inhibitor — it keeps the screw from rusting before you use it. For ceiling applications where the screw will be covered with spackle and paint, the phosphate coating is fine. For bathroom or kitchen applications where the screw might be exposed to moisture, stainless steel screws are better. For the nail pop repair in a dry ceiling, phosphate is what you want.
A one-pound box of one-and-a-quarter inch coarse thread phosphate drywall screws costs about four dollars at any hardware store. One pound is roughly two hundred screws, which is enough for several ceilings' worth of nail pops. The box will last most renters through the rest of their lease.
Where to place the screws
The right placement for a new screw is in the same framing member — usually the same stud or joist — but in fresh wood. Use a stud finder to locate the center of the stud behind the drywall. Then drive the screw about ½ to 1 inch above or below the original nail hole, staying on that same stud center. That puts the screw into solid wood without disturbing the loose area around the old nail. Close enough that the screw is biting into the same wood framing member (the stud or joist behind the drywall). Far enough that the screw is going into fresh, undisturbed wood.
For related renter-friendly drywall fixes beyond nail pops — like replacing door hinge screws that have stripped out of the frame — the renter repair walkthrough covers the broader toolkit.
The wrong placement is too close to the original nail — under an inch away — which means the screw is going into wood that's been loosened by the original nail's wiggling. Too close and the new screw will pop just like the old one. Too far — over three inches — and the screw may miss the framing entirely and just spin in the drywall.
For most drywall thicknesses and most framing layouts, an inch and a half from the original nail hole is the sweet spot. Drive the screw slowly, with steady pressure, until the screw head is slightly recessed below the surface of the drywall. Don't drive it so deep that the screw tears through the paper face of the drywall — the paper is what gives the drywall its strength. A quarter-inch recess below the surface is the right depth.
Once the screw is in, you have two small holes to fill: the original nail hole and the new screw hole. Spackle over both, sand smooth when dry, and paint to match. The screws will hold for the rest of the lease and probably the rest of the building's life.
The wrong screws to use
There are a few screws that look right for drywall but aren't. Wood screws are too long, too thin, and have a thread that's too aggressive for drywall. Deck screws have a coating that's designed for outdoor exposure, not for being covered with spackle. Drywall nails — yes, these exist, they're just shorter and thinner than the original construction nails — will pop the same way the original nails did.
The drywall screws for nail pops to avoid most is the construction screw. Construction screws are hardened for framing lumber and have a Torx or hex head. They'll go through drywall fine, but they're overkill for a nail pop repair and they cost more than drywall screws do. The drywall-specific screw is what you want.
The other wrong choice is a screw that's too long. A two-inch or longer screw will go through the drywall and through the wood framing and into whatever is behind the framing — a wire, a pipe, another wall. The screws should bite into the wood framing by three-quarters of an inch. Anything longer is going too deep. For related drywall decisions like which screw length works for door hinges (a similar head-and-thread problem), the renter repair walkthrough covers it.
The screw shouldn't be too short, either. A one-inch screw only gets about half an inch of bite into the framing, which isn't enough to resist the same outward pressure that pushed the old nail loose. Use 1¼ inches or longer. Use one-and-a-quarter inch or longer.
What I'd actually buy
For a single nail pop or a handful of nail pops in a single ceiling, the materials list is the same as the for nail pop repair in general. One box of one-and-a-quarter inch coarse thread drywall screws. One small container of spackle. One putty knife. One sanding sponge. One small container of matching ceiling paint. Total cost: about thirteen dollars.
The screwdriver is the tool that matters most. A drill is faster than a screwdriver for multiple screws, but for a single nail pop, a manual screwdriver is faster than getting the drill out. The drill wins when you're doing a whole ceiling. The screwdriver wins when you're doing one or two.
The bit is the other thing that matters. The bit that's right for your screw head is the bit that fits the screw head. Phillips head screws need a Phillips head bit. Square drive screws need a square drive bit. The bit that's "close enough" will slip inside the screw head after two or three turns and strip the head. The bit that fits will drive the screw all the way in without slipping.
For one or two nail pops, a manual screwdriver with a properly fitting bit is often faster than digging out the drill — nothing to plug in, nothing to assemble. If you already have a cordless drill out, use it. The threshold for switching tools isn't a hard number; it's whatever gets the screw in without stripping the head. For a whole ceiling, the drill is the only realistic option.
For the broader strategy of which drywall repairs are renter-friendly and which ones are landlord calls, the renter repair walkthrough sorts the categories I keep coming back to. For the documentation that protects you from being charged for ceiling damage you didn't cause at move-out, the deposit protection walkthrough walks through the photo-and-email chain that makes the difference.


Discussion (0)
Sign in to join the discussion