

Hannah texted me at 11:40 on a Tuesday night. A door handle repair kit — that's what she asked me for, because her bedroom door handle had fallen off in her hand. The spindle — the square metal rod that connects the two sides of the handle — was still in the door, but the handle itself was sitting on the floor. The lock still engaged, so the door was technically secure, but every time she reached for it she touched a bare square hole in the wood. She'd never repaired a door handle before. She wanted to know whether she should buy a door handle repair kit at Home Depot or just call someone.
I told her the same thing I'm going to tell you: a door handle repair kit is the right answer about half the time, the wrong answer the other half, and the difference between the two is a five-minute diagnosis you can do with a flashlight and a screwdriver. The kit costs between eight and twenty-five dollars at any hardware store. The call to a handyman costs between ninety and a hundred and fifty. Most of the time, the kit is the smarter buy — but only if you actually need one.
What's actually in a door handle repair kit
One important distinction before you buy: the kit I'm describing here replaces the external handle parts — the handles, the spindle, the faceplates, and sometimes the latch. It does not replace the lock body — the internal mechanism the latch slides into. If your lock body has failed — the key won't turn, the deadbolt won't throw, or the latch won't retract even after replacing the external parts — you need a lock-body replacement, not a handle kit. The two are different products, and the packaging doesn't always make that clear.
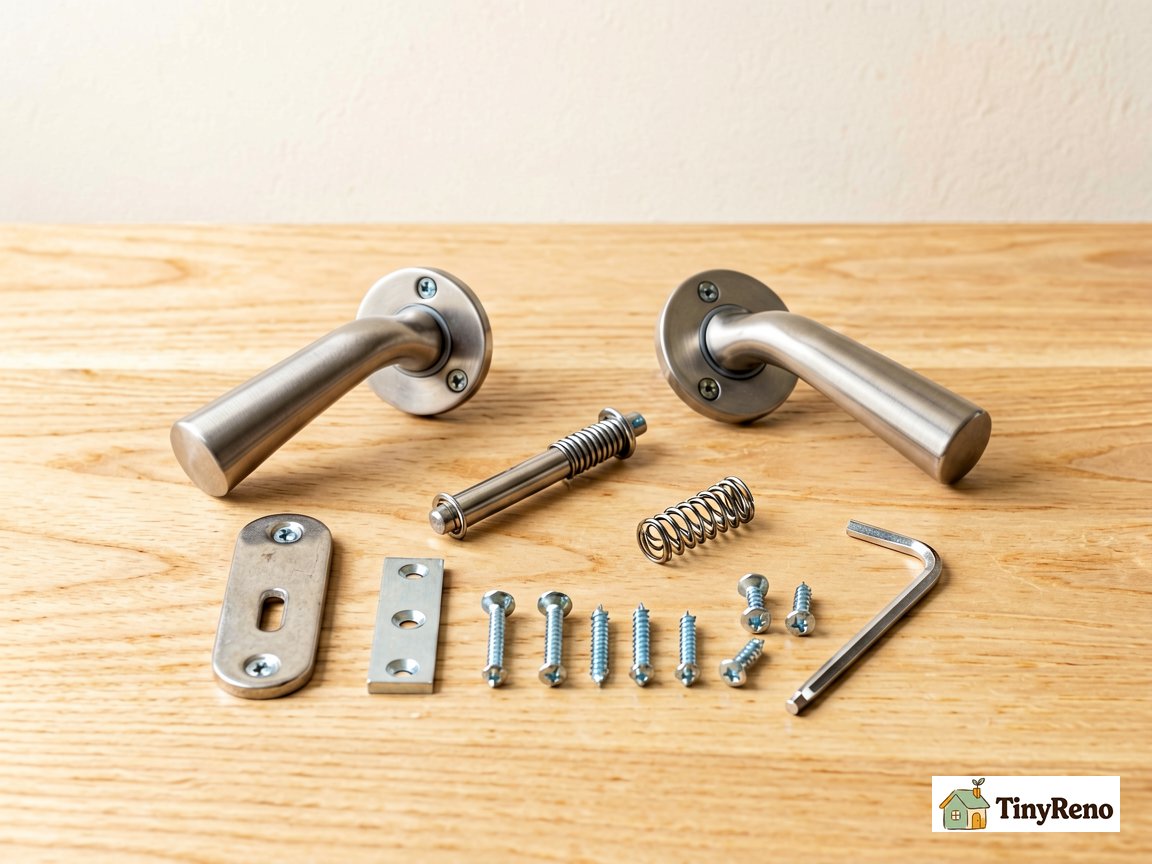
The kit that Hannah eventually bought — and the one I'd recommend for any renter who doesn't want to think too hard about which parts they need — is a universal door handle repair kit with the following inside:
- Two handles (inside and outside), usually in satin nickel or brass
- A square spindle in two lengths (most doors use the longer one)
- A spring mechanism (the small coil that gives the handle its return action)
- Two faceplates (the rectangular plate that sits flush against the door)
- A set of screws in two lengths, with a small Allan key for the set screw
- Instructions that nobody reads but everyone should
You don't necessarily use all of those parts. If your old handle fell off because the spring broke, you only need the spring. If it fell off because the set screw loosened, you only need the Allan key. The reason you buy the kit is that you don't know which part you need until you've opened the door, and the kit covers all of the common failures for less than the cost of any single replacement part ordered individually.
A renter-specific caveat: the kit should come with a reversible latch. Most door handles in North America use a latch that's reversible for either a left-handed or right-handed door. Make sure the kit includes a reversible latch or you'll install it backwards and have to redo the whole thing.
How to know whether you need a kit at all
The first question Hannah asked me was whether the problem was the handle or the door. I told her the answer is almost always the handle. The door is solid wood or solid-core composite. It doesn't fail unless something hits it. The handle, the latch, the spindle, the spring — those are all small parts that take mechanical stress every time the door opens. They fail. The door doesn't.
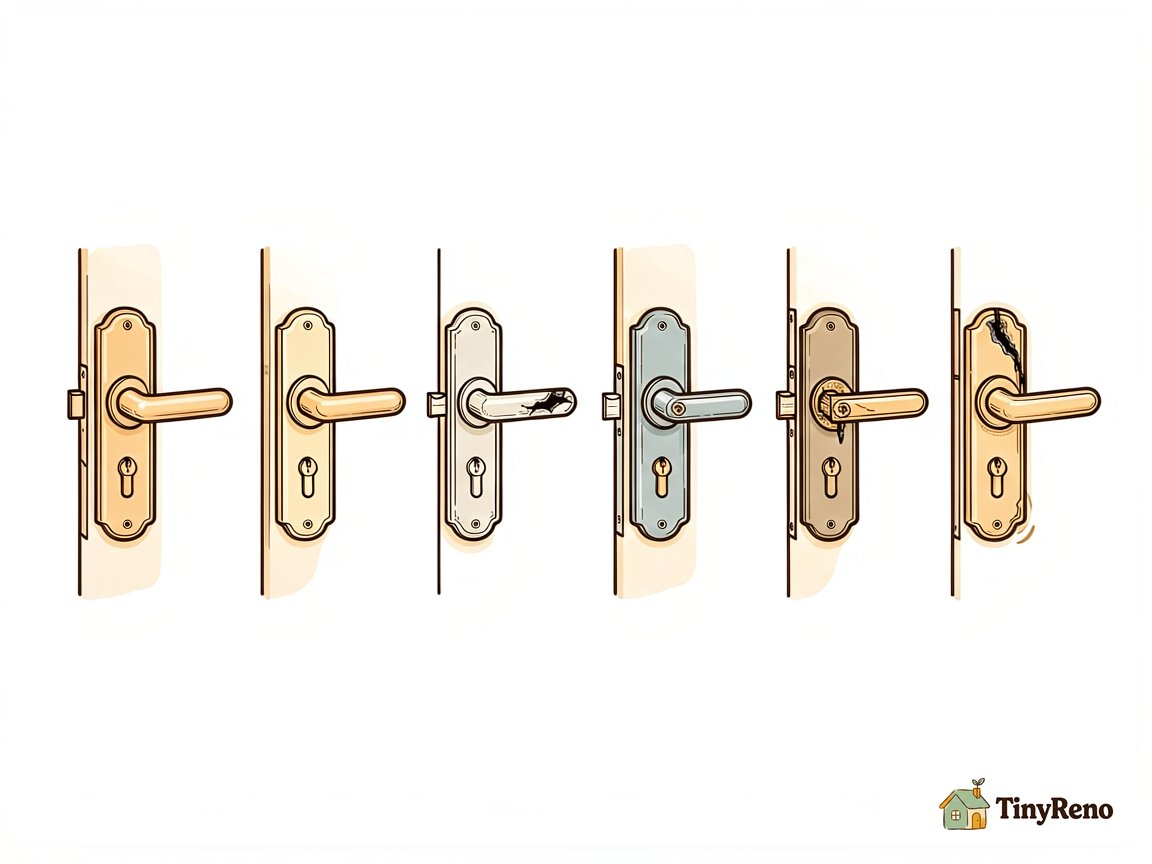
There are six things that go wrong with a door handle. Each one has a different fix. Here's how to tell which is yours:
- The handle is loose but still attached. The set screw — a small Allen screw on the side of the handle that clamps it to the spindle — has loosened. Tighten it with the Allan key. Don't buy a kit yet.
- The handle fell off in your hand. Either the set screw was never tight enough and finally gave way, or the spindle has worn down and the screw can no longer grip it. You probably need a kit — but first check whether the spindle inside the door is also worn.
- The handle won't return to horizontal after you let go. The problem is a broken or dislodged spring — but that spring is not always inside the rose (the round plate behind the handle). On many door handles, the return spring lives inside the latch mechanism or the lock body itself. If the spring is inside the rose, a handle kit with a replacement spring can fix it. If the spring is inside the lock body, you'll need to replace the entire lock assembly, not just the handle. The only way to know is to remove the handle and look at where the spring actually sits.
- The latch doesn't catch. Either the strike plate on the frame is misaligned — easy fix, move the plate — or the latch itself has worn down and no longer extends far enough. You need a kit with a replacement latch.
- The key turns but the deadbolt doesn't move. The mechanism inside the lock has failed. You need a kit, but make sure the kit matches your specific lock type (keyed entry vs. passage vs. privacy). The spindle inside the lock cylinder is different on each.
- The whole handle wobbles when you push on it. The screws holding the two halves of the handle together through the door have loosened. Open the door and tighten the two screws that hold the faceplates. Don't buy a kit.
Hannah's problem was the second one. The set screw had never been tight enough when the previous tenant installed the handle. Over a year of normal use, the screw slowly worked itself loose until the handle slipped off the spindle. She needed a new spindle — which was inside the kit.
How to actually install the kit without breaking anything else
The installation took me and Hannah about twenty minutes the next evening. Here's the order that matters:
- Take a picture of the old handle before you remove anything. The orientation of the latch, the direction the door swings, the side the key goes on — all of this matters for reassembly. A photo is faster than notes.
- Remove the old handle. Unscrew the two faceplate screws (the long screws that go all the way through the door). Pull both handles off. The spindle should slide out.
- Remove the old latch. Two screws hold the latch plate to the edge of the door. Pull the latch out. Note which end is up — the angled side of the latch faces the direction the door closes.
- Install the new latch. Reversible latches have an adjustable side — usually a small tab on the latch that flips depending on which way the door swings. Get this right or the door won't close.
- Slide the new spindle through the new latch. Most spindles have a groove or a flat spot that lines up with a matching tab or set screw inside the latch or lock body. How this alignment works varies by brand. The safest approach is to slide the spindle in, then gently turn the handle while applying light pressure — you'll feel it drop into place when the alignment is right. Don't force it.
- Push the handles onto the spindle. The set screw on each handle faces down — this is a convention, not a rule, but it's where the previous installer put it, so match it.
- Tighten the set screws. Tight. Not gorilla tight. The set screw is small and the threads strip easily.
- Test the handle. Push down, let go. The handle should return to horizontal. Push the door closed. The latch should catch. If either doesn't, you've installed something backwards.
If the latch doesn't catch on the strike plate, that's a different problem — the strike plate on the frame is misaligned. Loosen the two screws holding the strike plate, shift it up or down a sixteenth of an inch, retighten. This is a five-second fix that doesn't require a kit.
What to do if the kit didn't actually solve it
Hannah's first attempt didn't work. She installed the kit exactly as the instructions said, but the handle still wouldn't return to horizontal after she let go. We took everything apart a second time, and this time I noticed that the spindle she was using was the short one — the kit had included both lengths, and she'd grabbed the first one she saw.
The short spindle is for door knobs where the two sides of the handle sit close together. The long spindle is for door handles where there's more space between them. Most modern interior doors take the long spindle. The short one is for very thin doors, which most aren't.
We swapped to the long spindle, reinstalled the handles, and this time everything lined up the way it should. The handle returned to horizontal on the first release. The short spindle had been forcing the two sides of the handle inward just enough that the internal mechanism couldn't engage properly — so the spring never got a chance to do its job. The longer spindle gave the mechanism the clearance it needed.
If your door handle repair kit doesn't fix the problem on the first try, the most common reasons are: wrong length spindle, latch installed backwards, or set screw not seated in the spindle slot. All three take the door apart a second time to fix, but none of them require a second kit.
If the door itself is what's damaged — say, the hole for the spindle is too wide, or the wood around the faceplate screws has stripped out — you have a door problem, not a handle problem. The door frame repair guide covers how to patch the wood so the new handle screws have something to bite into. For a broader view of small renter repairs that don't require a handyman, the shower head replacement walkthrough is the same kind of twenty-minute fix with the same kind of universal kit.


Discussion (0)
Sign in to join the discussion