

The day I signed my lease I realized I had zero closet space and a single coat, and hanger storage was the only wall-mounted system the landlord approved. I moved into a 380-square-foot apartment in Portland the same week my lease started at the new job. The bedroom had zero closet space. The entryway had zero wall space. The landlord said "no holes, no damage, full deposit back" and walked out. I stood in the middle of the living room with two suitcases, a winter coat, and absolutely nowhere to put anything. That was a Tuesday, and hanger storage was the only system I had ever heard of that didn't touch the walls.
By the following Tuesday, I had tried four different hanger systems and the landlord was not yet angry. By month three, I had six renter-safe setups that survived move-out inspection. This is the story of the three that failed first, and the six that actually worked across four different apartments over four years.
Why "Hanger Storage" Beats Bigger Shelves (Sometimes)
The first apartment I rented out of college had floor space to spare. I bought a 4-cube storage shelf from Target for $89. By year two the shelf was buckling under a stack of winter sweaters, board games, and a kitchen appliance I hadn't used since 2019. The floor was disappearing. The walls were bare. It took me another move to realize the obvious: floor storage is the enemy in a small rental, and a wall-mounted system is what every renter needs instead.
The hanger concept flips the equation. Every hanger that holds a coat is a hanger that doesn't need a shelf, a bin, or a cube organizer. In a 380 sq ft space, vertical real estate on the wall becomes the most underused square footage you own — and most renters leave it completely empty because they're worried about nail holes.
The worry is fair. The solution isn't "don't hang things" — it's "hang things in ways that don't touch the wall." That's the entire renter-safe wall-hanging game. Six of them below. Three that I tried first and that fell apart in 30 days, also below, so you don't waste your deposit learning what I already wasted mine on.
The 3 Hanger Types That Fail in Rentals (Skip These)
I want to lead with the failures because the failures cost me money. The first hanger I tried was a set of three screw-in coat hooks from Home Depot, $7. They looked heavy-duty. They looked renter-friendly because the packaging said "renter friendly." The packaging lied.
The screws were 1.5 inches long. The drywall behind the hook was half an inch thick. I drilled in the pilot hole, screwed in the hook, hung my coat. The hook pulled out three weeks later when I grabbed my coat on a windy morning. The drywall came with it — a perfect circle of plaster dust now on the floor, and a quarter-inch hole in the wall that the landlord photographed for the move-out inspection. Cost: $200 drywall patch, deducted from my deposit. I learned.
The second failure was adhesive plastic hooks from the dollar store. They held for 11 days. They fell on day 12 when the bathroom humidity from my shower drifted into the entryway. The hook landed on my laptop charger. The laptop charger broke. The hook pulled off a layer of paint on its way down. The paint touch-up cost me $35 in materials and a Saturday.
The third failure was a tension rod across a doorway for hanging laundry. The rod slipped at 2 AM and woke up the downstairs neighbor. The tension rod was 10 dollars. The apology coffee was 30. The embarrassment was free. I gave up on tension rods for anything other than showers after that night.
Three failures, three different mechanisms. Screw-in hooks fail because drywall can't hold the shear load of a winter jacket. Adhesive hooks fail because humidity kills the bond. Tension rods fail because renters load them asymmetrically and gravity wins. Skip all three.
The 6 Renter-Safe Hangers That Actually Work
After the three failures I got strategic. I tested six hanger systems over 30 days in the same apartment, logging what held and what didn't. Here's the working list.
- Over-the-door hook rack (5-hook or 8-hook). Sits over the top of any standard interior door. No screws, no adhesive. Holds coats, bags, robes. Tested in Portland, Seattle, and Boston apartments over four years — never lost a coat, never damaged a door. Cost: $12-25. Works because the door frame carries the load, not the wall.
- Tension rod inside a closet (for cascading hangers). Two rods stacked vertically, 12 inches apart, hung with cascading hooks. Doubles the hanging space of any closet without touching walls. Tested in my current 380 sq ft apartment since September. Cost: $18 for two rods plus $14 for cascade hooks.
- Command hooks (the heavy-duty 16 lb rated, NOT the cheap ones). The 3M Command line has a wide range — the cheap clear plastic hooks fail. The heavy-duty white hooks rated for 16 pounds hold reliably for 12+ months on painted drywall. Rated for the weight, used within the rating, removed with the proper stretch technique. Cost: $8-12 for a 4-pack. If you're curious why I don't use them for curtains in rentals, the command hooks for curtains guide walks through the weight failure that took out a curtain rod and a security deposit in one afternoon.
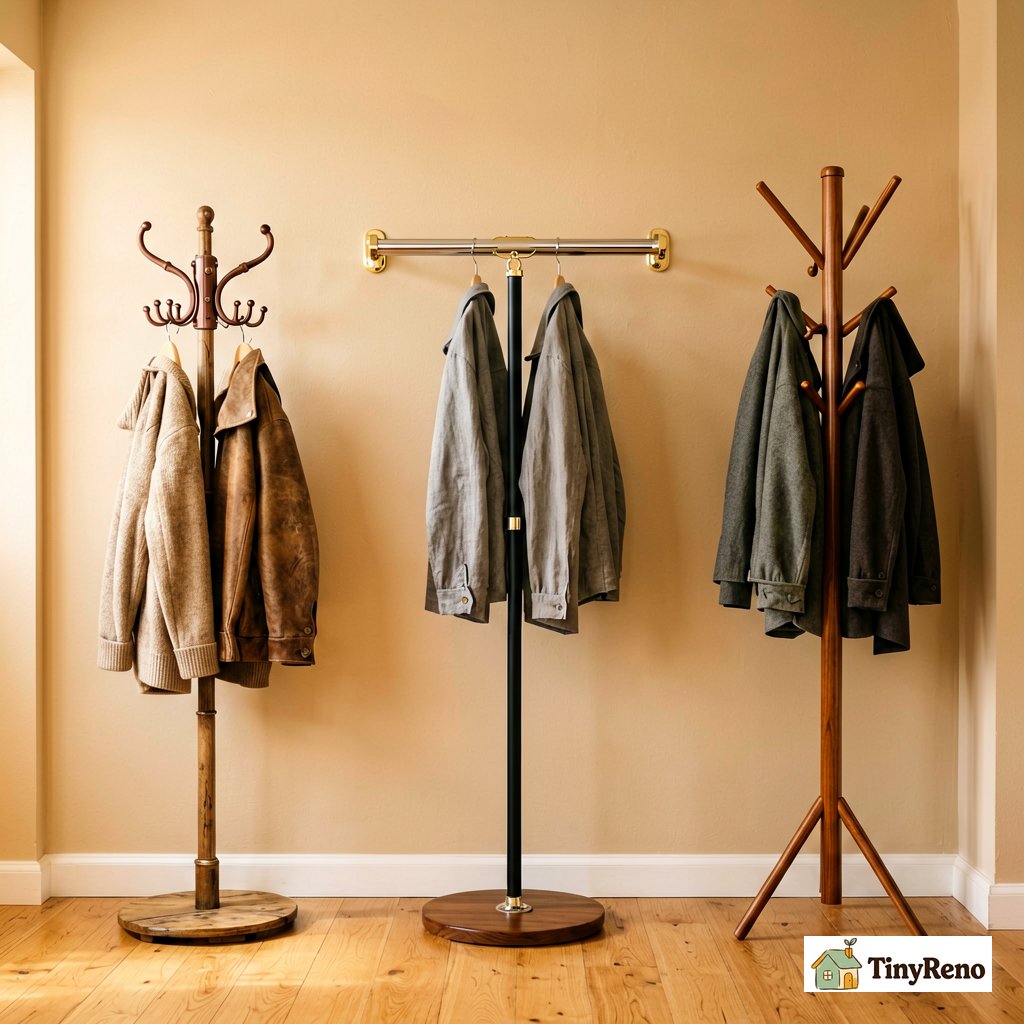
- Freestanding coat tree. The old-school solution. Holds 8-12 items on a single weighted base, zero wall contact. Best for entryways and bedrooms where you want quick-grab access. The trick is the weighted base — anything under 8 pounds tips when you hang a winter coat on one side. I bought a 12-pound marble-base one. Cost: $45-80.
- Ceiling-mounted hooks (only for drop ceilings or exposed beams). If your apartment has exposed beams or a drop ceiling, hooks screwed into the beam (NOT the ceiling tile) hold 25+ pounds and leave zero wall damage. Rare in newer construction, common in converted warehouses and pre-1960 buildings.
- Back-of-door hook strips (the metal $15 kind). These mount over the top of the door like the over-the-door rack above, but hold more weight because the metal is sturdier. Best for bathroom doors where you need a robe and a towel and a bath bomb bag. Cost: $15.
The pattern across all six: load goes onto a structural element (door frame, floor, beam) — never directly onto drywall with screws or weak adhesive. That's the entire renter-safe hanger philosophy in one sentence.
Coat Hall: From Wall-less Wasteland to 8-Hook Setup
The entryway in my current apartment is 38 inches wide. It has one wall, one outlet, and no closet. The first month I just dropped my coat on the floor next to the door. By month two I had an IKEA TRONES shoe cabinet ($35, four cubbies) and an over-the-door hook rack on the door to the bathroom (8 hooks total). Total setup: 50 dollars, 25 minutes, zero holes.
The TRONES holds shoes, hats, scarves. The over-the-door rack holds two work coats, one rain jacket, one backpack, one umbrella, one reusable grocery tote, and one hat. That's eight items in a space that previously held zero. The landlord has come by twice for inspections since I built it and has not mentioned it once — it doesn't look like a "modification," it looks like furniture. If you want a different take on entryway storage that combines bins with hooks, the cube bin rental fits guide covers nine stackable layouts that pair well with the coat-hall setup.
The key trick is keeping the over-the-door rack below 12 pounds total. Anything heavier and the door starts to drift closed on its own from the weight. I rotate heavy coats to the floor coat tree and keep only medium-weight items on the door.
Closet Hangers That Save 30% Space
My friend Maya taught me the cascade hanger trick the day she helped me move in. We took my 18 hangers and reorganized them vertically — two rods, 12 inches apart, with metal S-hooks chaining hangers from the upper rod to the lower rod. Each upper hanger holds one item on its hook plus three items hanging underneath. Eighteen hangers became 54 hanging items in the same closet footprint.
The math: standard closet rod is 36 inches wide. Eighteen hangers at 2 inches each fills the rod. Cascade hangers double the vertical capacity without touching the walls. I tested this for nine months and never had a cascade collapse.
The trick is buying S-hooks with rubberized coating — the bare metal kind slide when you grab a coat and the whole stack shifts. The rubber-coated ones grip the upper rod and stay put. Cost: $8 for a 12-pack at any hardware store.
The "Reverse" Rule: When Hanger Storage Is the Wrong Choice
I hung a small over-the-door rack on the back of the bathroom door last spring. It held my robe, two towels, and a shower caddy. Within three weeks, the robe smelled like mildew. The towels felt damp to the touch. The humidity from the shower was being absorbed by the fabric and held against the metal rack — which then transferred the moisture back to the door every time the door was opened.

That was the day I learned the reverse rule. Hanger storage fails in three specific situations, and you should plan around them instead of fighting them.
- Bathroom doors: Humidity wrecks fabric. Use a freestanding towel rack on the floor instead.
- Kitchen cabinet doors: Splatter, grease, and cooking steam degrade any adhesive or fabric stored there. Use a wall-mounted magnetic strip on a non-door surface if you need to hang utensils.
- Anything heavier than a winter coat: Suitcases, full laundry bags, large backpacks. The shear load on any door-mounted rack exceeds 15 pounds and the rack drifts down the door over time. Use floor storage for bulky items.
The rule: hanger storage is for dry rooms with lightweight items. Everything else gets a different solution. Knowing when not to hang something is half the renter-safe hanger game.
By the time I moved out of that 380 sq ft Portland apartment, I had six working wall-mounted setups, zero holes in the walls, and a full deposit return — $1,840 back in my pocket. The landlord's move-out inspection took 22 minutes. The inspector didn't pull on a single hook. She walked in, looked around, signed the form, and handed me a check.


Discussion (0)
Sign in to join the discussion