

How to replace shower head was not a question I expected to ask myself during my first lease. The shower head in the bathroom was the kind with a single thin stream and a flow so weak it could not rinse shampoo out of medium-length hair in under three minutes. I had assumed that was just how showers worked in older apartments. It was not. The fixture itself was corroded, half-clogged with hard water, and dated from some renovation in the early 2000s. Replacing it took ten minutes and a single wrench, and the new fixture cost $15. That is the budget for how to replace shower head work in a rental, and that is the budget I have used in three apartments since.
This guide is the version of how to replace shower head I wish I had at 19, when I thought it was a plumber's job. It is not. It is a renter's job, and the only complication is knowing which of three connection types you have before you buy anything. The rest of the work is a wrench, a roll of plumber's tape, and ten minutes of unscrewing the old and screwing on the new.
What kind of shower head you actually have (3 types)
How to replace shower head starts with one decision that most guides skip — figuring out what is already on the wall. There are three connection types in 90 percent of rentals in North America. They are not interchangeable. The good news is you can identify yours in under a minute with your eyes, no tools needed.
Standard threaded (the most common). The shower arm sticks straight out of the wall, with visible threads on the end. The shower head screws onto the arm by turning clockwise (when viewed from below). You see threads, you have a standard threaded. About 80 percent of rentals have this.
Ball-mount (the pivot kind). The shower arm ends in a small ball, not threads. The shower head has a matching socket with a lever or a small set screw that locks onto the ball. These let you tilt the head to any angle without rotating the whole arm. If your shower head pivots freely and there is no visible thread, you have a ball-mount.
Handheld shower on a slide bar. The shower head sits on a vertical or horizontal bar that mounts to the wall. The head detaches from the holder and has a flexible hose. If your shower has a hose, you have a handheld. The hose connects to the same standard threaded arm as a fixed head — only the holder is different.
If you have a non-standard connection (a proprietary brand-mount, a ceiling-mounted rainfall head, or a body spray system), stop. Those are not renter repairs. How to replace shower head on those is a contractor question, and changing them will affect other fixtures you do not own.
What to buy: the $15 to $80 range and what you get
How to replace shower head at the right price means knowing what you are paying for. The price ladder for a fixed shower head is roughly three tiers, and the differences between tiers are smaller than the marketing makes them sound.
$10 to $20: the basic single-function head. Plastic body, one spray pattern, sometimes a simple lever for a pause. These work fine. The build quality is lower than the next tier up, and they will not last past one lease, but they do the actual job of spraying water at you for $15. If your rental has hard water, this tier is a calculated loss — you will replace it again at the end of the lease anyway.
$25 to $50: the multi-function head with a flow restrictor. Metal or metal-look plastic body, three to five spray patterns (usually a button or a dial to switch between them), and a flow restrictor that limits output to 1.8 or 2.0 gallons per minute. This is the sweet spot for most renters. The flow restrictor is the part you actually want — it cuts your water bill by 20 to 30 percent without making the shower feel weaker, because the spray is more focused.
$50 to $80: the high-end fixed or basic handheld. Solid metal body, often a brand name, and either a premium spray pattern (rainfall, mist, combined) or a basic handheld wand. The build is better, the finish holds up to hard water longer, and you can usually swap in a flow restrictor if the head does not have one. This is the tier to buy if you plan to keep the head past the lease.
The one tier not to buy is the $5 to $10 ultra-basic plastic head from a discount bin. The plastic threads strip on install, the finish flakes within a month, and you will be back at the hardware store before the end of the lease. How to replace shower head on a budget is not the same as how to replace shower head cheaply. Aim for $20 to $30 and you will not redo the job.
The 10-minute install (standard threaded)
This is the procedure for 80 percent of rentals. If you have a standard threaded shower arm, this is the entire job. How to replace shower head on a standard threaded takes ten minutes the first time and five minutes every time after.
Before you do anything, turn off the water to the shower. Most rentals don't have a separate valve for the shower, so you'll probably need to shut off the main water to the unit — or, in some buildings, the valve behind an access panel in the wall behind the shower. If you can't find a shutoff and don't want to flood the bathroom, stop and call the landlord. Do not attempt to unscrew the shower head with the water still on.
Step 1: remove the old head. Grip the shower head with one hand and the shower arm with the other. Turn the head counterclockwise to unscrew it. If it has not moved in years, it may be stuck — wrap the head in a rag for grip and try again, or use a pair of adjustable pliers on the connecting nut (not on the head body). Do not use so much force that you twist the shower arm itself — that is a wall repair, not a head replacement.
Step 2: clean the threads. With the old head off, the threads on the shower arm are exposed. Wipe them with a rag. If there is old plumber's tape or pipe dope on the threads, peel or scrape it off. The threads should be clean metal before you put new tape on.
Step 3: apply new plumber's tape. This is the step that determines whether your new head drips. Wrap the threads with PTFE plumber's tape (the white plastic tape, $1 a roll) clockwise — the same direction you will tighten the head. Two full wraps is enough. Press the tape into the threads with your finger so it conforms. If you've already removed the old head and cleaned the threads, take a second to flush the shower arm before putting the new head on. Turn the water on for three or four seconds — not all the way, just enough to push out any debris or old pipe scale that's been sitting in the arm. Then turn it off and install the new head. This step gets skipped in a lot of guides, but it's the difference between a clean new shower head and one that clogs up in the first week.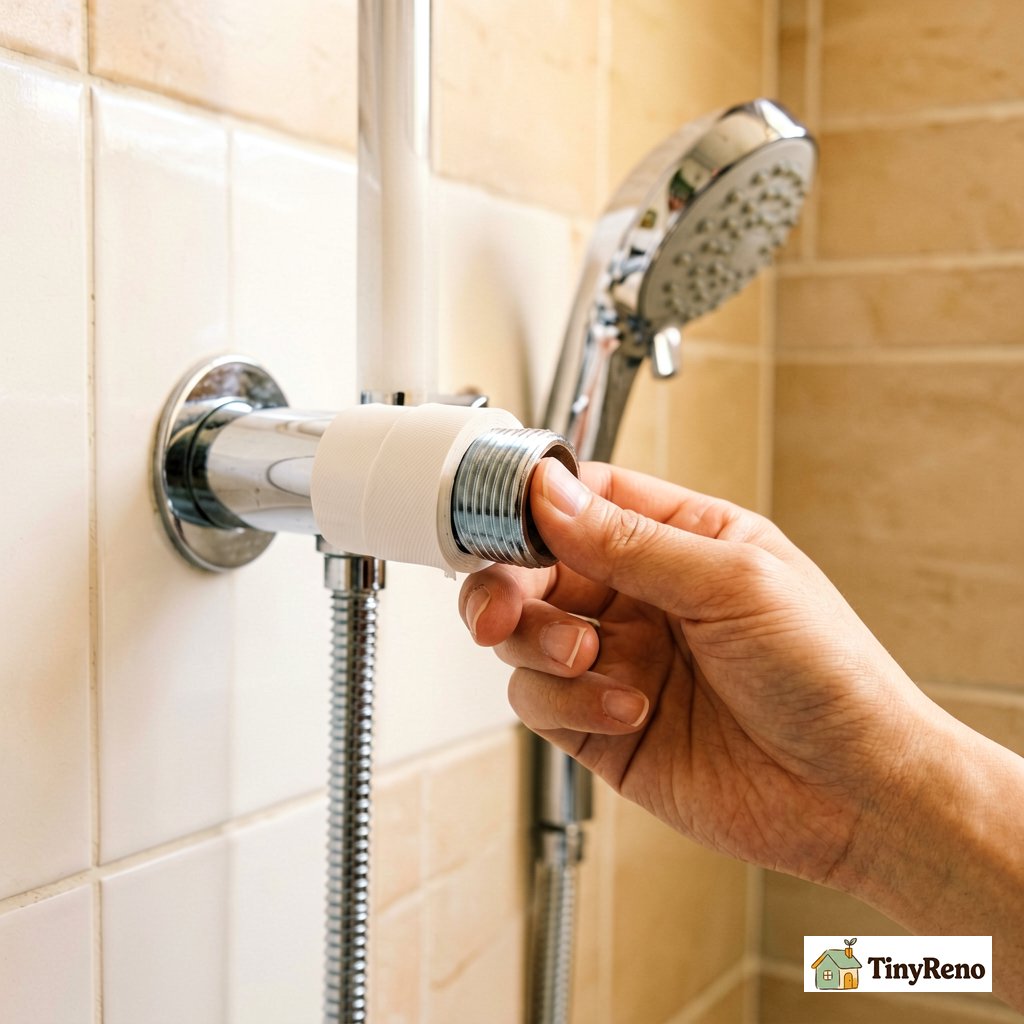 If you wrap counterclockwise, the tape unravels as you tighten the head and you get an instant leak.
Step 4: install the new head. Screw the new head onto the taped threads by hand, turning clockwise. Hand-tight is usually enough for plastic shower heads. Turn the water on and check the joint. If you see water beading, turn it off and tighten just a little more — an eighth of a turn at a time, with a rag between the wrench and the nut. Metal heads can take a firmer quarter turn, but plastic ones crack surprisingly easily. Do not overtighten. The wrench is for snug, not for crushing. Overtightening cracks the plastic body on the cheaper heads and strips the threads on the metal ones.
Step 5: test for leaks. Turn the shower on for 30 seconds at full pressure. Watch the connection point where the head meets the arm. If water is beading up at the joint, the tape did not seat. Turn off the shower, unscrew it, add one more wrap of tape, and retighten.
That is the whole job. Five steps, ten minutes, $15 to $30 for the head plus $1 for the tape. How to replace shower head on a standard threaded is the cheapest, fastest plumbing repair a renter can do.
The 15-minute install (ball-mount or handheld)
The ball-mount and the handheld take about five extra minutes because of the connection hardware, but the principles are the same. How to replace shower head on a ball-mount is slightly different because there are no threads to tape.
For a ball-mount head:
1. Remove the old head by loosening the set screw (usually a small hex screw on the side of the socket) with an Allen wrench. Pull the head straight off the ball. Do not twist the ball itself.
2. Clean the ball with a rag. If there is mineral buildup on the ball, scrape it gently with a flathead screwdriver. The ball needs to be smooth for the new socket to seal.
3. Slide the new head's socket onto the ball. The socket has a rubber gasket inside that seals against the ball. If the gasket is missing or damaged, the head will leak no matter how tight the set screw is. Most new heads come with a spare gasket.
4. Tighten the set screw until the head holds its angle when you let go. Do not overtighten — you can crack the socket.
For a handheld shower:
1. The handheld replaces a standard threaded arm just like a fixed head does. Remove the old head, tape the threads, and screw on the new mount or bracket.
2. The hose screws onto the bottom of the handheld wand and onto the outlet on the mount. Both ends usually have a rubber washer inside the nut — if the washer is present and intact, you don't need tape at all. Adding tape to a washer-sealed connection can actually prevent the nut from tightening enough and cause a leak. Check the washers first. Only use tape if a washer is missing and you can't replace it right away. Two wraps on each end, clockwise.
3. Hand-tighten both ends, then a quarter turn with the wrench. Test for leaks at both ends.
4. Mount the bracket or slide bar to the wall with the included hardware. If you are renting, do not drill into tile for a permanent bracket — use the suction-cup or tension-mount version that comes with most handhelds.
How to replace shower head as a handheld upgrade takes about 15 minutes total and the same tools. The only thing that changes is the number of threaded connections to tape — which is two instead of one.
The 3 things that go wrong and how to fix each
How to replace shower head has three common failures, and all of them are easy to diagnose and fix. None of them require a plumber.
1. The head drips from the joint after install. Ninety percent of the time this is a tape problem. Unscrew the head, look at the tape — if it looks bunched up or unraveled, that is your leak. Remove the old tape, re-wrap with two fresh wraps clockwise, and retighten. The other 10 percent of the time, the connecting nut is not tight enough. A quarter turn more with the wrench usually fixes it.
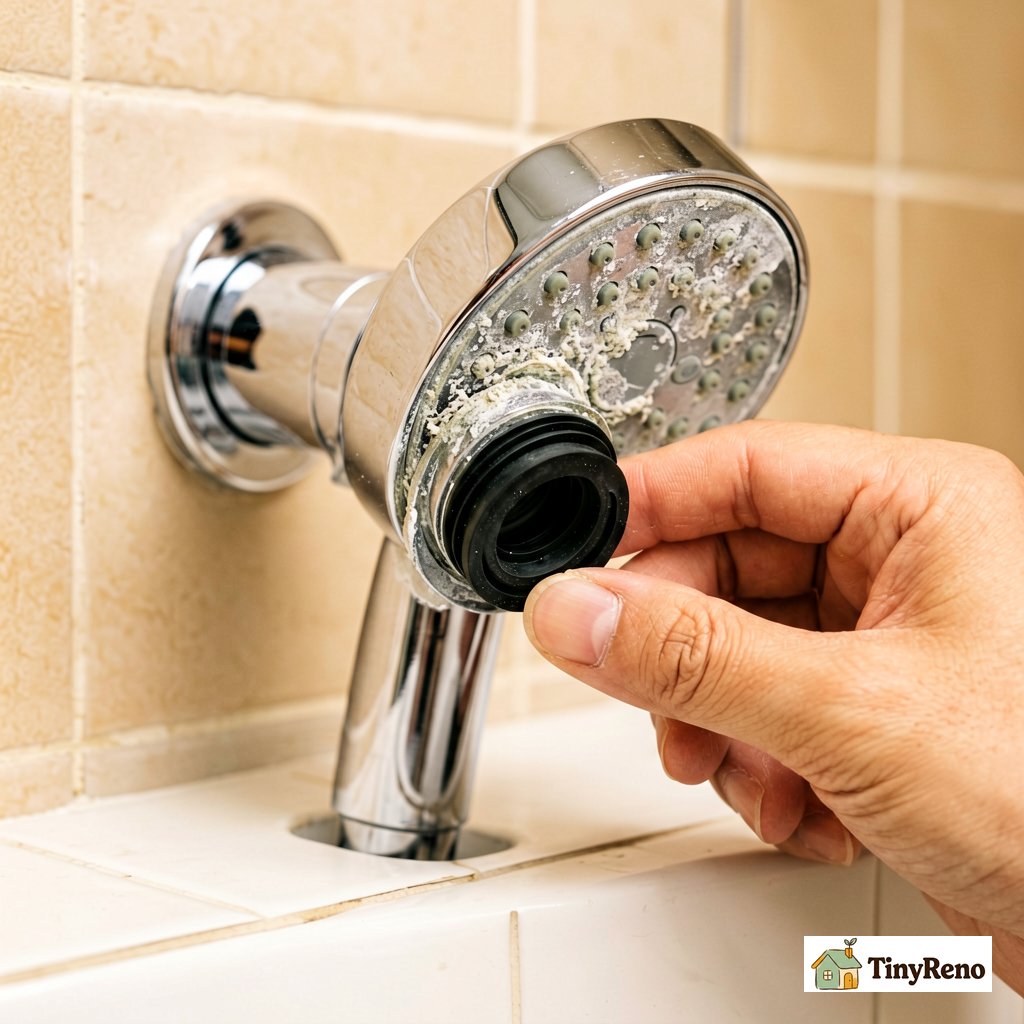
2. The head sprays weakly or unevenly after install. This is almost always debris in the new head, not a defect. Most new shower heads come with a flow restrictor washer installed. Hard water or pipe debris gets caught in the restrictor during install. Unscrew the head, remove the rubber washer from the inlet, rinse it under the tap, and reinstall. If the head still sprays weakly, soak the head face in a 1:1 vinegar and water solution for 30 minutes to dissolve any remaining mineral buildup.
3. The threads on the shower arm strip during install. This is the failure that feels catastrophic but is also a renter repair. The threads on the shower arm are part of the plumbing that goes into the wall. If the threads are visibly damaged or the arm is leaking from behind the wall, stop and call the landlord. Adding extra tape to stripped threads is a short-term patch that might hold for a while, but it can also hide a bigger problem and lead to water damage inside the wall. Replacing a damaged shower arm is the landlord's job, not a renter's DIY fix. Document the damage with a photo and send it to the landlord before doing anything else. If the arm is leaking from behind the wall, that is a landlord call.
How to replace shower head in a rental is a $20 job and a 15-minute job. The new head will outlast your lease if you spend $25 to $30 on it. The old head goes in the trash (or saved as a spare if you want to put the original back when you move out — most landlords will not notice either way, but if you are a strictly by-the-rules renter, swap it back at move-out for free). That is the budget and the time. Anything more than that is something else going on with the plumbing behind the wall, and that is where the landlord's responsibility starts.


Discussion (0)
Sign in to join the discussion