

Shower door repairs were not on my move-in checklist. My second apartment had a glass sliding shower door with a single bottom wheel that had seized up so badly the door would not slide at all, and the previous tenant had caulked the track to the tile instead of fixing it. I found that out at 11 pm on a Tuesday when I pulled the shower curtain back and three gallons of standing water drained out onto the bathroom floor and under the wall into the hallway. That was the night I learned shower door repairs are a renter skill, not a contractor skill, and that Most of what looks like a replacement problem is actually a $15 parts problem. I don't have a hard number for this — it's based on my own experience across three apartments and four years. But every time I've been called to look at a "broken" shower door, the fix has been wheels, track, or caulk — never the glass, never the frame.
This guide is the three repairs I have done on rental shower doors over four years and three apartments, in the order most renters will hit them. Shower door repairs break into three categories — wheels, tracks, and caulk — and each one has a fix that costs less than the plumber's minimum service fee. The 20 percent that does not have a renter fix is the part I almost always caught too late, which is the part I will tell you when to stop.
The 3 things that actually break on a shower door (and the 1 that doesn't)
Most shower door repairs guides list ten possible problems and five tools you might need. That is contractor thinking. As a renter, you are dealing with three failure points, and only three, on a sliding glass door. The fourth common worry — cracked glass — is not a renter repair, full stop.
The wheels. Two or four small rollers at the bottom of the door, sometimes one at the top. They take the weight of the glass and slide along a metal track. The plastic wears down, the bearing seizes, and the door stops sliding or comes off the track entirely. This is the most common shower door repair by a wide margin.
The track. The metal channel at the bottom (and sometimes top) of the door frame. It collects soap scum, hair, and mineral deposits. The door drags or jumps. Cleaning the track fixes it 70 percent of the time. A bent or detached track is the next failure mode — usually renter-fixable with a screwdriver and a $3 replacement strip from a hardware store.
The caulk and seals. Where the glass meets the tile, and along the bottom edge of the door, there is silicone caulk and a vinyl sweep. Both degrade. Water leaks onto the floor. This is the messiest of the three repairs but the cheapest — a $4 tube of kitchen-and-bath silicone and an afternoon.
Cracked glass. Not a renter repair. If the glass itself is cracked, chipped at an edge, or shattered, that is a landlord problem and likely an insurance problem. Stop here and call the leasing office.
What you need for $15: the renter's tool kit
The tool kit for shower door repairs in a rental fits in a single shoebox. None of it is specialty. Most of it you probably already have.
Screwdriver set with both Phillips and flathead (you own this). The only specialty is a small flathead for the wheel adjustment screws, which are almost always a #1 or #2 Phillips but occasionally a slotted. A multi-bit screwdriver from a dollar store handles both.
A tube of 100 percent silicone kitchen-and-bath caulk, clear (~$4). Not latex caulk. Not "all purpose" caulk. The label must say 100 percent silicone and must say kitchen-and-bath or bath. The cheap $2 tubes are acrylic and will not hold up to water.
A caulk gun (~$3 if you do not own one). You will use it twice in this lease and then never again. The cheap single-use ones from the hardware store work fine. Borrow one if your downstairs neighbor has one — that is the move that saved me the $3 the second time around.
A pack of replacement shower door wheels (~$8 for a 4-pack). These are universal-fit on 90 percent of sliding doors. Take the old wheel to the hardware store and match the diameter of the wheel itself (most are 7/8 inch or 1 inch) and the diameter of the post that snaps into the door frame. The hardware store person will help — this is the one part of the job where asking is faster than measuring.
A utility knife, a rag, a bottle of rubbing alcohol, and a pair of work gloves (you own these). The gloves matter when you're pulling out old silicone — the edges of cured silicone are sharp enough to cut your fingers. For removing old caulk and cleaning the track.
Total: about $15 if you start from nothing, $4 if you own a screwdriver and have rubbing alcohol. Anything else you read about for shower door repairs is for installers, not renters.
The 10-minute wheel fix (most common break)
If your shower door is dragging, jumping, or has come off the track entirely, the wheels are the first place to look. The wheel replacement is the most common shower door repair because the wheels are the moving part and the part that wears. The fix takes ten minutes per door, costs $4 to $8, and does not require removing the door from the frame.
Step 1: lift the door off the track. Stand inside the shower. Grab both sides of the door at the top. Lift straight up and tilt the bottom of the door toward you. The door will come off the bottom track. Do not force it — if it does not lift easily, the wheels may still be engaged. Push the top of the door toward the wall first, then lift.
Step 2: find the wheel assembly. Lay the door on a towel on the bathroom floor. The wheels are in the bottom edge of the frame, accessible through a small hole or a removable cap on each side. Some doors have an adjustment screw on the face that lets you raise or lower the wheel without removing it.
Step 3: remove the old wheel. Most wheels snap out by pulling the post sideways. Some have a small retaining clip you pry off with a flathead screwdriver. If the wheel has an adjustment screw, back it all the way out (counterclockwise) and the wheel will drop free.
Step 4: match the wheel at the store. This is the step that wastes the most time if you guess. Take the wheel to the hardware store and match the wheel diameter and the post diameter visually. The universal 4-packs cover most sliding doors from the last 20 years, but the post sizes vary enough that eyeballing at the store is faster than measuring at home.
Step 5: install and adjust. Snap the new wheel into the frame, replace the retaining clip if there was one, and set the door back on the track. Most new wheels come set to the lowest position — turn the adjustment screw clockwise to raise the wheel until the door sits just above the track by about 1/8 inch. Too low and it drags. Too high and the door wobbles.
Step 6: test slide. Slide the door across the full length of the track three or four times. If it binds at any point, the wheels are not aligned the same on both sides — adjust the screws one at a time, a quarter turn each, until the slide is smooth.
The 30-minute track fix (when the door drags)
If the wheels are fine but the door still drags, the problem is the track. This is the second most common shower door repair. The track fills with soap scum, hair, and the white calcium buildup from hard water. The fix is mostly cleaning, with a small repair if the track itself is bent or detached.
Step 1: clean the track. Vacuum the loose debris with a hose attachment. Then Take a small flathead screwdriver and run it along the inside of the track, scraping the buildup out. For hard calcium deposits, wrap the screwdriver in a rag for grip, but use the bare metal edge to break the crust. You can also use an old toothbrush or a small nylon brush for the corners. The goal is to get the track back to bare metal. Follow with a paper towel soaked in rubbing alcohol. The track should be shiny metal when you are done.
Step 2: check for bends. Look down the length of the track from each end. If it is bent inward anywhere, the door will bind at that point. Small bends you can straighten with pliers. Large bends you cannot straighten — that section of track needs to be replaced.
Step 3: re-attach a loose track. The track is usually held to the tub surround or the tile by a bead of caulk and sometimes by a few screws into the wall. If the track has come loose, scrape off the old caulk, dry-fit the track back in place, and re-caulk with the silicone from your kit. Press it in firmly and wipe the excess with a damp rag. Let it cure 24 hours before running water on it.
Step 4: replace a damaged track section. Hardware stores sell replacement track in 5-foot lengths for $6 to $10. Cut to length with a hacksaw, file the ends smooth, and install the same way as the original. This is the edge of renter repair — if the track is molded into the frame rather than removable, stop and call the landlord.
The track is also where you find out if your shower door repair is going to last. A clean track with new wheels will outlast the lease. A clean track with old wheels will be back to dragging within six months.
The 60-minute caulk fix (when water leaks onto the floor)
The third of the common shower door repairs is the only one that involves a tube. If water is leaking under the door onto the bathroom floor, the bottom sweep or the side caulk has failed. This is the messiest repair and the one most likely to make a renter nervous because silicone is permanent until you cut it out.
Step 1: cut out the old caulk. A utility knife, held at a low angle with the blade flat against the surface, drawn slowly along the old bead. Don't worry about the exact angle — the goal is to keep the blade from digging into the tile or glass underneath. Pull the old caulk away as you cut. Do not rush this step — old silicone that breaks off in chunks leaves residue that the new silicone will not bond to. The surface must be clean down to the original tile or glass.
Step 2: clean with rubbing alcohol. Wipe the joint with a rag soaked in rubbing alcohol. Let it dry for 15 minutes. Silicone will not bond to a wet or oily surface, and this is the step most first-time caulkers skip. The repair will fail in two months if you skip the alcohol wipe.
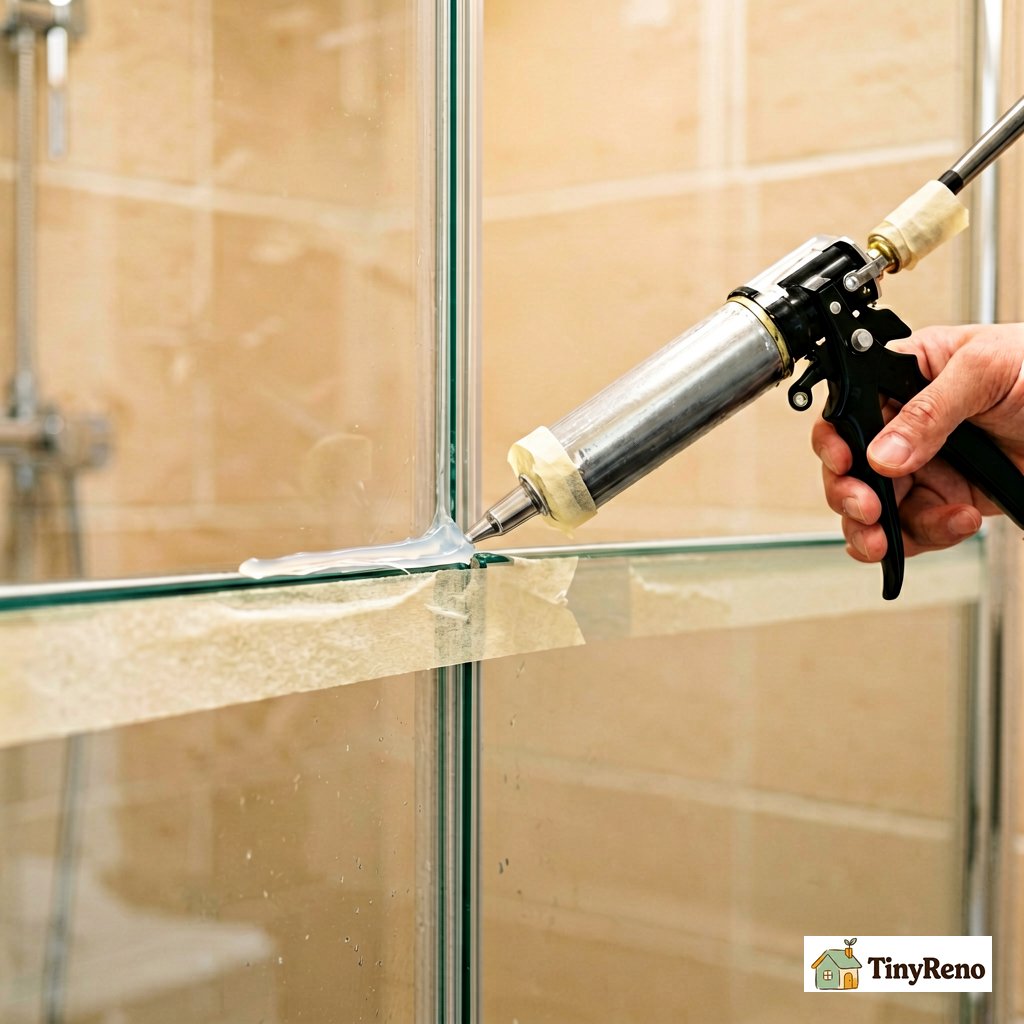
Step 3: tape the joint. This is the move that makes the difference between a renter caulk job and a contractor caulk job. Run a strip of painter's tape along each side of the joint, about 1/8 inch away from where the silicone will land. You will pull the tape off immediately after tooling the bead, leaving a clean straight line on each side.
Step 4: lay the bead. Cut the tip of the silicone tube at a 45-degree angle, making the opening about 1/8 inch wide. Squeeze the trigger with steady pressure and move the gun along the joint at a slow, even pace. Do not stop mid-bead — keep moving until you reach the corner, then release the trigger.
Step 5: tool the bead. Wet your finger with a little water and a drop of dish soap. Drag your finger along the bead in one continuous motion, pressing lightly to push the silicone into the joint and smooth the surface. Wipe excess silicone off your finger with a rag between passes.
Step 6: pull the tape. Pull the painter's tape off immediately, before the silicone skins over (about 5 minutes). If you wait and the silicone has skinned, pulling the tape will tear the bead. The tape leaves you with a clean edge that looks like a contractor did it.
Step 7: cure 24 hours. No water on the new caulk for a full day. The shower has to stay dry. This is the part that takes longer than the actual repair and the part renters skip. Skipping the cure is why most renter caulk jobs fail in three months.
One part I didn't cover above: the vinyl sweep along the bottom of the door. That's the flexible plastic strip that keeps water from running under the door. If your door leaks from the bottom but the caulk looks fine, the sweep is probably worn out. Replacement sweeps cost about $6 for a 3-foot strip and snap into a channel on the bottom edge of the door. Pull the old one out, press the new one in, done. It takes five minutes and fixes a leak that looks like a caulk problem but isn't.
When to stop and call the landlord
Shower door repairs in a rental have a clear stopping point. Three situations where you stop, document with photos, and call the leasing office instead of finishing the repair yourself.
Cracked or chipped glass. Already covered. Stop. Glass repair is not a renter skill and a crack can spread under the stress of a wheel swap or a track bend.
Frame separated from the wall. If the metal frame around the door has come away from the tile or the tub surround, that is a structural problem, not a maintenance problem. Water is getting behind the frame into the wall. The fix requires removing the frame, addressing whatever is behind it (often water damage), and reinstalling. That is a landlord expense and a landlord responsibility.
Mold behind the caulk. If you cut out the old caulk and see black or dark green staining on the drywall or the back of the tile, the leak has been going on longer than the previous repair. Surface caulk will not fix it. The wall needs to be opened, dried out, and possibly replaced. That is also a landlord call, and you should photograph the damage before you re-caulk over it for the time it takes to get the landlord to act.
Everything else — wheels, tracks, caulk — is a renter repair. The total cost for all three over the life of a lease is about $25 to $40, less than the minimum service fee for a plumber to come out and look at the door. The total time is about two hours, spread across as many Saturdays as your shower needs. That is the budget for shower door repairs in a rental, and the budget holds across almost every door I have worked on.


Discussion (0)
Sign in to join the discussion