

The first time I tried a pro tile cleaner was in my Sunnyside apartment about six months into the lease, when I finally got around to cleaning the bathroom floor for the second time. The first time I had cleaned it, I used the same dish soap I use on dishes, which got the surface dirt but left the grout looking gray. The second time I bought a bottle labeled "professional strength tile cleaner" at the grocery store, expecting it to work some kind of magic. It did not. It cleaned the tile face slightly better than the dish soap and did basically nothing to the grout. I still spent forty-five minutes on my hands and knees with a stiff brush. By the time I finished, the grout was the same gray it had been before I started.
I learned later that the "professional" on the label meant almost nothing in a consumer product. Real commercial products used by janitorial companies are different entirely. They have higher concentrations of active ingredients, they are usually diluted before use, and they are designed to be used with specific equipment. The consumer-grade stuff in the grocery store is a much milder version, and on grout that has years of buildup, mild is not enough. I ended up buying a mid-grade tile cleaner online that came with a small brush attachment, and that did the job. This is what I would have done differently if I had known the right approach from the start.
What Makes a Tile Cleaner "Professional"
The actual difference between consumer tile cleaners and pro tile cleaners is concentration and chemistry. Consumer products are usually pre-diluted and pH-balanced to be safe on skin and on a wider range of surfaces. Pro products are usually concentrated and meant to be diluted at specific ratios. The active cleaning ingredients in commercial products are typically 5 to 10 times more concentrated than in consumer products.
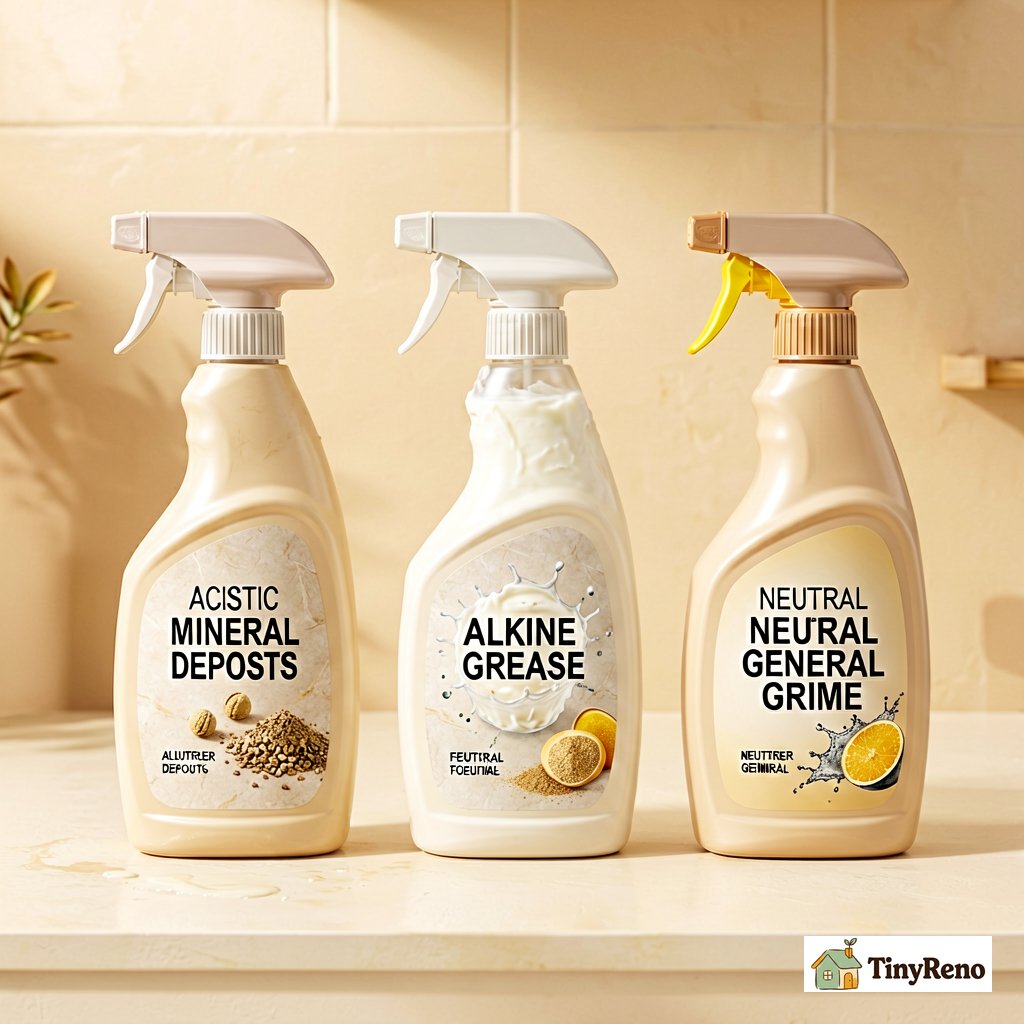
The chemistry matters too. These concentrated cleaners fall into three categories based on the active ingredient. Acidic cleaners use diluted hydrochloric acid or phosphoric acid. They work fast on mineral deposits and rust stains but can etch natural stone. Alkaline cleaners use sodium hydroxide or similar. They work well on grease and body oils but are slower on mineral stains. Neutral cleaners use solvents and surfactants. They work on general grime and are safe on natural stone.
For most renter situations — bathroom and kitchen floors with a mix of body oil, soap residue, and food spills — an alkaline cleaner is the right choice. It is safe on ceramic and porcelain tile, it is effective on the things that build up in renter grout, and it does not require the safety gear that acid cleaners do. The only time you need an acid cleaner is for hard water deposits or rust stains, which are not common in renter grout unless you have very hard water or old iron pipes.
What the Cleaning Solution Actually Does
The cleaner is not magic. It is a chemical reaction that breaks the bond between dirt and the grout surface, combined with mechanical action from a brush that lifts the loosened dirt out of the pores. The chemical does the loosening. The brush does the lifting. Neither alone does the job.
This is why the toothbrush approach often fails. A toothbrush with dish soap gets some chemical action and some mechanical action, but the chemical is too weak to break down grout that has been building up for years. Pro tile cleaner gets strong chemical action but still needs the brush. The brush is what physically moves the dirt out of the pores where it has been accumulating. Skipping the brush and just using the chemical is not enough either, because the chemical will dissolve the dirt but not pull it out. You end up with dissolved dirt sitting in the grout pores ready to resolidify when the chemical dries.
The combination of chemical and mechanical is also why professional cleaning services get grout looking like new. They use commercial chemicals that dissolve the dirt fast, and they use commercial brushes that spin at the right speed and apply the right pressure. The result is that the grout gets back to close to its original color. You can get to about 80 percent of that result at home with a mid-grade pro tile cleaner and a stiff brush. The last 20 percent is what the commercial equipment is for.
The Brushes That Actually Work
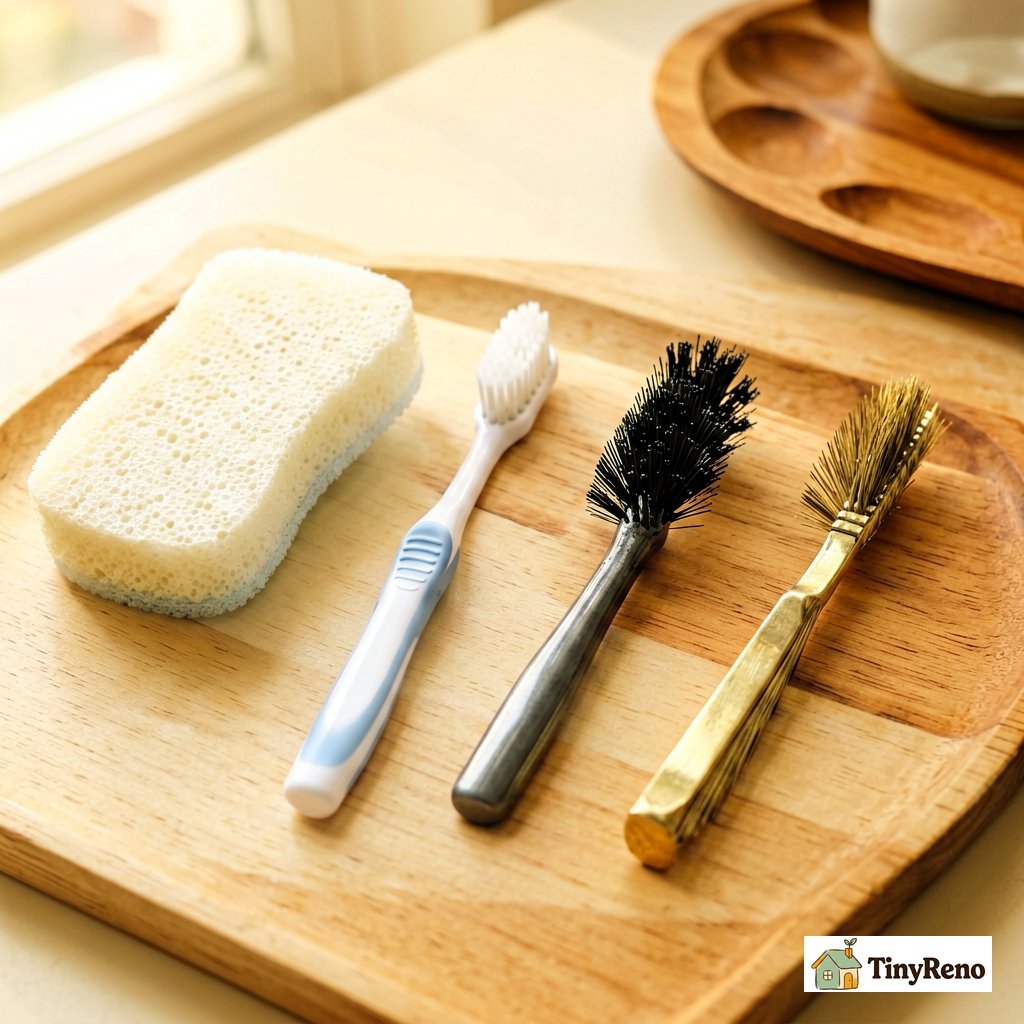
For the mechanical part of the cleaning, the brush matters more than most people think. A regular dish sponge is too soft — it does not get into the pores of the grout. A toothbrush is okay but the bristles are too thin and too short to apply much pressure. A stiff nylon brush, the kind that looks like a shoe brush, is much better. The bristles are thick and stiff, and they hold their shape against the grout.
For really stubborn grout, a brush with brass or stainless steel bristles is more aggressive. The metal bristles will scratch ceramic tile if you press too hard, but if you keep the brush moving and use light pressure, the metal bristles dig into the grout without damaging the tile face. I bought a brass bristle brush for about $8 at the hardware store and it lasted five years before the bristles bent.
The brush attachment that came with my mid-grade tile cleaner is nylon and motorized. The motorized brush does about the same work as the brass bristle hand brush, but in less time and with less effort. For a renter who cleans grout twice a year, the hand brush is fine. For someone who is cleaning grout in a rental they just moved into that has years of buildup, the motorized brush is worth it.
Whatever brush you use, the motion matters. Work in small sections, about two square feet at a time. Apply the cleaner, let it sit for three to five minutes per the label, then scrub in circles rather than back and forth. Circular scrubbing covers more area per stroke and is less likely to leave visible scrub marks. Work the brush in multiple directions — some circles, some diagonal strokes — to get into the grout from different angles.
How Long to Let the Cleaner Sit
The dwell time — how long you let the cleaner sit on the grout before scrubbing — is the difference between a clean floor and a barely-clean floor. Most pro tile cleaners need three to five minutes of dwell time to fully break down the dirt. Less than that and you are scrubbing before the chemical has done its work, which means you are mostly doing mechanical cleaning with a weakened chemical. More than ten minutes and the chemical starts to dry on the surface, which can leave a film.
I made the dwell time mistake a lot when I first started. I would spray the cleaner and immediately start scrubbing because I wanted to see the results. The result was that I had to work twice as hard and the grout was still gray. When I started doing the three to five minute dwell, the grout came back noticeably cleaner with about the same amount of scrubbing.
For really stubborn grout, you can do two cycles of cleaner and dwell rather than one longer cycle. Spray, dwell five minutes, scrub, rinse, then spray again, dwell five minutes, scrub again. The two-cycle approach lets the first round of cleaner do most of the chemical work, and the second round finishes what the first one loosened but did not fully remove. This is what the commercial cleaning services do.
What to Do About the Tile Face
Pro tile cleaner is for the grout. The tile face usually just needs a separate clean with a pH-neutral tile cleaner and a soft cloth. Using the same pro cleaner on the tile face is wasteful — the tile is much less porous than the grout and does not need the same chemical action. Plus, the stronger chemicals can leave a film on glazed tile that requires extra rinsing to remove.
For the tile face, a damp microfiber cloth and a small amount of regular tile cleaner is enough. Wipe in sections, rinse the cloth frequently, and dry the tile with a clean towel to prevent water spots. If you have hard water, the drying step matters more than for the rest of the cleaning — water droplets on the tile will leave mineral deposits as they dry, and those deposits are much harder to remove than whatever you just cleaned off.
For tile that has visible soap scum or hard water buildup, a separate bathroom cleaner with citric acid works better than a general tile cleaner. Apply the citric acid cleaner to the tile face, let it sit for five minutes, then wipe and dry. This is a separate step from the grout cleaning and should be done with a different cloth.
What to Do After the Clean
The grout looks much better after the pro tile cleaner, but it is also vulnerable. The pores are open and will start collecting new dirt immediately. Sealing the grout after cleaning is the way to keep it looking good for longer. A penetrating grout sealer soaks into the pores and creates a barrier that slows how fast dirt gets back in.
Apply the sealer with the applicator bottle, working in small sections. Let it soak for ten minutes, then wipe off the excess with a clean rag. Wait two hours before anyone walks on the floor. The sealer is invisible once it dries and does not change the appearance of the grout. The benefit shows up the next time you mop — the dirt comes off much faster because it is sitting on top of the sealer rather than embedded in the grout.
I started using a grout sealer after about the third time I deep cleaned the grout in my Sunnyside apartment. The difference in how long the grout stayed clean was noticeable — about four months between deep cleans instead of two months without the sealer. The sealer bottle costs about $10 and lasts for two or three applications. It is the cheapest thing I do to maintain the bathroom floor and the most effective.
The pro tile cleaner I bought online was about $25 for a half-gallon, which is enough for two or three cleanings of a typical renter bathroom. Combined with the grout sealer, the annual cost of keeping the bathroom floor clean is about $15 to $20, which is less than one professional cleaning service visit. I still use the same bottle I bought three years ago, mostly because I learned to dilute it properly. The cleaner is concentrated. A 4-to-1 dilution works for most renter situations. A 2-to-1 dilution is for very dirty grout. The label will tell you the recommended dilution, but for residential grout, you can usually go more diluted than recommended without losing effectiveness.


Discussion (0)
Sign in to join the discussion