

I learned how to sharpen serrated knife the wrong way first, in a fifth-floor walk-up in Astoria with a bread knife that would barely cut through a soft sourdough. I ran it across my cheap pull-through sharpener three or four times the way I did with my chef knife, watched the burrs disappear, and figured I had done a good job. What I actually did was grind the serrated edges flat — the knife went from mediocre to useless in about a minute. The bread started tearing instead of slicing, and the only thing the knife could do well after that was saw through a tomato, which it already could before I touched it.
Serrated knives are not broken chef knives. They are a different tool that takes a different sharpening method, and if you have ever tried to sharpen one the way you sharpen a chef knife, you probably already know this the way I did — by ruining a good blade. The good news is that how to sharpen serrated knife is one of the easier knife jobs once you stop thinking about it like a regular edge.
Why Serrated Knives Need a Different Method
A regular knife has a single straight edge that you push or pull across a stone. The contact happens along the whole edge at once. A serrated knife has a row of tiny angled teeth, and only the tip of each tooth does the actual cutting. The flat side of the blade — the one without the scallops — is the back of the teeth. The sloped side — the one with the scallops — is where the cutting edge lives.
When you run a serrated knife across a pull-through sharpener or a whetstone like you would a chef knife, you only contact the tips of the teeth. You never touch the inner curves of the scallops where most of the dullness actually happens. Worse, the pull-through action grinds down the tooth tips until they match the height of the scallop base, which makes the serrations flat. That is what I did to my Astoria bread knife. The knife stopped being serrated and became a low-grade straight edge that could not cut anything.
The fix is to sharpen each tooth individually, on the sloped side only, with a tool that fits inside the scallops. The most common tool is a tapered round rod — usually ceramic or diamond coated. You run the rod inside each scallop a few times, then very lightly dress the flat back of the knife. That is the entire method. It sounds fiddly but it is actually faster than sharpening a long chef knife once you have done it two or three times.
What You Need to Sharpen a Serrated Knife
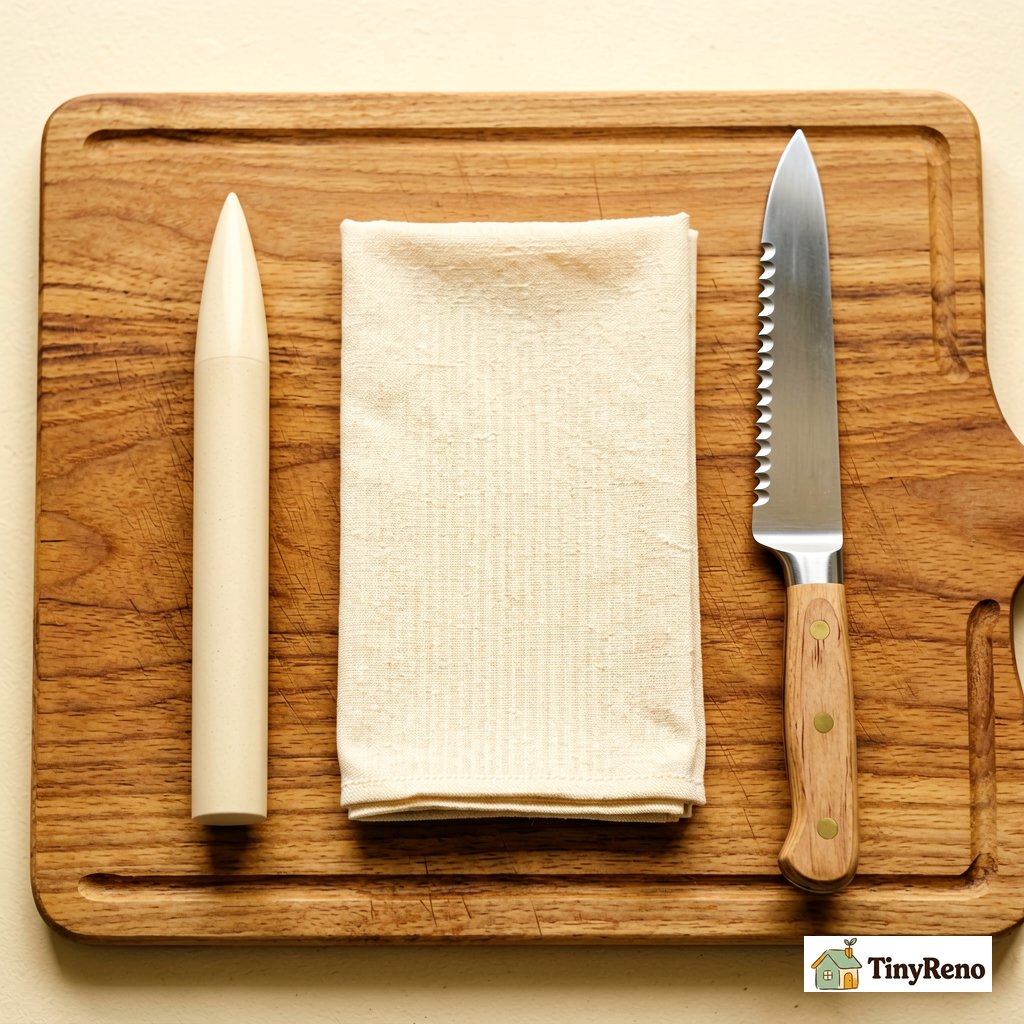
You need three things for how to sharpen serrated knife at home. A tapered sharpening rod that fits inside the scallops. Most kitchen knife sets that include a sharpener also include a tapered rod — if yours has one, that is what it is for, and it is probably been sitting in the back of a drawer since the day you got the set. If you do not have one, a dedicated ceramic or diamond tapered rod costs about $10 to $15 from any kitchen store or online.
A clean cloth or paper towel. A few drops of water or honing oil, depending on what your rod manufacturer recommends. Diamond rods can be used dry or with water. Ceramic rods usually come pre-treated and do not need any liquid. Most of the time you can skip the liquid entirely and just sharpen dry.
That is the full kit. No pull-through sharpeners, no whetstones, no electric sharpeners with the serrated slot. The serrated slot on pull-through sharpeners works on the same principle as the rod but it is too aggressive for most home cooks — it removes too much metal per pass and shortens the life of the knife. The tapered rod is the gentlest option and the one professional knife sharpeners actually use on serrated blades.
If you do not want to buy a tapered rod, there is one cheap alternative — a piece of 600-grit sandpaper laid flat on a cutting board. You can lay the sloped side of the knife flat against the sandpaper and slide it across a few times to refresh the tooth edges. This is a hack, not a real method, but it works in a pinch for a bread knife that has lost its bite. The rod is better.
The Actual Sharpening Method
Here is the routine I use on my current bread knife, which I have resharpened twice in three years using this method. Lay the knife flat on a cutting board or a folded towel, sloped side up. Pick up the tapered rod and match the angle of the rod to the angle of the scallop. Most scallops are cut at around 13 to 17 degrees from vertical. You don't need to measure it — just hold the rod so it rests naturally inside the scallop and matches the existing angle. Look at the knife and you will see the angle — match it.
Place the tip of the rod inside the first scallop at the tip of the knife, near the handle end. Apply light pressure — much lighter than you would use on a whetstone. Stroke the rod along the scallop three to four times, going in one direction only. Do not saw back and forth. Each stroke should feel almost like a single gentle scrape. You will feel a slight burr form on the back of the knife after two or three strokes. That is the signal to stop on that tooth and move to the next.
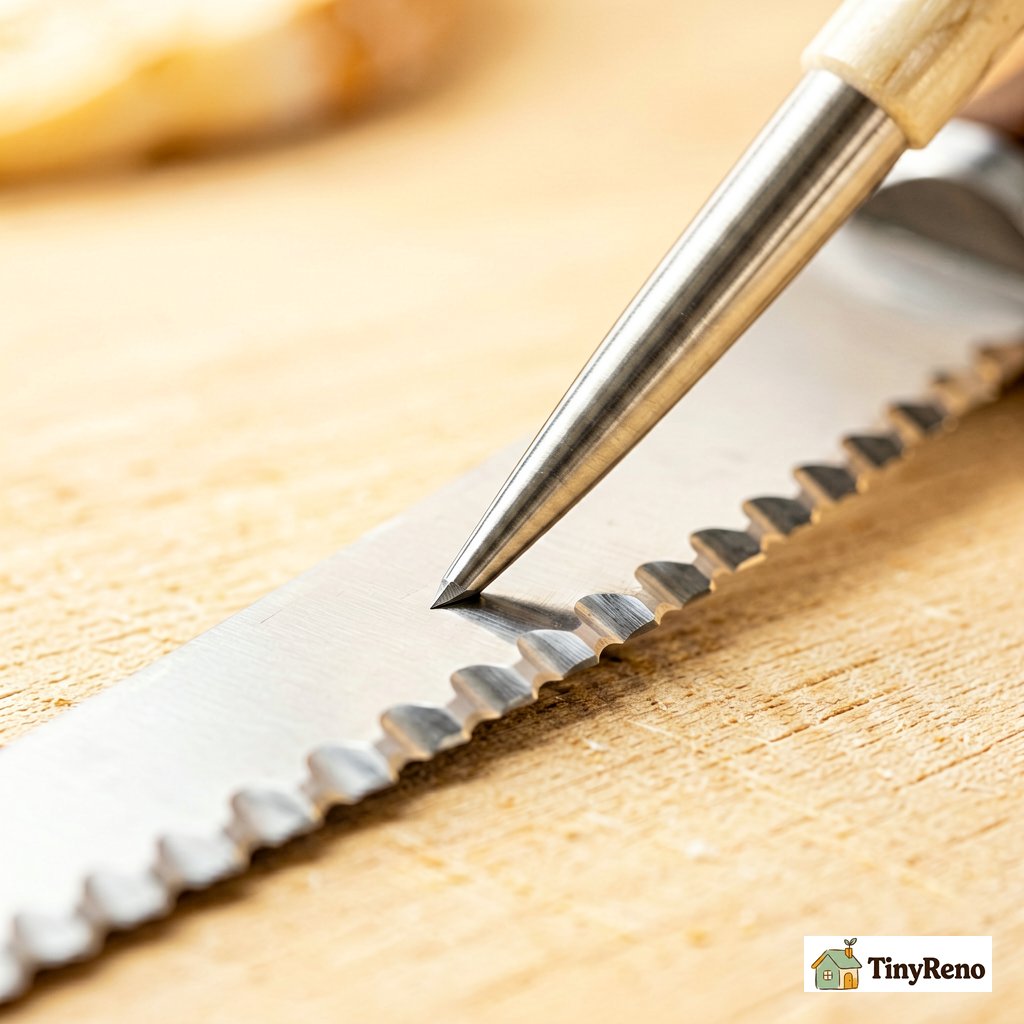
Work your way down the knife one scallop at a time. For a bread knife with maybe 20 to 30 scallops, this takes about 90 seconds once you are in rhythm. For a steak knife with 6 to 10 scallops, it takes 30 seconds. The smaller the knife, the fewer the scallops, the faster the job. Do not skip any scallops — every tooth needs the same number of strokes or you end up with a knife that cuts well on one end and not the other.
After every scallop is done, flip the knife over and lay the flat back against the rod. Give it two or three very light passes to knock off the burr you raised on each tooth. The flat back does not need sharpening — only the burr removal. Use the lightest pressure you can manage. You are not grinding, you are just knocking the wire edge off.
Testing the Edge the Right Way
Most people test a sharpened knife by trying to cut something, and that is fine for chef knives. For serrated knives there is a better test that takes about five seconds. Hold a single sheet of newspaper by the top corner. Let the rest of the sheet hang free. Try to slice down through the paper with the knife. A sharp serrated knife will cut the paper in a clean line with almost no pressure. A dull one will snag and tear.
I use this test on my bread knife after every resharpening and it tells me in one cut whether I am done. If the paper snags, I go back to the scallops that feel rough under my thumb — usually the ones near the heel of the knife where I made contact with the cutting board more than the others — and do two or three more passes per scallop. Then I test again. Two rounds is usually enough.
Another quick test is a ripe tomato. A sharp serrated knife will go through the skin and the flesh of a ripe tomato with almost no pressure, leaving a clean slice. A dull one will crush the skin before it cuts. The tomato test is messier than the newspaper test but works on the kind of knife you are most likely resharpening — a bread knife that does not need to be razor sharp but does need to glide through a crust without dragging.
Do not test on a soft loaf of bread. Bread is too forgiving and you cannot tell a sharp serrated edge from a slightly dull one by cutting bread. That is the trap I fell into with my Astoria knife — the bread cut fine, so I thought I had done a good job, but the knife was getting worse with every pass. A test on paper or tomato tells you what you actually want to know.
How Often to Sharpen
Serrated knives need sharpening far less often than straight-edged knives. The geometry of the teeth protects the cutting edge from the kind of contact that dulls a chef knife. A home cook who uses a bread knife two or three times a week will resharpen it once every one to two years. A steak knife used twice a month might never need sharpening in its lifetime — though if you have a wooden-handled set from a wedding registry you have had for ten years, the serrations might be permanently flattened by now from dishwashing.
The bigger maintenance habit for serrated knives is keeping them dry. Serrated knives are harder to dry than straight knives because water hides inside the scallops and against the back of the teeth. If you put a wet serrated knife in a drawer, the moisture sits in the scallops and the steel starts to oxidize. A bread knife with rust spots in the scallops will cut fine for a while but it is on its way out. Towel dry every serrated knife before putting it away, including the cheap steak knives.
The other habit is hand washing. Serrated knives, especially wooden-handled ones, should never go in the dishwasher. The high heat cycles and the detergent exposure will destroy the handle glue and accelerate the rust in the scallops. A two-minute hand wash with dish soap and a soft sponge will keep a serrated knife going for years. The same knife in a dishwasher will be junk in two years. This is the single biggest reason kitchen knife sets end up in the trash.
When to Stop Sharpening and Replace
A serrated knife cannot be resharpened indefinitely. Each time you run the rod through the scallops you remove a small amount of metal from the teeth. Eventually the teeth become so short they cannot hold an edge anymore, and the knife is permanently dull. For a quality bread knife, you should be able to resharpen it four to six times before the teeth get too short. For a cheap steak knife from a big box store, you might get one or two sharpenings before the teeth are gone.
The tell that a serrated knife is at the end of its life is that even after a careful resharpening, the teeth look almost flush with the scallop base. There is no visible point to each tooth anymore. At that point no amount of rod work will bring them back — the geometry is just gone. Time to replace.
If you are renting, the knives in your unit are almost certainly at this point. I have never lived in a rental that had a serrated knife worth saving. The bread knife in my current place came with a flat-edged serration that I gave up on after one failed resharpening attempt. I keep my own bread knife in a drawer and ignore the rental one. A new bread knife costs about $25 to $40 for a perfectly good one, and it will outlast your lease with one resharpening per year.
How to sharpen serrated knife is mostly about using the right tool in the right way. The tapered rod, the right angle, light pressure, one stroke per direction, work each scallop the same. That is the whole method. Once you have done it twice you will never go back to trying a pull-through sharpener on a bread knife again, and you will stop ruining good blades the way I ruined mine in that Astoria kitchen.


Discussion (0)
Sign in to join the discussion