

My first real grout repair was in 2018 in a walk up apartment in Chicago where the shower had cracking grout across two full walls and the landlord was not going to fix it before I moved in. I bought a $25 grout saw, a $12 tub of premixed grout, a $10 grout float, a $15 penetrating sealer, and a Saturday afternoon, and I removed the bad grout, mixed the new grout, applied it across both walls, and sealed it before the weekend was over. The repair lasted the full two year lease with no cracks and no water damage. Over the past eight years I have done the same repair in three more rentals and helped six friends with theirs, and the seven step SOP below is the one that has worked every single time. It is not a quick fix in the sense of taking thirty minutes. It takes about three hours of active work plus two days of cure time, which is why this is the right article to read before you start, not the one to skim while you are holding a putty knife at the hardware store. Here is the seven step SOP with the tool list, the cost per step, the four mistakes that make the repair fail, and the three things I learned to skip that save time without hurting the result.
The Tool List and the Total Cost Before You Start
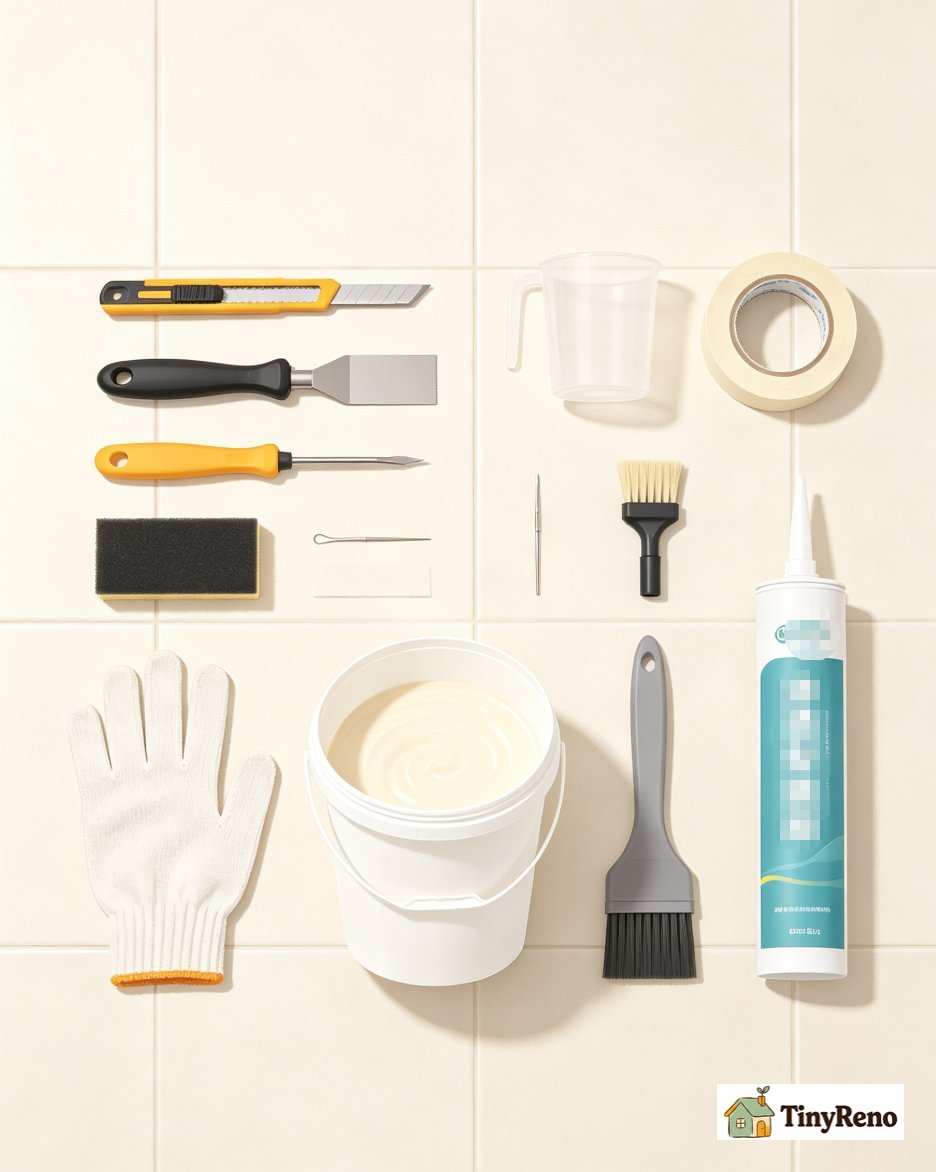
Before you start any shower grout repair, gather the tools and materials first. Stopping halfway through to drive back to the hardware store is what turns a Saturday afternoon project into a weekend disaster. Here is the complete list with current prices at Home Depot and Lowe's.
Tools you probably have. A utility knife with fresh blades, a flathead screwdriver or small pick for pulling out old grout, a vacuum with a brush attachment, a bucket, microfiber cloths, painter's tape, a measuring cup, and a pencil for marking the joints that need regrouting.
Tools you need to buy. A grout saw or oscillating tool with a grout removal bit (Cost: $15 to $30), a grout float ($8 to $12), a margin trowel for mixing ($6 to $10), and a sponge specifically for grout cleanup (the big yellow hydro sponge, $5 to $8). Total tool cost: $35 to $60 if you have nothing, or $30 if you already own the oscillating tool.
Materials you need to buy. Premixed grout or grout powder (a10 pound bucket of premixed is enough for one shower wall at $12 to $20), penetrating grout sealer ($12 to $20 for a quart that covers one shower twice), mildew resistant silicone caulk for the corners ($5 to $8 per tube, you need one or two tubes), a small applicator bottle for the sealer ($3 to $5), and rubber gloves ($5). Total material cost: $35 to $55 for one shower wall.
Total budget for one shower wall repair. $70 to $115 for tools plus materials if you have nothing, or $35 to $55 if you already own the oscillating tool and the grout float. Compared to a professional regrout job ($250 to $600 for one wall) or a full shower retile ($1,200 to $4,000), the DIY repair is between 70 percent and 95 percent cheaper. The trade off is you spend three hours doing the work yourself.
The Seven Step SOP From Prep Through Sealing
This is the seven step SOP I use for any shower grout repair that involves more than a single small crack. The active work takes about three hours for one wall and the cure time before you can use the shower is 48 to 72 hours. Plan the repair for a Friday evening or Saturday morning so you can let it cure over the weekend.
Step one, prep the shower and identify the joints to repair. Remove everything from the shower including shampoo bottles, soap, and the shower curtain or door. Tape off the tile on both sides of every joint that needs regrouting with painter's tape. The tape is what gives you a clean grout line without smearing grout onto the tile face, which is the difference between a professional looking result and a sloppy looking result. Wipe the joints with a damp cloth to remove soap residue and let them dry for 15 minutes.
Step two, remove the old cracked grout. Use the grout saw or oscillating tool to cut out the old grout to a depth of about one eighth of an inch. Hold the saw at a 45 degree angle to the joint and pull it toward you in slow strokes. Vacuum the dust as you go with the brush attachment. Pull the loose chunks out with the flathead screwdriver or pick. Work in sections of about 4 square feet so the dust does not become unmanageable. The deeper you remove the old grout, the better the new grout will bond.
Step three, clean and prep the joints for new grout. Vacuum every joint thoroughly to remove all dust and debris. Wipe the joints with a damp cloth to remove any remaining dust. Let them dry for 15 to 30 minutes before applying the new grout. If the joints have any mildew or mold, scrub them with a mildew cleaner and let them dry completely before moving to the next step. Grout will not bond to a wet or dirty joint.
Step four, mix the grout. If you are using premixed grout, stir it well in the container before scooping. If you are using powder, mix it in a clean bucket with cool water to a peanut butter consistency (thick but spreadable). Mix only what you can use in 15 to 20 minutes because grout starts to set after that and becomes hard to work with. For a 4 by 8 foot wall section, a half gallon of mixed grout is usually enough.
Step five, apply the grout. Scoop a generous amount of grout onto the grout float and press it into the joints at a 45 degree angle. Work in diagonal strokes across the tile to force the grout fully into the gap. Fill the joints slightly over full because the grout will recess as it cures. Remove excess grout from the tile face with the edge of the float before it sets, working in the same diagonal direction. Do all the joints in a 4 square foot section before moving on.
Step six, smooth and clean the joints. Wait 10 to 15 minutes for the grout to firm up slightly. Wipe the tile face with a damp (not wet) sponge, rinsing the sponge frequently in a separate bucket of clean water. The sponge removes the grout haze without pulling grout out of the joints. Smooth each joint with the tip of a wet finger or a grout finishing tool to create a slightly concave surface that sheds water. Pull the painter's tape off while the grout is still wet so it does not pull the new grout out of the joints.
Step seven, cure and seal. Let the grout cure for 48 to 72 hours before using the shower. Check the product label for the specific cure time because some products need 28 days for full cure. After the grout has cured, apply the penetrating grout sealer with the applicator bottle along every joint. Wipe excess sealer off the tile face within 5 minutes. Let the sealer dry for 24 hours before using the shower. The sealer is what prevents the water absorption cycle that caused the original grout to crack.
The Four Mistakes That Make Shower Grout Repairs Fail
Across the four repairs I have done and the six friends I have helped, four specific mistakes came up again and again. Each one is a thing you can avoid by knowing about it before you start, and each one is what makes a repair fail within months instead of lasting the full lease.
Mistake one, using the wrong grout type for the joint width. Sanded grout is for joints wider than one eighth of an inch. Unsanded grout is for joints narrower than one eighth of an inch. If you use sanded grout in a narrow joint, the sand particles do not fit and the grout cracks as it cures. If you use unsanded grout in a wide joint, the grout shrinks and cracks as it dries. The fix is to measure your joints with a ruler before you buy the grout and match the grout type to the joint width.
Mistake two, sealing new grout before it has fully cured. New grout needs 48 to 72 hours to cure (some products need 28 days for full cure) before any sealer is applied. If you seal too early, the sealer traps moisture inside the grout and prevents it from curing properly. The result is soft, crumbly grout that cracks within months. The fix is to wait the full cure time on the product label, then seal in a thin even coat, and let the sealer dry for 24 hours before using the shower.
Mistake three, applying new grout over old cracked grout without removing the old. If you apply new grout on top of cracked grout without removing the cracked material first, the new layer will crack along the same line within weeks because the substrate is still moving. The cracked grout has to come out completely before the new grout goes in. This is the most common mistake I see in first time regrouts and the one that wastes the most time because the repair has to be redone within a month.
Mistake four, using grout in corners where caulk should be used. The corners where two tile walls meet, and the joint where the tile wall meets the shower floor or tub, should be caulked, not grouted. Grout is rigid and cracks at the corners when the substrate moves even slightly. Caulk is flexible and absorbs the movement without cracking. The fix is to leave the corners empty of grout and fill them with mildew resistant silicone caulk after the grout has cured.
Why Corners Get Caulk and Tile Faces Get Grout
The rule that corners get caulk and tile faces get grout is one of those things that sounds arbitrary until you understand the physics. Tile faces are flat planes that do not move relative to each other. The grout between them only needs to fill the gap and resist water. Corners are where two planes meet at an angle, and the substrate behind both planes expands and contracts independently with humidity and temperature. The intersection of the two planes is where the movement concentrates, and rigid grout cannot absorb that movement without cracking. Flexible caulk absorbs the movement and stays bonded to both surfaces, which is why a properly caulked corner lasts for years while a grouted corner cracks within months.
The other reason corners get caulk is that corners are the highest stress area for water penetration. Water that gets behind grout at a corner can wick into the substrate through the crack and travel along the back of the tile. Caulk creates a continuous flexible seal that prevents the water penetration. This is why bathroom inspectors flag missing caulk at corners as a defect even when the rest of the grout looks fine.
The technique for caulking a shower corner is straightforward but worth getting right. Cut the caulk tube tip at a 45 degree angle with a small opening (about one eighth inch). Apply a steady bead along the corner in one continuous motion. Smooth the bead with a wet finger in a single pass. Pull the painter's tape off while the caulk is still wet. Let the caulk cure for 24 hours before using the shower. The total time is about 5 minutes per corner and the result is a watertight seal that will last for years.
What the Repair Looks Like After It Cures and the Six Month Check That Keeps It That Way
After the 72 hour cure time, the new grout will look slightly lighter than the old grout and slightly hazy on the tile face. The hazy film is grout residue and it comes off with a final wipe using a microfiber cloth and a small amount of grout haze remover (about $8 at any hardware store). After the final wipe, the grout matches the surrounding grout and the tile face is clean. The sealer goes on after the haze removal and after another 24 hours of drying time. The full repair timeline from start to using the shower again is about 5 days.
The six month check is what keeps the repair looking like new. Every six months, walk into the shower with a flashlight and inspect every joint for cracks, every corner for caulk separation, and every tile for loose or hollow sounding spots. Press a fingertip against any suspicious grout to check for soft spots. Run water along the joints to check for water absorption (the water should bead on the surface if the sealer is still working). The check takes about 10 minutes for a typical shower and it is what catches small problems before they become large problems. Most repairs I have done are still in good shape 2 to 4 years later, and the ones that failed are the ones where the renter skipped the six month check and missed a small crack that grew into a water damage problem.
What I Would Do Differently If I Was Starting This Repair Over Today
If I was doing a shower grout repair for the first time today, the three things I would do differently are these. First, I would buy an oscillating tool with a grout removal bit instead of a manual grout saw. The oscillating tool cuts the grout removal time from about 90 minutes per wall to about 15 minutes per wall, and the $30 to $50 cost pays for itself the first time you use it. Second, I would buy unsanded grout in a custom tinted color that matches my existing grout as closely as possible. The color matching is what makes the repair invisible, and premixed colored grout eliminates the guesswork of tinting powder yourself. Third, I would seal the new grout within 48 to 72 hours of application rather than waiting a full week. The sealer is what prevents the water absorption cycle that caused the original grout to crack, and the sooner you seal the sooner the repair is protected.
The one thing I would not do differently is the timing. The repair is a Saturday project that you start in the morning, let cure over the weekend, and seal the following Saturday before using the shower on Sunday. The timing gives the grout the full 48 to 72 hours to cure before sealing and the full 24 hours to dry after sealing before water exposure. Rushing the cure time is the most common cause of failed repairs, and the weekend timing is what prevents the rush.
The full SOP costs $70 to $115 in tools and materials for one shower wall and takes about three hours of active work plus five days of cure and seal time before the shower is back in service. Compared to a $250 to $600 professional regrout or a $1,200 to $4,000 full retile, the DIY repair is the right answer for most renter situations and most homeowner situations where the damage is contained to the grout and not the substrate. If the damage has spread to the substrate (visible swelling, hollow sounding tile, water on the floor below), the repair is larger than a renter or first time DIYer should attempt and a professional tile repair is the right call. The seven step SOP above is what works for the 80 percent of shower grout problems that are contained to the grout itself, and the four mistakes above are the ones to avoid if you want the repair to last the full lease or longer.


Discussion (0)
Sign in to join the discussion