

My friend Maya moved into a 2010 build apartment in Brooklyn last year and noticed a thin crack running through the shower corner grout within the first month. She figured it was cosmetic and put a towel over the area to stop thinking about it. Two weeks later the towel was damp after every shower, and a faint brown stain had appeared on the drywall of the adjacent bedroom wall. She texted me a photo and asked whether she needed to call a plumber or just live with it. The answer turned out to be neither, because cracked grout is not a plumbing problem and it is not a thing you live with. It is the early signal that water is getting behind the tile where it does not belong, and the fix depends on which of the six common causes is the actual culprit. I have repaired grout cracks in three of my own rentals and helped six friends with similar problems across five different apartments over the past six years, and the four fixes below are the ones that actually worked. Here is why shower grout cracks in the first place, the four fixes ranked by cost and skill, the four ways my friends made their repairs worse before they called me, the six step SOP I now use for a thirty minute small crack repair, and the renter rules that decide whether you should fix it yourself or hand it to the landlord.
The Six Reasons Shower Grout Cracks That Are Not Just Old Age
The first thing I learned from Maya's shower is that grout cracks are rarely about age. New showers crack. Old showers crack. The reason matters because the fix that works for one cause will fail for another. Here are the six causes I have seen in real apartments, ranked by how often they appear in renter situations.
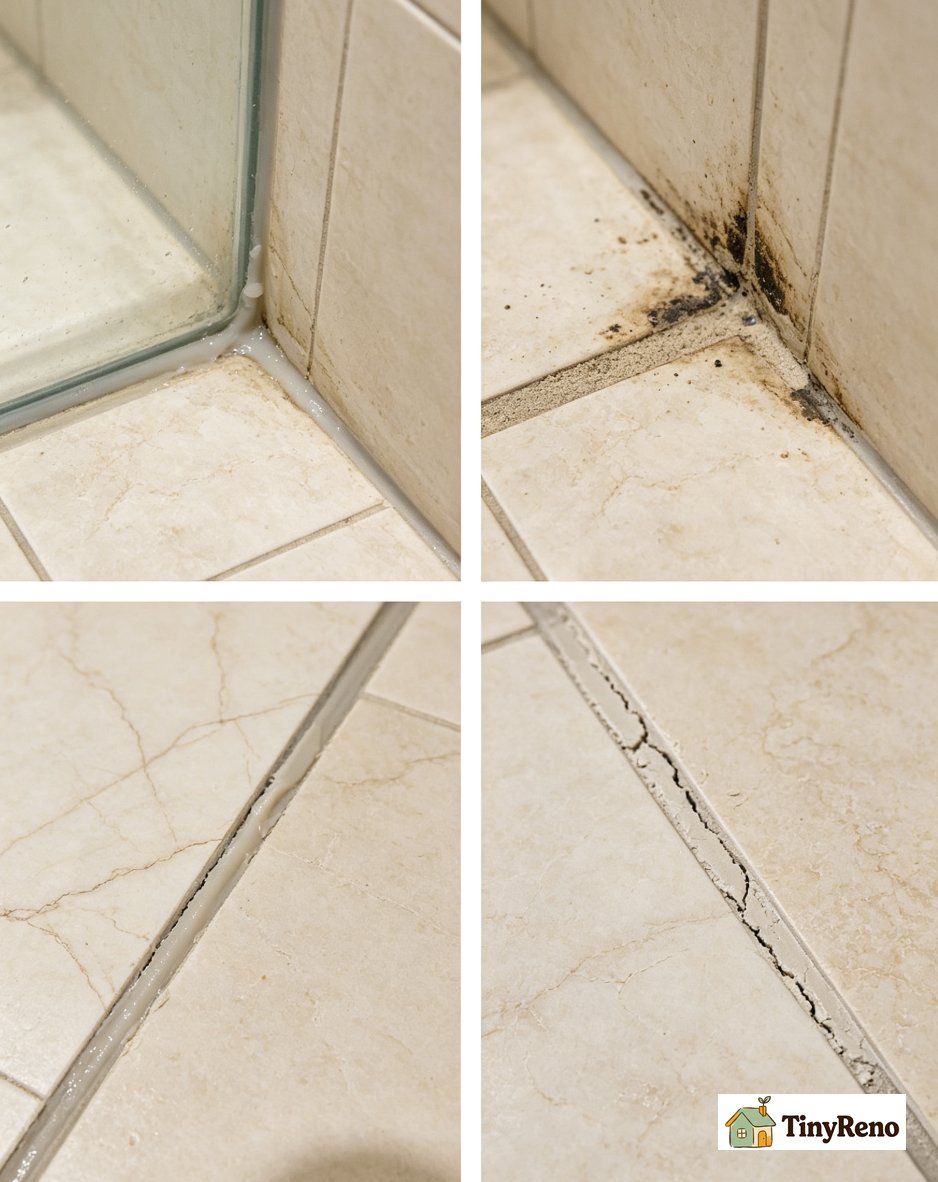
Cause one, the shower frame or substrate has shifted slightly. Wood stud walls expand and contract with humidity and seasonal temperature changes, and the small movements transfer through to the tile and grout. This is the most common cause in newer apartments (built within the last ten years) where the wood framing is still drying and settling. The crack typically appears as a single straight line running vertically along a corner or along a tile seam, and it reopens slightly every few months. The fix is flexible caulk in corners (not grout) and a flexible grout additive in the tile seams.
Cause two, the wrong grout type was used. Sanded grout is for grout lines wider than one eighth of an inch. Unsanded grout is for grout lines narrower than one eighth of an inch. If the installer used sanded grout in a narrow joint, the sand particles do not fit and the grout cracks as it cures. If the installer used unsanded grout in a wide joint, the grout shrinks and cracks as it dries. The fix is to remove the wrong grout and replace with the correct type for the joint width.
Cause three, the grout was never sealed. Unsealed grout absorbs water through its surface. The absorbed water expands the grout slightly when wet and contracts it when dry, and the cycle of expansion and contraction is what causes hairline cracks over time. The fix is to seal the grout with a penetrating grout sealer after the grout has fully cured (at least 28 days for new grout). This is the prevention step that most renters skip and that would prevent most of the cracks I have seen.
Cause four, the substrate behind the tile is failing. If the cement board or drywall behind the tile is swelling, rotting, or detaching, the grout will crack because the tile itself is moving. This is the most serious cause and the one that requires professional repair. The sign is grout cracks that grow quickly week to week, or grout that comes out in chunks when you press on it, or a hollow sound when you tap the tile. If you see any of these signs, stop and call your landlord or a tile professional.
Cause five, no waterproof membrane behind the tile. Older showers (pre-1990s in many markets) were installed without a waterproof membrane behind the cement board, which means any water that gets past the grout goes directly into the wall cavity. The grout cracks faster in these showers because the substrate behind the tile is constantly wet. The fix is a full shower renovation with a modern waterproof membrane, which is a landlord responsibility and a professional job.
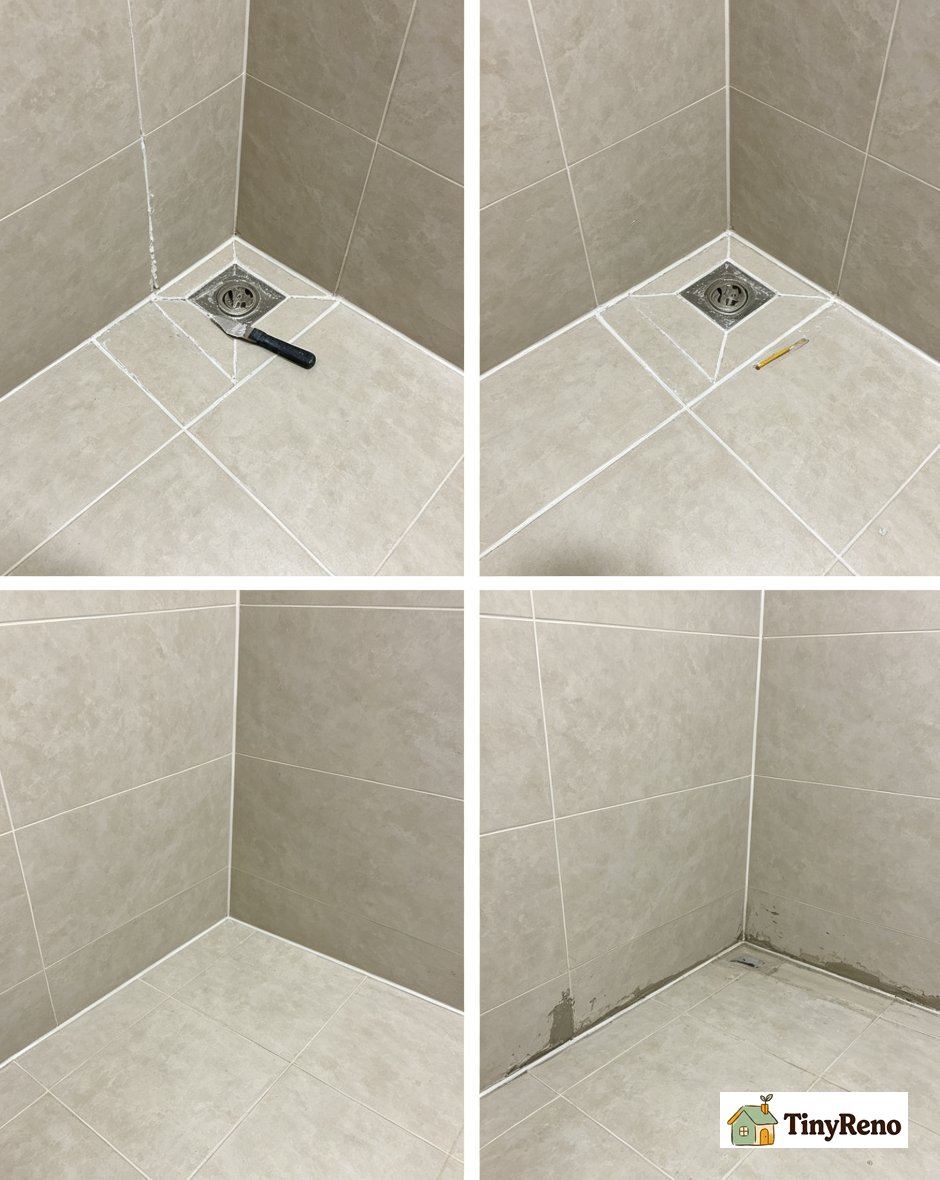
Cause six, grout was used where caulk should have been. The corners where two tile walls meet, and the joint where the tile wall meets the shower floor or tub, should be caulked, not grouted. Grout is rigid and cracks at the corners when the substrate moves even slightly. Caulk is flexible and absorbs the movement without cracking. If your shower has grout in the corners and the corners are cracked, the fix is to remove the grout and replace with mildew resistant silicone caulk.
The Four Grout Crack Fixes Ranked by Cost and Skill
Across the three rentals and six friends I have helped, the same four fixes come up again and again. Each one is the right answer for a different combination of cause, cost, and skill level. Here is the ranking I now use when someone texts me a photo of their shower.
Fix one, fifteen dollar caulk tube for corner cracks and small gaps. The right answer for any crack at a corner (wall to wall, wall to floor, wall to tub) and for any hairline crack under three inches long that is not getting worse. The job is to remove the old grout or caulk from the joint, clean the joint with mildew remover, let it dry, and apply a bead of mildew resistant silicone caulk (GE Supreme or DAP Kwik Seal Ultra). Total time is about thirty minutes per joint and the materials cost about $15 per tube. The crack will not come back as long as the substrate stays stable. This is the fix I have used most often.
Fix two, twenty five dollar grout saw and patch kit for small to medium cracks. The right answer for cracks in the field of the tile (not at the corners) that are between three inches and one foot long, where the surrounding grout is still in good condition. The job is to use a grout saw or rotary tool to remove the cracked grout to a depth of about one eighth of an inch, vacuum the dust, mix a small batch of matching grout, press it into the joint, smooth it with a damp sponge, and let it cure for 48 to 72 hours before sealing. Total time is about sixty minutes and the materials cost about $25 for a saw and a small grout packet.
Fix three, fifty dollar full regrout kit for a whole shower wall. The right answer when the grout is cracking across more than one third of the shower walls, or when multiple causes are contributing. The job is to remove all the grout from the affected walls using a grout saw or oscillating tool, vacuum the dust, mix a full batch of grout, apply it with a grout float, wipe with a damp sponge, and let it cure for 72 hours before sealing. Total time is about half a day for one wall and the materials cost about $50 for the saw, grout, and sealer. This is the fix I used in my first rental when I inherited a shower with cracking grout across two full walls.
Fix four, three hundred dollar plus professional repair for water damage behind the tile. The right answer when the grout cracks are growing week to week, when the tile sounds hollow when you tap it, when brown staining is appearing on the adjacent wall, or when water is leaking to the floor below. The job is to remove the tile in the affected area, replace the substrate, install a waterproof membrane, retile, regrout, and reseal. This is a landlord responsibility in a rental and a professional job in an owned home. Total cost is $300 to $1,200 depending on the size of the area and the type of tile.
The Four Ways My Friends Made Their Shower Grout Repairs Worse Before They Called Me
Across the six friends I have helped, four specific repair mistakes came up again and again. Each one is a thing you can avoid by knowing about it before you start, and each one is a thing I now warn people about when they text me a photo of their shower.
Mistake one, using regular silicone caulk in a shower corner. Regular silicone caulk will grow mildew within weeks in a shower environment because it is not formulated with a mildewcide. The caulk will look fine for the first month and then turn black or pink with mold, and the mold will stain the caulk permanently. The fix is to use a caulk labeled "kitchen and bath" or "mildew resistant" or "tub and tile," which has the mildewcide built in. GE Supreme, DAP Kwik Seal Ultra, and Loctite Polyseamseal are all mildew resistant and shower safe.
Mistake two, using sanded grout on polished marble or natural stone tile. Sanded grout contains fine sand particles that scratch the surface of polished marble, granite, and other natural stone tiles as you press the grout into the joint. The scratches are permanent and the tile has to be replaced or resurfaced. The fix is to use only unsanded grout on any tile with a polished surface, including marble, granite, polished porcelain, and most natural stone. The joint width should also be under one eighth of an inch, which is the range where unsanded grout is appropriate.
Mistake three, patching over cracked grout without removing the cracked material. If you apply new grout or caulk on top of cracked grout without removing the cracked material first, the new layer will crack along the same line within weeks because the substrate is still moving. The cracked grout or caulk has to come out completely before the new layer goes in. This is the most common mistake I see, and the one that wastes the most time because the repair has to be redone within a month.
Mistake four, sealing new grout before it has fully cured. New grout needs 48 to 72 hours to cure (some products need 28 days for full cure) before any sealer is applied. If you seal too early, the sealer traps moisture inside the grout and prevents it from curing properly. The result is soft, crumbly grout that cracks within months. The fix is to wait the full cure time on the product label, then seal in a thin even coat, and let the sealer dry for 24 hours before using the shower.
The Six Step Thirty Minute Shower Grout Crack Repair SOP
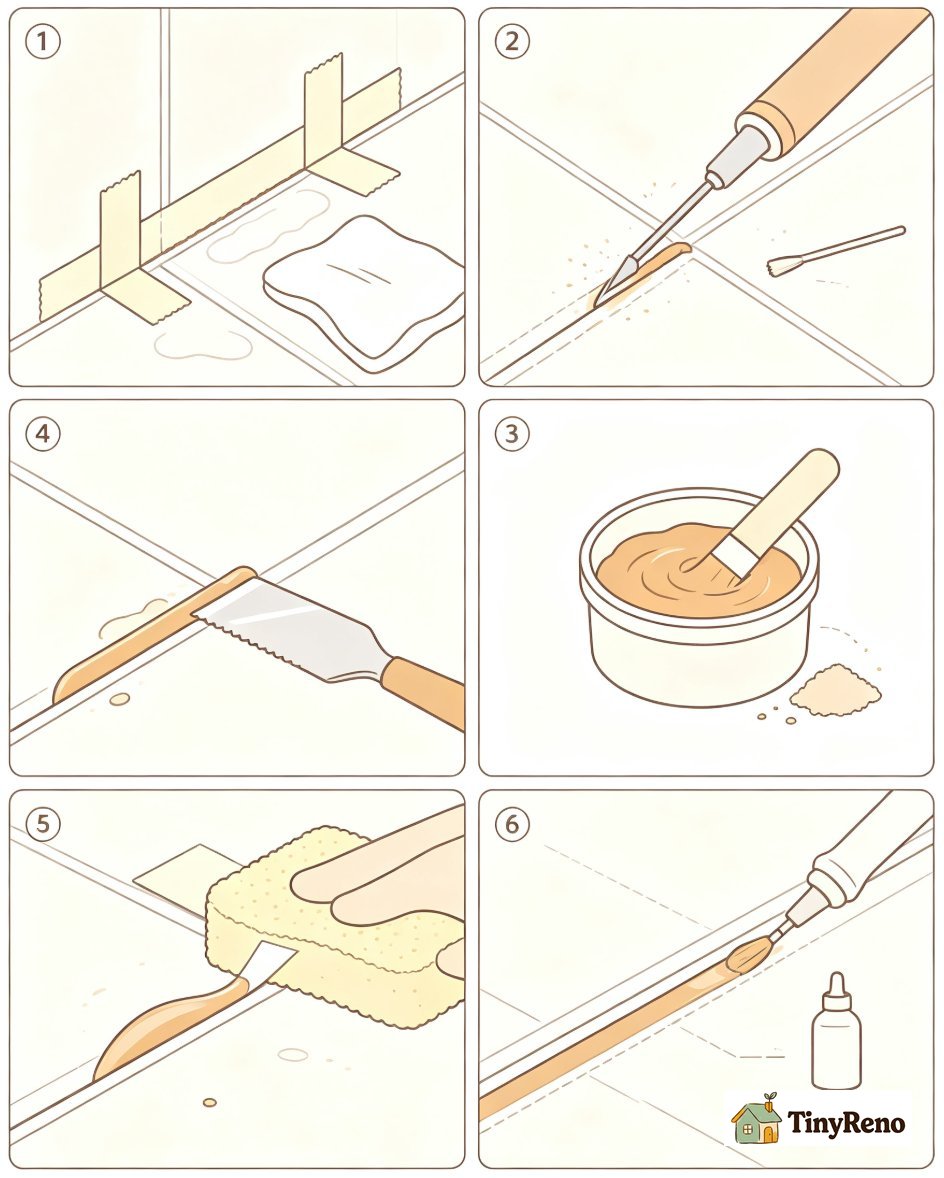
For any small crack in the field of the tile (not at corners) that is under six inches and not growing, this is the SOP I use. Total time for one crack is about thirty minutes of active work plus 48 to 72 hours of cure time before using the shower.
Step one, prep the area. Tape off the tile on both sides of the cracked grout with painter's tape. The tape is what gives you a clean grout line without smearing grout onto the tile face. Wipe the area with a damp cloth to remove any soap residue or mildew. Let it dry for ten minutes before moving to the next step.
Step two, remove the cracked grout. Use a grout saw or a rotary tool with a grout removal bit to cut out the cracked grout to a depth of about one eighth of an inch. Pull the loose grout out with a small pick or the tip of a flathead screwdriver. Vacuum the dust with a brush attachment. The deeper you remove the cracked grout, the better the new grout will bond.
Step three, mix the grout. Mix a small batch of pre mixed grout or mix your own from powder and water to a peanut butter consistency. Only mix what you can use in fifteen minutes because grout starts to set after that and becomes hard to work with. Match the color to your existing grout as closely as possible, or buy a small container of custom tinted grout if the existing color is unusual.
Step four, apply the grout. Press the grout into the joint with a grout float or the edge of a putty knife, working at a 45 degree angle to the joint to force the grout fully into the gap. Fill the joint slightly over full because the grout will recess as it cures. Remove excess grout from the tile face with the edge of the float before it sets.
Step five, smooth and clean. Wait ten minutes for the grout to firm up slightly. Wipe the tile face with a damp (not wet) sponge to remove the grout haze, rinsing the sponge frequently. Smooth the grout joint with the tip of a wet finger or a grout finishing tool to create a slightly concave surface. Pull the painter's tape off while the grout is still wet so it does not pull the new grout out of the joint.
Step six, cure and seal. Let the grout cure for 48 to 72 hours before using the shower (check the product label for the specific time). After cure, apply a penetrating grout sealer with a small applicator bottle or brush. Wipe excess sealer off the tile face within five minutes. Let the sealer dry for 24 hours before using the shower. Reseal the grout every one to two years as ongoing maintenance.
Renter Rules for Shower Grout Crack Repair Plus the Six Month Monitoring Routine
If you are renting, the rule is to email your landlord before any grout repair work, even a small one. Most landlords will approve a $15 caulk repair because it prevents the larger repair later, and the email protects your deposit if there is any dispute at move out. Here are the four scenarios and what to do for each.
Scenario one, a single small crack under six inches that is not getting worse. This is renter repairable with a $15 caulk tube or a $25 grout patch. Email your landlord with a photo and your plan, and most landlords will approve within 24 hours. Save the email and the receipt for the materials as proof of the repair at move out.
Scenario two, multiple cracks across more than one wall, or cracks that are growing week to week. This is a landlord repair. The substrate is failing and the fix is larger than a renter should attempt. Email your landlord with photos and a description of the growth pattern, and ask for a professional tile repair. Do not attempt to patch because the patch will fail and the landlord will charge for the failed patch at move out.
Scenario three, brown staining on the adjacent wall, water on the floor below, or hollow sounding tile. This is an emergency landlord repair. The water is getting past the tile into the wall cavity and possibly into the floor below your unit. Email and call your landlord the same day. If your landlord does not respond within 48 hours, document the damage with photos and timestamps and contact your local tenant rights organization.
Scenario four, the crack is at a corner and the grout keeps cracking every few months. This is the corner should be caulk not grout scenario. Email your landlord with a photo and explain that the corner needs to be caulked. Most landlords will approve this as part of normal maintenance. If your landlord does the repair, ask them to use mildew resistant silicone caulk, not grout.
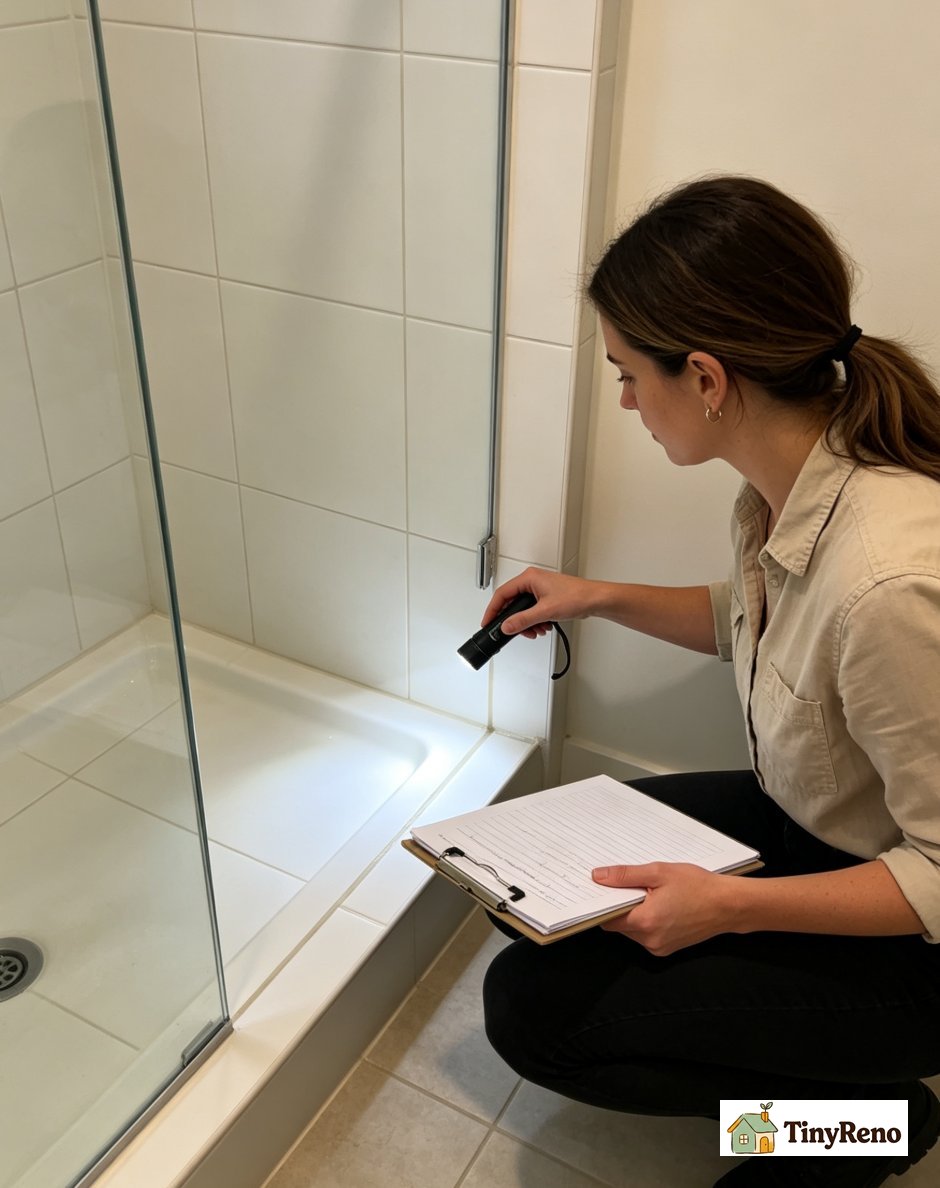
The six month monitoring routine is what I do in every rental to catch grout cracks before they become water damage. Every six months I run a flashlight along every grout line in the shower looking for new cracks, I press a fingertip against any suspicious grout to check for soft spots, and I check the corners for caulk separation. The check takes about ten minutes for a typical shower and it is what caught Maya's corner crack before the water damage spread to the drywall. The cost of the monitoring is zero. The cost of ignoring it is potentially thousands of dollars in water damage and the loss of your security deposit. Grout cracks are the canary in the coal mine of bathroom water management, and the six month check is what keeps the canary quiet.
What Maya's Shower Looks Like After the Repair and the One Thing I Would Do Differently
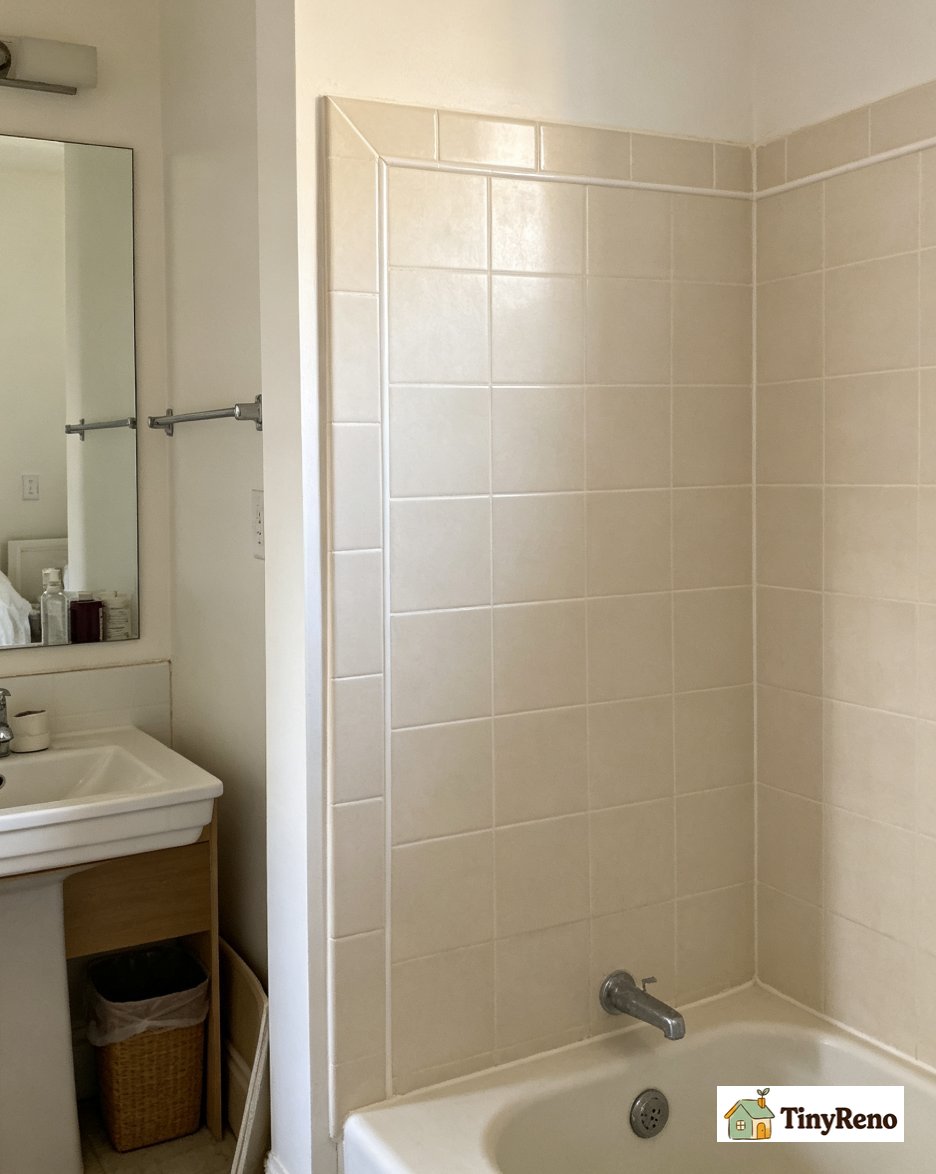
Maya did the repair herself in a Saturday afternoon. She removed the cracked grout with a $25 grout saw from the hardware store, applied mildew resistant caulk in the corner where the wall met the floor, and patched the two small field cracks with premixed grout from a $8 container. She cured the grout for 72 hours before using the shower, sealed everything with a $15 penetrating sealer, and sent her landlord a photo and an email documenting the repair. Six months later the cracks have not returned, the water staining on the bedroom wall has dried out, and her deposit is safe.
The one thing I would do differently is recommend that Maya check the grout in her entire shower, not just the visible crack. When she pulled out the cracked grout in the visible area, she found that the grout along the back wall was also beginning to separate from the tile. She did a quick repair pass along the whole back wall while she had the tools out, which is the kind of preventive repair that adds an hour but saves a future repair. The lesson from Maya's shower and from every shower I have repaired since is that grout cracks rarely happen in isolation. If you see one crack, check the whole shower. The repair that catches the cracks early is the one that saves the deposit, and the six month monitoring routine is what catches them early enough to matter.


Discussion (0)
Sign in to join the discussion