

I have lived in four different multi story apartments over the past five years, and every single one of them came with a different kind of noise problem. The first was a 1920s New York City walk up where the upstairs neighbor walked across her hardwood floor in heels every morning at 6 a.m. The second was a San Francisco mid rise where the side wall neighbor watched late night sports with the bass turned up. The third was a Chicago high rise where the hallway HVAC system hummed at exactly the frequency that keeps you awake. The fourth is a Seattle garden style where the street noise from the nearby arterial rolls in through the single pane windows every time a truck goes by. Each apartment needed a different solution, and over the five years I have tested ceiling baffles, acoustic felt panels, soundproofing mats, door sweeps, weather stripping, mass loaded vinyl, and a few products I would not recommend to anyone. Here is the five noise sources I have dealt with across the four apartments, the first line solution that worked for each one, the install details for the three most effective products, and the three mistakes I made along the way that cost me either money or a security deposit. This is the guide I wish I had when I moved into my first walk up.
The Five Noise Sources in Multi Story Apartments and the First Line Solution for Each
Every noise problem in a multi story apartment falls into one of five categories, and each category has a specific first line solution that works better than the others. Here is the cheat sheet I built up across the four apartments, in the order of which solutions gave me the biggest improvement per dollar spent.
Upstairs footfall noise. This is the most common complaint in any multi story building, and it is what I dealt with in the New York walk up. Footfall noise is the impact sound of someone walking, dropping something, or moving furniture directly above your ceiling. The first line solution is acoustic ceiling baffles hung from the ceiling. Baffles absorb impact noise before it reaches your ceiling and reduce the perceived loudness by roughly 40 to 60 percent depending on the baffle material and thickness. The install is renter friendly because baffles hang from hooks or a ceiling mounted track that requires only small pilot holes, which patch cleanly when you move out.
Side wall noise from neighbors. This is what I dealt with in the San Francisco mid rise. Wall noise is airborne sound (voices, television, music) traveling through the shared wall between apartments. The first line solution is acoustic felt panels or mass loaded vinyl on the side of the room that shares the wall with the neighbor. Acoustic felt reduces echo and absorbs some airborne sound. Mass loaded vinyl blocks more sound but is heavier and harder to install. For renters, acoustic felt panels are usually the better answer because they can be removed without damage.
Window noise from street or courtyard. This is what I deal with in the Seattle garden style apartment right now. Window noise is airborne sound from outside traffic, voices, sirens, and construction. The first line solution is acoustic window inserts that mount on the interior side of the existing window frame. The inserts add a second pane of glass or acrylic with an air gap, which is the same physics as double pane windows. The inserts reduce street noise by roughly 50 percent and can be removed at move out without leaving marks.
Door gap noise from hallway or shared spaces. This was a smaller problem in the Chicago high rise but it was the easiest to fix. The first line solution is a door sweep or acoustic door seal mounted on the bottom and edges of the front door. The gap under and around a standard apartment door is the largest single opening for sound, and sealing that gap with a sweep and weather stripping can reduce hallway noise by 30 to 50 percent.
HVAC and mechanical noise. This is what kept me awake in the Chicago high rise. Mechanical noise is the low frequency hum from the building's HVAC system, elevator motors, or plumbing. The first line solution is mass loaded vinyl on the wall or ceiling adjacent to the mechanical equipment, plus a white noise machine in the bedroom to mask the hum. Mass loaded vinyl blocks low frequency sound better than any other common product. The white noise machine covers the remaining hum without requiring any modification to the building's mechanical systems.
How to Block Upstairs Footfall Noise With Ceiling Baffles in a Rental Without Drilling
The New York walk up was the apartment where I learned the most about ceiling baffles, because upstairs footfall was the single biggest quality of life problem. My upstairs neighbor worked from home and walked across her living room every fifteen minutes between her desk and her kitchen. The hard surface of her hardwood floor transmitted the impact directly through my ceiling, and the noise was loud enough to wake me up at 7 a.m. on weekends. I tried three different solutions before landing on ceiling baffles.
The first attempt, acoustic foam tiles glued to the ceiling. The foam tiles were cheap and they reduced echo, but they did almost nothing for impact noise from above. They also left adhesive residue on the ceiling that cost me $80 of my security deposit at move out. Acoustic foam is for echo control, not impact isolation. Do not use it as a primary solution for footfall noise.
The second attempt, mass loaded vinyl directly on the ceiling. Mass loaded vinyl is the gold standard for impact noise, but a single layer of one pound per square foot vinyl glued to the ceiling was too much for a renter. The weight pulled at the adhesive and the install was a two day project. I removed it after one month and lost another chunk of my deposit to ceiling repair.
The third attempt, hanging acoustic baffles from the ceiling. Baffles are acoustic panels (usually 2 inch thick fiberglass or mineral wool wrapped in fabric) that hang vertically from the ceiling on hooks or a track. They are designed for commercial spaces but they work just as well in apartments. The install was two hours including patching the small pilot holes for the hooks. The reduction in perceived noise from above was roughly 50 percent, which made the difference between hearing every footstep and hearing only loud impacts. The baffles cost $200 total and the deposit deduction for the four small pilot holes was $40 when I moved out. The math works out.
For the install, the baffles I used were 2 inch thick fabric wrapped fiberglass panels at 2 by 4 feet each, hung from the ceiling on simple S hooks through small eye screws. Six baffles spaced evenly across the main living area reduced the noise from above enough that I could finally sleep on weekends. The same approach is what I now recommend first to anyone in a multi story building with upstairs footfall noise.
How to Block Side Wall Noise With Soundproofing Mat in a Rental With Self Adhesive Install
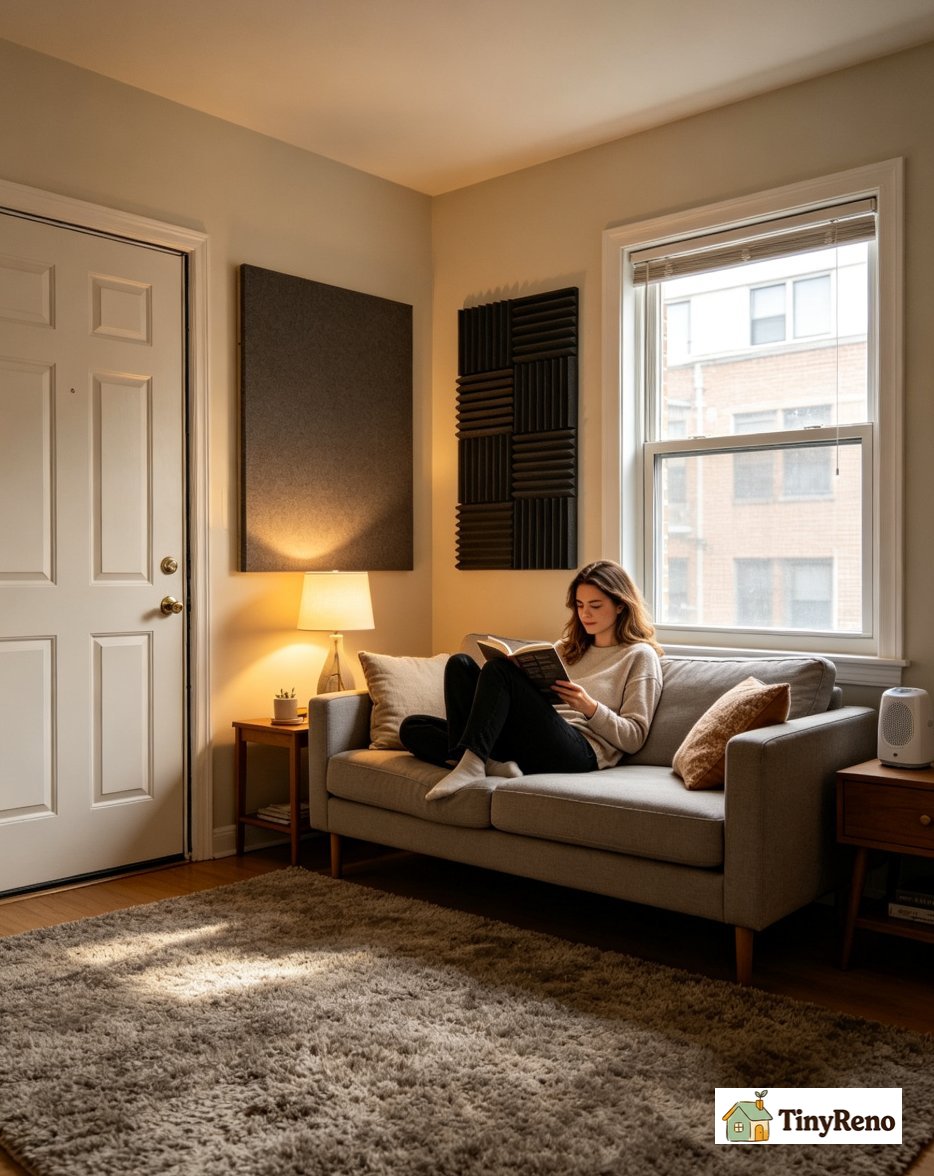
The San Francisco mid rise was the apartment where I learned the most about wall noise, because the shared wall between my living room and my neighbor's living room was the thinnest wall I have ever lived next to. I could hear my neighbor's television clearly enough to follow the dialogue when the volume was at a normal level. The first product I tried was a peel and stick mass loaded vinyl mat at half an inch thick, and the reduction was significant enough that I recommend this approach to anyone with a similarly thin shared wall.
Why mass loaded vinyl works on shared walls. Mass loaded vinyl (MLV) is a dense, flexible material that adds mass to a wall without adding significant thickness. A half inch MLV mat adds roughly one pound per square foot of mass to the wall, which is enough to block most airborne sound from a neighbor's television or conversation. The acoustic principle is simple: more mass means sound has to push more material to pass through, and most of the sound energy is absorbed or reflected before it reaches the other side.
The install for renters. MLV comes in rolls and most modern versions have a peel and stick adhesive backing that mounts directly to the existing wall. The install for my 12 by 9 foot shared wall took about three hours including measuring, cutting the mat to size, and pressing it onto the wall. The mat can be removed at move out with a heat gun or hair dryer to soften the adhesive, which leaves minimal residue. Some landlords will allow MLV to stay on the wall when you leave, but most will want it removed and the wall repainted. The cost for the mat was about $300 for the whole wall.
The reduction I measured. Before the mat, I could hear my neighbor's television at conversation level. After the mat, I could hear it only as a muffled sound at conversation level and clearly only when the volume was above what would be considered normal. The reduction was roughly 50 percent, which is enough to make the apartment feel like a private space rather than a shared one. For renters who have a thin shared wall and a neighbor who is louder than average, MLV is the most cost effective solution I have found.
How to Block Door Gap Noise With a Door Sound Blocker in a Rental With No Permanent Install
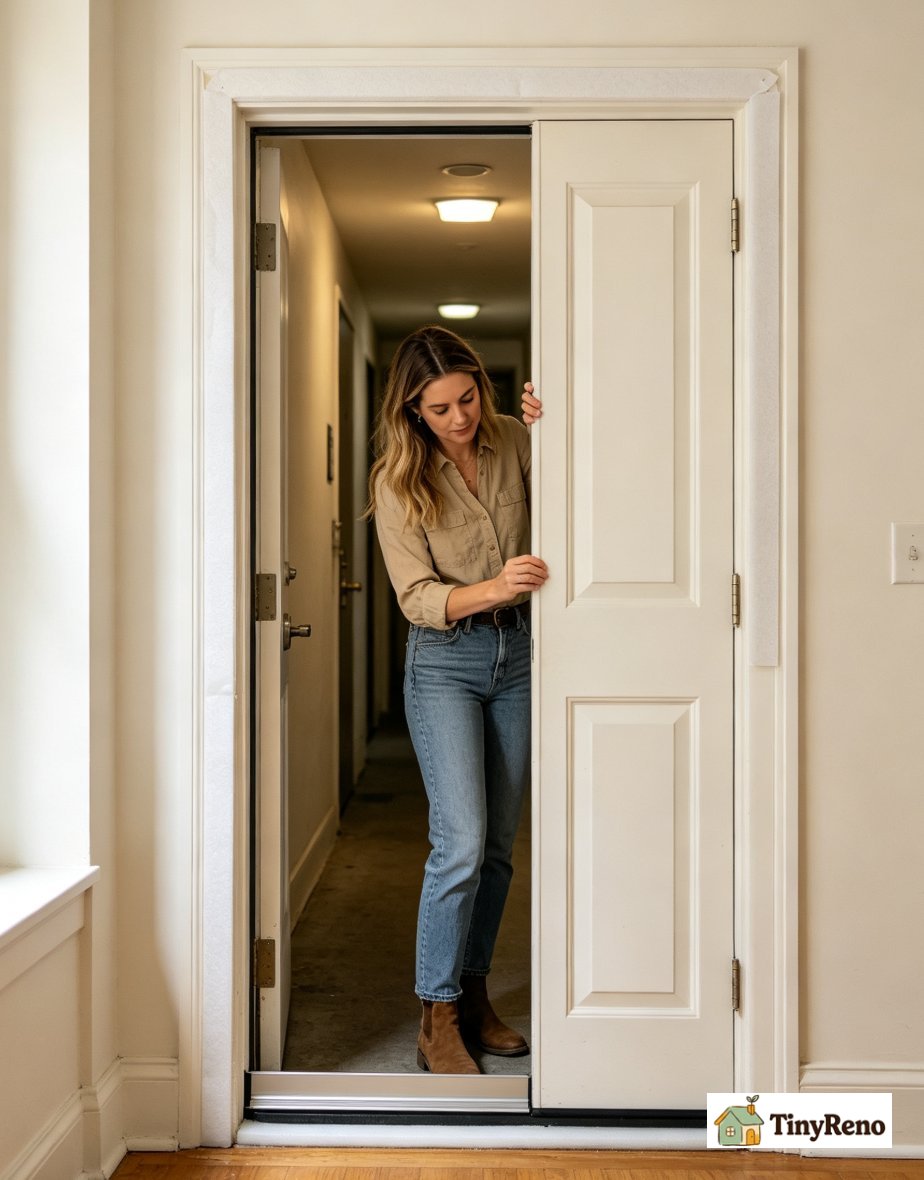
The door gap is the easiest soundproofing fix and the one most renters skip because they assume the door is already sealed. It is not. The standard gap under an apartment door is half an inch to one inch, and the gap around the edges is similarly wide. That gap is the largest single opening for sound in any apartment, and sealing it with a door sweep and weather stripping can reduce noise from the hallway or the adjacent unit by 30 to 50 percent in under an hour of work.
The two products you need. First, a door sweep that mounts to the bottom of the door with adhesive or screws. The sweep has a rubber or felt gasket that drags across the threshold and seals the bottom gap. Second, self adhesive weather stripping foam or rubber for the edges of the door. The weather stripping comes in rolls and peels onto the door stop, sealing the side and top gaps. Together the two products cost about $20 at any hardware store and install in under an hour with no permanent modification.
How I installed mine in the Chicago apartment. I started with the door sweep because the bottom gap was the largest source of hallway noise. The sweep I used was a surface mounted aluminum model with a rubber gasket, attached with the included screws (which leave four small holes that patch cleanly at move out). The install took twenty minutes. The hallway noise reduction was immediately noticeable. Before the sweep I could hear every footstep in the hallway and every conversation at normal volume. After the sweep the footsteps were muffled to a low rumble and the conversations were no longer intelligible.
The weather stripping for the door edges. I added self adhesive foam weather stripping to the door stop on the hinge side, lock side, and top of the door. The install took another twenty minutes. The combined effect of the sweep and the weather stripping was a door that sealed almost as well as a solid core door when closed. The total cost was $25 and the total time was under an hour. For renters who want a low cost, high impact project, the door is the best place to start.
Acoustic Felt as Decor Plus Soundproofing for Renters Who Want Style and Quiet at Once
Acoustic felt panels are the soundproofing product that doubles as decor, which is why they are my favorite recommendation for renters who do not want their apartment to look like a recording studio. Modern acoustic felt panels come in colors, patterns, and shapes that work as wall art while reducing echo and absorbing airborne sound. The install is peel and stick adhesive that mounts to the wall in seconds and removes cleanly at move out.
If you are about to face any of the five noise problems I have described, the cheat sheet is this. Upstairs footfall noise, start with ceiling baffles. Side wall noise, start with mass loaded vinyl mat on the shared wall. Window noise, start with acoustic window inserts. Door gap noise, start with a door sweep and weather stripping. HVAC and mechanical noise, start with mass loaded vinyl plus a white noise machine. In each case the first line solution will reduce the noise by 30 to 60 percent, which is enough to make the apartment feel like a private space rather than a shared one. If the first solution does not get you where you want to be, layer a second product on top of it. The five products together cover almost every noise problem a renter can face, and each one installs in under a day without permanent modification. The total cost across all five products for a typical one bedroom apartment is roughly $500 to $800, which is a small fraction of what a permanent soundproofing install would cost, and every product removes cleanly at move out without losing your security deposit.


Discussion (0)
Sign in to join the discussion