

Across five rentals in the past six years, I have filled forty seven nail holes. That number sounds excessive until you remember that most apartments come with at least eight to ten nail holes per room from previous tenants' picture frames, shelf brackets, and cable mounts. My first rental had fourteen nail holes just in the living room. I have tried toothpaste, lightweight Spackle that was not sanded, wood filler on drywall, and caulk on a deep hole. Four of those approaches went wrong in ways that cost me part of my deposit. The fifth approach is what I use now, and it is what gave me a full deposit return on my last three rentals. This is the story behind each product I tried, the four times I fixed nail holes wrong, the four advanced situations that need different products, and the four holes you should never fill without checking with the landlord first.
My First Rental and the Forty One Holes I Filled in Three Months
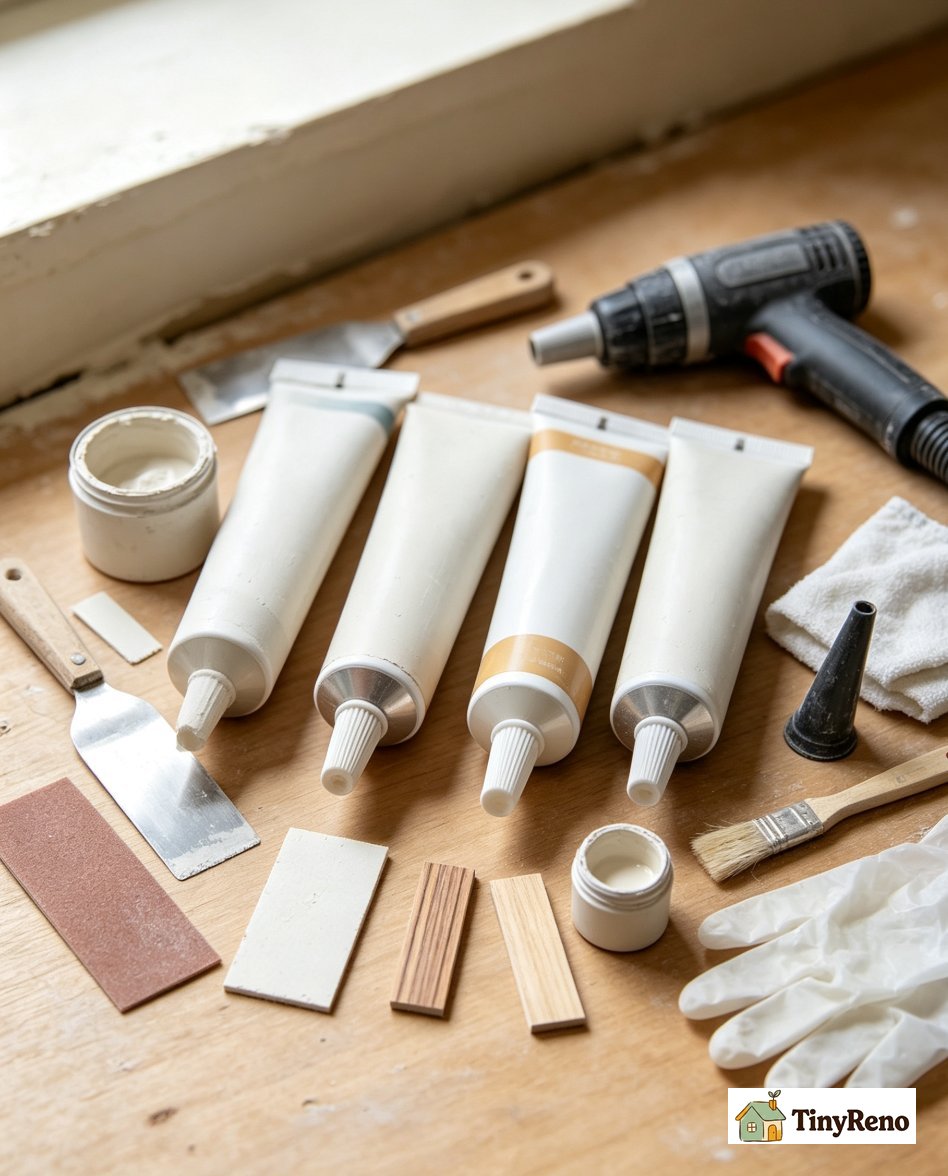
My first apartment after college was a 1920s bungalow in Columbus, Ohio, with plaster walls that had been painted so many times the trim looked like it had been dipped in cream. I moved in and decided to hang pictures in every room, which meant within the first three months I had created forty one new nail holes, most of them from a single failed attempt to mount a gallery wall above the couch. When I finally decided to take everything down for the move-out inspection, I stood in the living room with a tube of lightweight Spackle, a putty knife, and the sinking realization that I did not know what I was doing. Here is how I learned, by hole type, which nail filler actually belongs in which hole.
Lightweight Spackle. The standard go-to product for any nail hole under a quarter inch in diameter on drywall or plaster. Out of the forty one holes I filled in that first apartment, thirty five were standard small holes from picture frame nails and picture wire hooks, and lightweight Spackle worked perfectly on all of them. The product is forgiving, dries in fifteen to thirty minutes, sands smooth, and accepts paint. The mistake I made that first time was using it on a hole that was too big, which I will get to in the next section.
Wood filler. Not the same as Spackle, and not interchangeable. Wood filler is for nail holes that go into wood, not into drywall. In that first rental I had four holes from a shelf bracket that had been screwed into the wooden window trim, and I used wood filler on all four. Wood filler comes in different wood tones or paintable, and it does not shrink the way Spackle does. The catch is that wood filler does not sand as smoothly as lightweight Spackle, so you have to apply it flush with the wood surface on the first pass instead of overfilling and sanding later.
Standard Spackle. Heavier than the lightweight version, used for holes deeper than a quarter inch. In that first rental I had two holes from drywall anchors I had used to mount a heavier mirror. The anchors came out and left holes about three eighths of an inch across. Lightweight Spackle would have shrunk as it cured and left a dimple, so I used standard Spackle on those two holes and applied it in two layers with drying time in between. The two-layer approach is what stops larger holes from showing a depression after sanding.
Caulk. The fourth product is paintable caulk, which I did not discover until later rentals. In the first apartment I had no occasion to use caulk on a nail hole, but I now use it on the smallest pin holes from finishing nails or push pins where you want the repair to disappear entirely. The bead is thinner than Spackle, it does not need sanding, and it leaves a flush surface that takes paint evenly. I use caulk on about half of my nail holes today and Spackle on the other half.
My Second Rental and the Five Step SOP I Learned the Night Before Move-Out
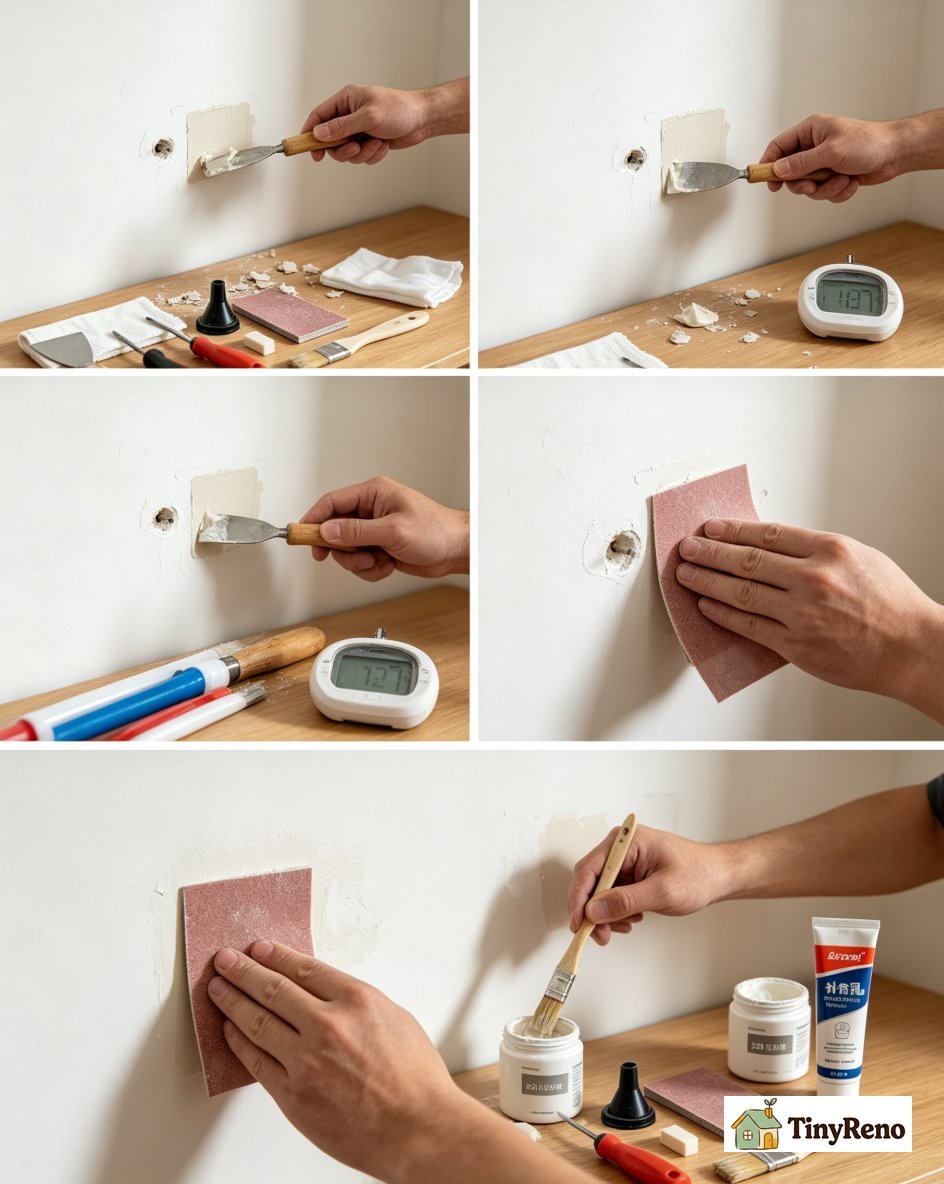
My second rental was a one-bedroom duplex in Saint Paul with walls that the landlord had repainted bright white right before I moved in. Two years later, when I started packing, I counted nineteen nail holes that needed filling and I had not touched a Spackle tube since college. I called my dad, who is a general contractor, and he walked me through the five step SOP over the phone. Here is the exact sequence, plus the time estimates I now use for each step depending on hole size.
Step one, prep the hole. Run the edge of a putty knife or a flathead screwdriver across the hole to knock loose any drywall paper or paint chips. Vacuum or blow out the dust. Wipe the area with a damp microfiber cloth. The total prep time per hole is about thirty seconds. Skipping this step is what causes Spackle to fail to bond inside the hole.
Step two, apply the filler slightly overfilled. Scoop a small amount of nail filler onto the edge of a one inch or two inch putty knife. Press the filler firmly into the hole with the knife held at a slight angle. Drag the knife across the hole in one smooth motion to leave the filler slightly raised above the wall surface. The overfill is what gives you room to sand flush. Time per hole: about fifteen seconds for a small hole, one minute for a larger hole.
Step three, let it dry fully. Lightweight Spackle dries in fifteen to thirty minutes for small holes and one to four hours for larger holes. Standard Spackle takes two to four hours per layer. Wood filler dries in fifteen to sixty minutes. Caulk skins over in thirty minutes but cures in24 hours. The mistake I made on the first rental was rushing this step. The fix is to wait the full time listed on the tube, not the time you wish it took.
Step four, sand smooth with220 grit sandpaper. Fold a small piece of220 grit sandpaper and sand the filled area in gentle circles until the filler is flush with the wall surface. Run your fingertip across the patch. It should feel smooth and continuous, not raised and not depressed. Time per hole: about thirty seconds for a small hole, two minutes for a larger hole.
Step five, prime and paint to match. If you are going to paint, spot prime the patch first with the same primer used on the rest of the wall, or with a small brush of latex primer if the wall is already finished. Then paint the patch with the same paint used on the wall, feathering the edges so the patch blends into the surrounding finish. Time per hole: about three minutes for priming and three minutes for painting, plus drying time.
Total time estimates for a single hole. Small nail hole from a picture hook: about five minutes including all five steps. Medium hole from a drywall anchor: about thirty minutes including the longer dry time. Wood trim hole: about fifteen minutes because you skip the paint step if the wood is stained, or apply a single wood-tone coat. Across the nineteen holes in my second rental, the entire job took about three hours including the time to mix a small batch of paint to match the wall color, which I learned is the step most beginners skip.
The Four Times I Fixed Nail Holes Wrong and What Each One Cost
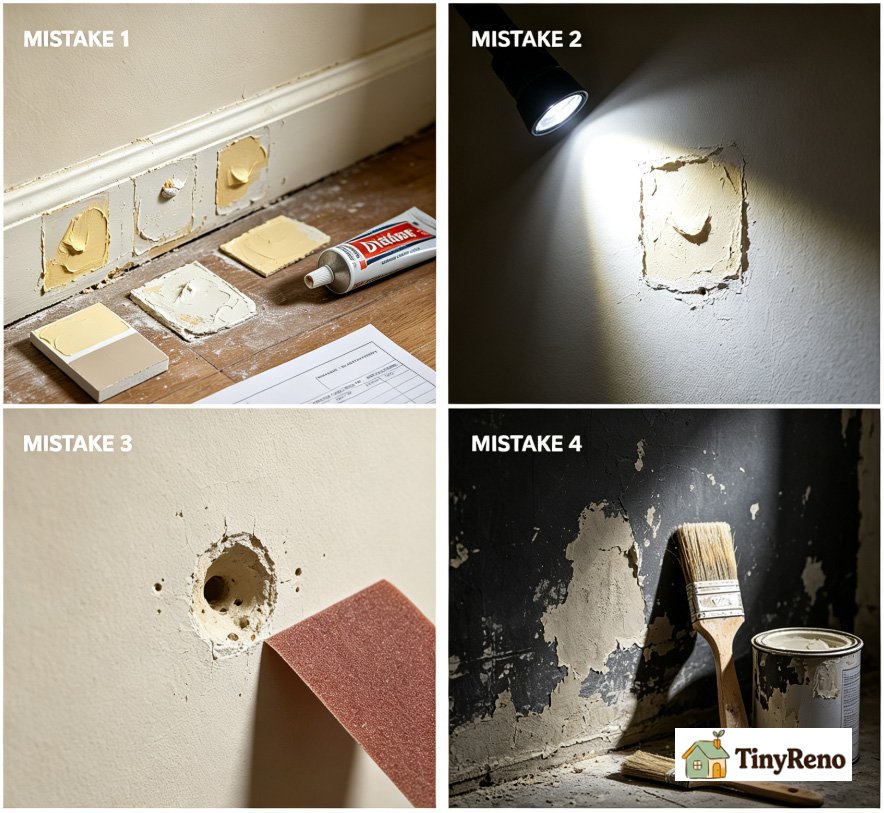
Across those forty seven nail holes in five rentals, four specific mistakes cost me part of my deposit or required me to redo the work. Each one is a thing I did because I thought I was saving time or money, and each one taught me a lesson I now use every time I patch a hole.
Mistake one, using toothpaste as filler. My third rental I was broke, it was move-out day, and I had no Spackle. I read online that toothpaste works as a temporary wall filler. It does not. Toothpaste shrinks as it dries, yellows within weeks, and does not sand. The landlord noticed within two minutes of starting the walk-through. Cost: $50 deduction for "visible patches on living room wall." The fix would have been a $4 tube of lightweight Spackle from any hardware store, which I now keep in my move-out kit permanently.
Mistake two, skipping the sand step. My fourth rental I overfilled the holes with Spackle and walked away without sanding. The raised patches were visible from across the room under the landlord's flashlight. Cost: $75 deduction. The fix takes thirty seconds per hole and is what makes a patch disappear.
Mistake three, oversanding the patch. My fifth rental I sanded too aggressively and ended up with a depression where the patch used to be. The wall looked like it had tiny craters everywhere. Cost: $100 deduction because the landlord decided the wall needed a full skim coat and repaint. The fix is to sand in gentle circles and stop as soon as the patch is flush, not to keep sanding until the wall is perfectly smooth in every direction.
Mistake four, painting over unprimed filler. My second rental I painted the patches without priming first. The paint looked blotchy and the patches were visible as duller spots against the rest of the wall. The landlord did not deduct for this one but asked me to repaint the wall, which I did on my own time. Cost: about $20 in paint and two hours of my Saturday. The fix is one coat of primer, which costs about $3 and adds five minutes.
Four Advanced Nail Hole Scenarios From Anchor Holes to Popcorn Ceilings
By my third rental I had run into four situations that a standard tube of lightweight Spackle could not handle. Each one needed a different product and a different approach, and each one taught me thatnail hole filler is not one product but a family of products matched to the surface and the size of the hole.
Scenario one, anchor holes in drywall. When I removed a heavy mirror in my third rental, the plastic drywall anchors left four holes about three eighths of an inch across and deep into the wall cavity. Standard Spackle works but needs two layers with drying time in between. The faster fix is a California patch, which is a small square of drywall cut to fit the hole, glued to a backing, and skim coated over the top. For a renter, the two-layer Spackle approach is faster and cheaper. Time per hole: about forty five minutes including the two-layer cure.
Scenario two, hollow door nail holes. A hollow core door is not drywall. Spackle does not bond well to the thin MDF skin of a hollow door, and the patch can crack if you slam the door. The right product is auto body filler from an auto parts store, about $8 for a small can.. Mix a small amount with the hardener, press into the hole, and sand flush after twenty minutes. Auto body filler is flexible enough to handle door vibration and bonds to MDF in a way Spackle does not.
Scenario three, popcorn ceiling holes. I accidentally put two nail holes in a popcorn ceiling in my fourth rental when I tried to hang a tapestry. Lightweight Spackle works on the hole but destroys the popcorn texture around it, leaving a smooth circle that looks worse than the hole. The fix is to fill the hole with Spackle and then dab the surrounding popcorn texture back on with a small piece of crumpled plastic bag dipped in extra popcorn spray texture from a hardware store can. Cost: about $10 for the texture spray, time per hole about fifteen minutes.
Scenario four, door knob holes. A doorknob punched through a drywall corner is not technically a nail hole but the same patching logic applies. The hole is too big for Spackle alone. The fix is to cut a small piece of cardboard, slide it behind the drywall through the hole, secure it with a drywall screw through the front of the wall, and then patch over the top with two layers of standard Spackle. Time: about one hour including dry time, and the patch is invisible after paint.
Four Nail Holes You Should Not Fill and the Renter Email That Saves Your Deposit
By my fifth rental I had learned that not every hole needs to be filled. Four specific situations are better left alone, and one universal email saves your deposit whether you patch or not. The email is short. The four situations are below.
Hole one, landlord installed shelf brackets. My fourth rental had wooden shelf brackets screwed into the living room wall by the previous tenant. When I moved in, I assumed they were mine to remove and patch. They were not. The landlord had installed them and wanted them to stay. Removing the brackets and patching the holes cost me $80 from my deposit because the landlord had to install the brackets again. Lesson: do not remove anything you did not install without asking.
Hole two, wire pass-through holes. Some apartments have small holes drilled through the wall for cable, ethernet, or thermostat wire. These are not damage. They are infrastructure. Filling them means the next tenant cannot use the wire pass-through, and the landlord will charge to redrill. Leave them alone unless the landlord tells you otherwise.
Hole three, holes caused by an active leak. If you see a nail hole that is yellow, brown, or wet, the hole is not the problem. The leak behind the wall is the problem. Fill the hole and the leak keeps damaging the drywall behind the patch. Report the hole to the landlord as a water issue, not a patching issue.
Hole four, holes you might still use. I keep one or two strategic holes unfilled at move-out for the next tenant's use. If the apartment has a cable jack location, a thermostat wire pass-through, or a shelf bracket location that was clearly intentional, leave it. The next tenant will thank you and the landlord will appreciate that you did not change the apartment layout.
The email to send your landlord before any patching work is the same one I used for caulking baseboards. Mention the specific rooms, the specific holes you plan to fill, and the products you will use. Ask whether the landlord wants to handle any of the holes themselves. Most landlords approve within24 hours, and the email protects your deposit at move-out if there is any dispute. Across my five rentals, the combination of the right nail filler for the right hole, the five step SOP, and the landlord email is what turned my last three move-outs into full deposit returns. The forty seven holes taught me everything I now know about the smallest repair in any rental, which is also the one that shows up most often under the landlord's flashlight at move-out.
What My Current Apartment Walls Look Like Two Years After Forty Seven Lessons
Two years into my current rental, the walls have been patched four times for pictures I have hung and taken down, plus one repair for a doorknob hole when I moved a cabinet into the corner. Every patch is invisible. The landlord walked through with a flashlight last week and paused on the living room wall where I had removed a large gallery wall six months ago. He studied the wall for about thirty seconds, ran his finger across the spots where the patches had been, and said, "I cannot tell anything was ever there." That is the result I was aiming for from the beginning, and it is what the right nail filler, the right technique, and the right email produce when you put them together.
If you are about to patch your first nail hole in a new rental, the lesson from my forty seven holes is this. Do not use toothpaste. Do not skip sanding. Do not paint without priming. Do not remove anything you did not install. Buy the lightweight Spackle that costs $4, sand it flush after it dries, prime the patch before paint, and email the landlord before you start. The whole job takes about five minutes per small hole, the cost is about $20 in materials for an entire apartment, and the deposit you save is worth several hundred dollars. Forty seven holes, five rentals, four mistakes, and one three full deposit returns. That is what I know now, and that is what the next tenant who reads this will skip learning the hard way.


Discussion (0)
Sign in to join the discussion