

A drywall gap between wall and ceiling showed up in my neighbor's bedroom last spring — about a foot wide where the wall meets the ceiling, thin enough to let daylight peek through from the apartment above. She knocked on my door holding a ladder. "This looks terrible," she said. "And expensive." I climbed up and looked. The drywall had actually pulled away from the ceiling joist, leaving a dark line that made the corner look unfinished.
It turned out to be neither. Her building was 12 years old, the truss framing had shifted slightly with seasonal humidity, and the original drywall contractor hadn't taped the top corner properly. A $9 tube of paintable caulk and a Sunday afternoon made it disappear. She's lived there two more years without seeing it again. That's the good news about a drywall gap between wall and ceiling: most of the time, the cause is harmless and the repair is renter-friendly. You just need to figure out which one you have.
This guide covers the five things that actually cause that gap, how to tell which one you're dealing with in under two minutes, and the one fix a renter can safely do without touching the lease. If your gap came with cracks spreading down the wall, check the cracks-when-to-worry guide first — that's a different problem with a different fix.
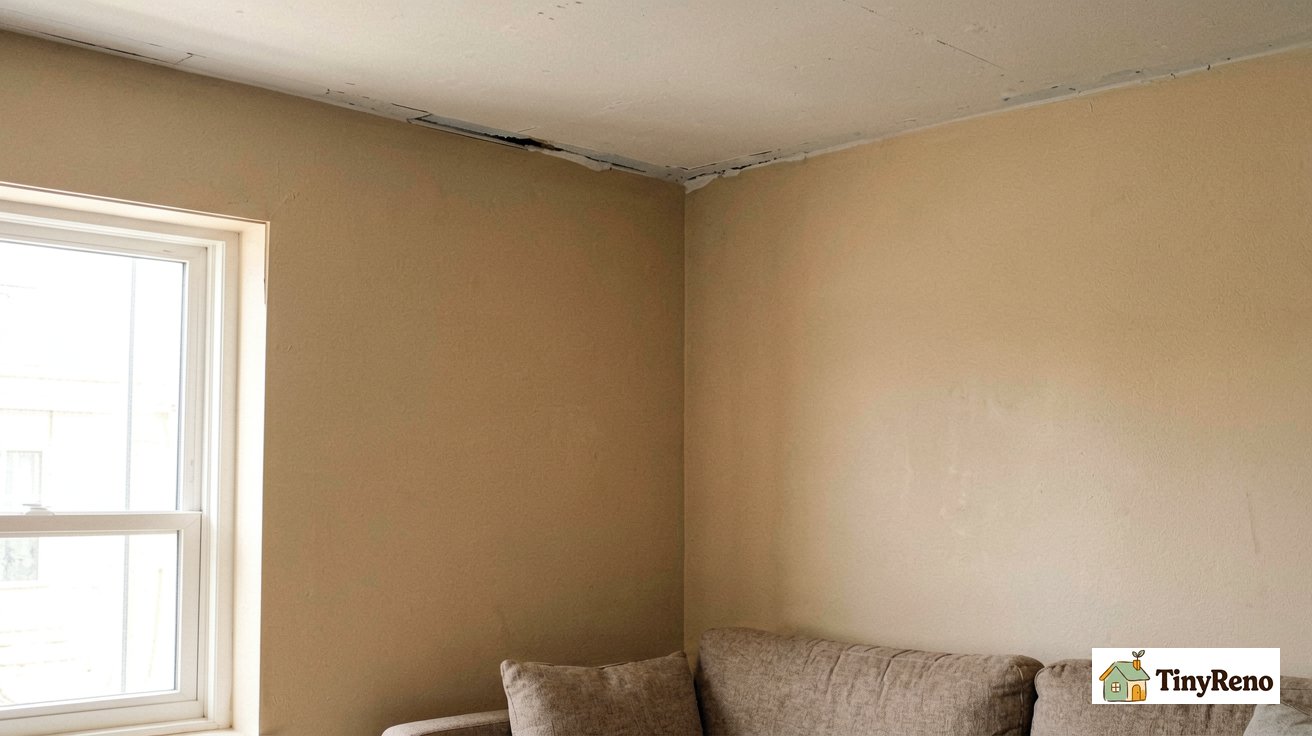
Why the Drywall Gap Between Wall and Ceiling Happens (And What It Means)
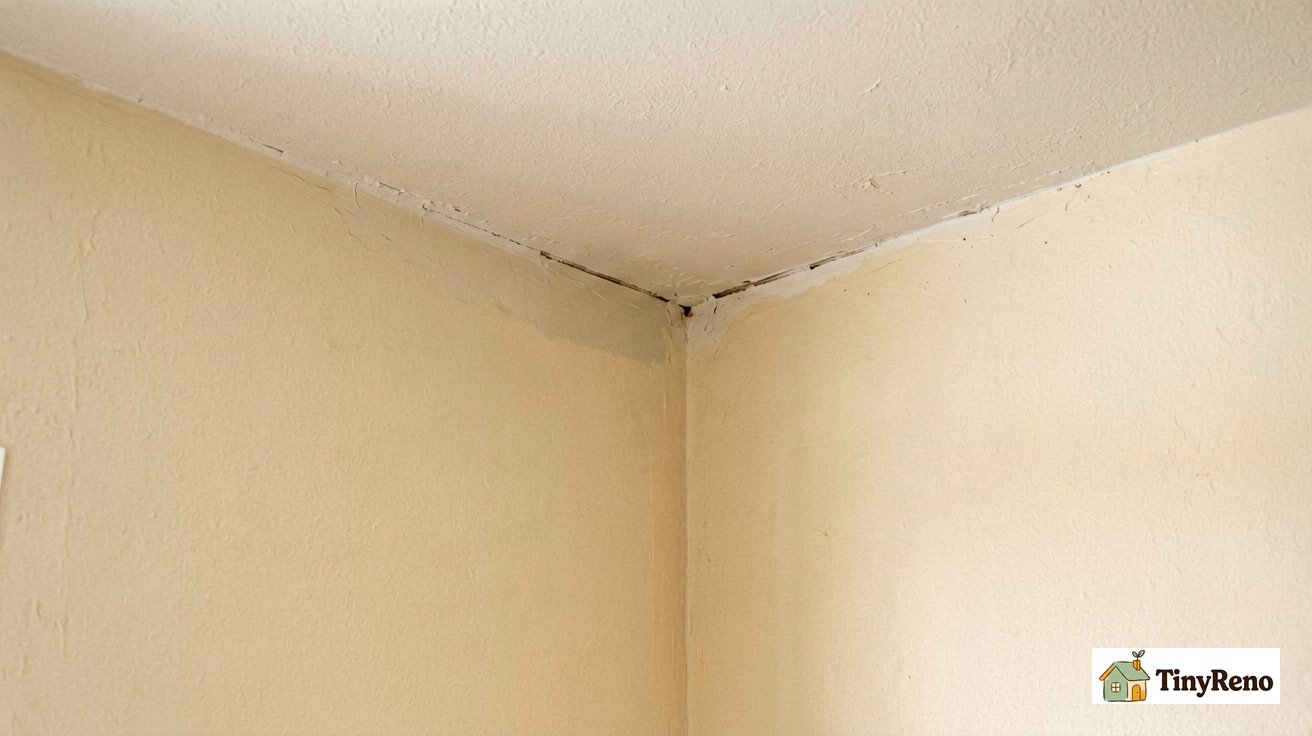
A drywall gap between wall and ceiling almost always traces back to one of five things. None of them are urgent in a vacuum, but three of them get worse if you ignore them, and one of them is a sign the building is moving. Here's the quick version. The detailed ranking is in the next section.
The first cause is the most common: seasonal truss uplift. In winter, the bottom chord of the roof trusses (exposed to warm indoor air) stays warmer and expands less than the top chord (exposed to cold attic air). This temperature difference causes the trusses to bow upward slightly, lifting the ceiling drywall away from the top of the wall. In summer, the trusses flatten out. This cyclical movement, not simple expansion, creates the gap.
The second cause is foundation settlement. Every building settles a little in its first decade. When one corner settles faster than another, the drywall gets pulled in directions it wasn't installed for. You'll see the gap on one specific wall, not all four. If your floor slopes slightly toward that wall, the settlement is the likely culprit. Our settlement-cracks guide has the full rundown on how to read those signs.
The third cause is bad taping. Drywall sheets meet the ceiling along a horizontal seam. A competent taper covers the seam with paper tape and three coats of compound, then sands it flush. A rushed taper leaves the seam uncovered or covered with a thin layer that cracks within a year. You can spot this one because the gap runs the entire length of the wall, not just one spot. The butt-joints guide explains why this seam is the most common failure point on a top corner.
The fourth cause is humidity. Bathrooms and kitchens breathe a lot of moisture. Over years, the ceiling drywall near those rooms absorbs enough humidity to swell slightly, then dries out and shrinks. The gap that appears is usually along the wall closest to the moisture source. Mold loves this scenario, so if you see dark spotting near the gap, jump to our mold-on-sheetrock guide before you do anything else.
The fifth cause is the rarest and hardest to spot: poor original framing. The ceiling joists weren't level when the drywall went up, so the drywall was forced to follow an uneven line. The gap appears because the gap was always there, just covered by caulk or paint that finally gave up. If the gap is uniform from end to end and never changes with the weather, framing is the likely answer.
5 Causes, Ranked by How Serious They Are
The table below ranks each cause by three things: how common it is, how serious the underlying problem is, and what kind of fix it needs. Most renters can handle the bottom three. The top two need a landlord.
| Cause | How Common | Severity | Who Fixes It |
|---|---|---|---|
| Truss uplift (seasonal framing movement) | Most common in 5-15 year old buildings | Cosmetic only — repeats yearly if not addressed | Renter (paintable caulk) or landlord (proper re-tape) |
| Foundation settlement (uneven sinking) | Common in first-decade buildings, especially corners | Structural if ongoing — needs professional assessment | Landlord only, with an engineer if active |
| Bad taping (rushed original work) | Common in any building with rushed drywall work | Cosmetic only — won't get worse | Renter (caulk + paint) or landlord (re-tape) |
| Humidity damage (bathroom/kitchen adjacent) | Common in older apartments with poor ventilation | Can escalate to mold if ignored | Renter for the gap, landlord for ventilation |
| Poor original framing (uneven joists) | Rare — usually caught during inspection | Cosmetic only — was always there | Landlord for a real fix, renter for caulk only |
Flexibility matters: for gaps caused by seasonal movement like truss uplift, make sure your acrylic latex caulk is labeled "siliconized" or "elastomeric." That means it has added flexibility to stretch and compress with the building's movement without cracking. Standard painter's caulk can be too rigid for active gaps and will reopen within a year.
Notice that only one of these five is genuinely structural: foundation settlement, and only when it's still active. The other four are cosmetic, meaning a renter can patch them and call it done. The trick is making sure you're not accidentally covering up the one that needs a professional. The next two sections cover how to tell which one you have, and what to do about each.
What a Renter Can Safely Fix (And What Needs the Landlord)
The decision comes down to one question: is the gap changing? If you took a photo of it six months ago and the photo matches today, the gap is stable and you can fix it yourself. If the gap was half as wide a year ago and it's wider now, the building is still moving and you need to involve your landlord before you patch it.
Here's the renter-safe zone. A stable gap, less than a quarter inch wide, that runs along one wall and hasn't changed since you moved in. You can fill it with paintable caulk in an hour. A stable gap that's wider than a quarter inch. You can fill it too, but you need a backer rod first — a foam rope you press into the gap before caulking. Choose a backer rod that is slightly larger (about 1/8" wider) than the gap width so it fits snugly. This provides a backing for the caulk and controls the depth, preventing the caulk from bonding to the bottom of the gap (which would restrict its ability to flex with movement). Anything past a half inch wide is technically renter-fixable but the visual result won't be great unless you're willing to skim coat the whole top of the wall after.
Here's the landlord zone. A gap that's grown in the last year. A gap that comes with cracks spreading down the wall. A gap on a wall where the floor slopes toward it. A gap that reopens within weeks of you caulking it. A gap with dark staining around it. All of these mean the underlying issue is active and needs professional attention. Patch them yourself and the gap will reopen, or worse, you'll cover up a moisture or structural problem that gets more expensive the longer it sits.
The email to send is short: "There's a gap between the wall and ceiling in [room]. It's been [X] for [time period]. I have photos from [date] and today showing the change. Please advise on next steps." That's it. No demands, no accusations, just facts and a request for direction. Save the email and any reply. If the gap turns into a bigger problem and the landlord tries to deduct from your damage deposit for related damage later, you have a paper trail showing you reported it when you noticed it. Our repair order guide covers why fixing ceiling damage before wall damage matters, in case the landlord wants to handle it but asks you to wait.
The Renter-Only Fix That Actually Disappears (Caulk Method)
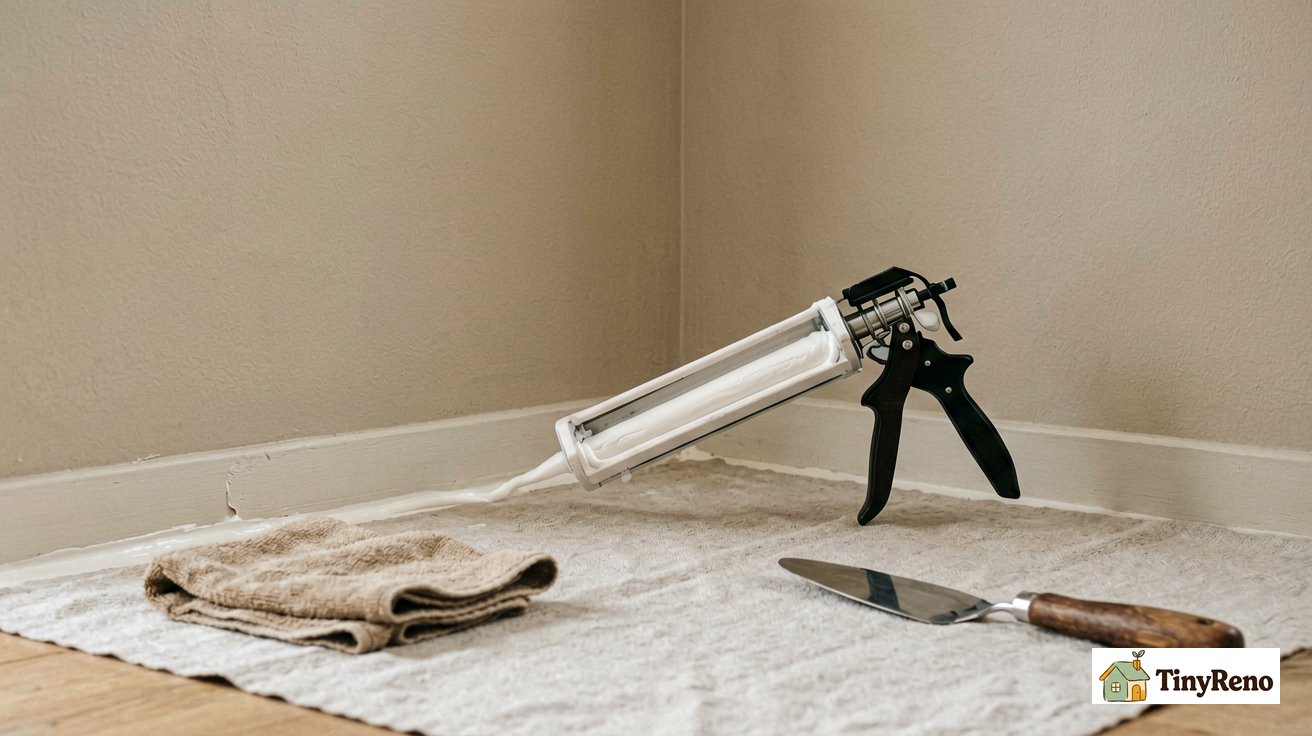
This is the one fix a renter can do that genuinely looks professional when done right. The trick isn't the caulk — it's the prep. Skip the prep and the caulk peels within six months. Do the prep and the repair holds for years.
- Clean the gap. Vacuum out any loose dust or old caulk. Wipe the wall and ceiling surfaces with a damp rag and let them dry. Paint doesn't stick to dust, and dust is what 90% of failed caulk jobs have in common.
- Tape both sides. Run painter's tape along the ceiling edge and the wall edge, leaving the gap exposed between the two tape lines. This is what gives you a clean, straight caulk line. Skip the tape and you'll spend twenty minutes scraping excess caulk off your ceiling with a razor.
- Cut the caulk tube small. Snip the tip at a 45-degree angle, leaving an opening about 1/8 inch wide. Wider than that and the bead gets fat and wavy. You can always cut more off, but you can't put it back.
- Apply a steady bead. Hold the gun at 45 degrees and pull it toward you in one continuous motion. Don't stop mid-line. If you do stop, release the gun trigger before you lift the tip away, or caulk will drip onto the wall.
- Smooth within 2 minutes. Dip your finger in water and drag it along the bead to press it into the gap and remove the excess. Wipe your finger on a rag between passes. The 2-minute window matters — once the caulk starts skinning over, smoothing it just makes a mess. Pro tip: a dedicated caulking finishing tool (a small plastic or rubber tool with different radius curves) or a damp sponge can give a more consistent, professional finish without the mess on your hand.
- Remove tape before the caulk skins. Pull the tape off at a 45-degree angle while the caulk is still wet. If you wait until the caulk dries, the tape pulls dried caulk off with it.
- Wait 24 hours, then paint. Paintable caulk needs 24 hours to fully cure before you paint over it. Paint too early and the caulk shrinks under the paint, leaving a faint line. If the gap you're filling is near a bathroom or kitchen, also check the hairline-ceiling-cracks guide — similar fix, but ceiling-only cracks follow different stress patterns.
Material callout: use a high-quality acrylic latex caulk labeled "paintable" (often sold as "interior trim and molding" caulk). Avoid 100% silicone caulk, especially the acetoxy type that smells like vinegar — it's waterproof but paint will not adhere to it, causing peeling later. While "paintable silicone" hybrids exist, standard acrylic latex is the gold standard for interior wall-to-ceiling joints because it bonds well to drywall and accepts paint seamlessly.
The one mistake that ruins this repair is skipping the painter's tape. Without tape, you end up with caulk smeared along two inches of wall and ceiling on either side of the gap, and trying to wipe it clean while wet just pushes it further into the paint. With tape, you can be messy with the bead and the tape catches everything. The whole repair takes 45 minutes including setup. If the gap reopens within a year, the cause is almost always one of two things: you used pure silicone instead of paintable acrylic, or the underlying cause is active (settlement or humidity) and the gap is moving faster than the caulk can stretch.
When to Document and Email Your Landlord
Two situations always warrant a written report. First, the gap is on a wall where you can see daylight through to the apartment above, or you can feel air movement when you hold your hand near the gap. That means the seal is fully broken and you're losing heated or cooled air into the framing cavity, which is a real energy loss the landlord should know about even if you plan to caulk it yourself.
Second, the gap came with any of the following: water staining on the ceiling near the gap, a musty smell that doesn't go away, paint bubbling near the gap, dark spots that look like dirt but don't wash off. Any of those means moisture is getting in, and moisture plus drywall plus time equals mold. Our mold-on-sheetrock guide covers what to do if you already see the dark spots, but the email to the landlord should go out the same day you notice them.
For the email, attach two photos: one of the gap when you first noticed it, and one of the same gap taken from the same angle today. Note the gap's width with a ruler in the photo if you can — that gives the landlord a real measurement to compare against future reports. The phrasing that protects you is: "I noticed [X] on [date]. It appears to have [grown/stayed the same/opened further] since [previous photo or move-in date]. Please let me know how you'd like to proceed."
Save the email and the photos in a folder named after the apartment. If you ever need to dispute a damage deposit deduction related to this gap, you have a dated paper trail showing you reported it the day you noticed. Most landlords handle it within a week when you give them photos and a clear ask. The ones who don't are telling you something else useful about how move-out will go.
Most drywall gap between wall and ceiling situations come down to one of the four cosmetic causes, and a Sunday with a $9 tube of paintable caulk makes the problem disappear for years. The five minutes you spend figuring out which cause you have is what separates a one-hour fix from a $1,500 deduction at move-out. Take the photo, measure the gap, send the email if it falls into the landlord zone, and patch it yourself if it doesn't. That's the whole playbook.


Discussion (0)
Sign in to join the discussion