

My first caulk job was a baseboard in a 2018 rental. I didn't use painter's tape. I squeezed the gun with too much pressure. I used my finger to smooth the bead without wetting it first. The wall got 3 long smears of white caulk, my landlord's pre-move-out inspection noted it as "damaged wall finish," and the cleaning took longer than the caulking itself. The same baseboard in my 2020 place — same caulk, same tools, 30 minutes — looked like a pro did it. The only difference was painter's tape. Here's the 3-step method I now use on every trim job, and the 30-second trick that makes the painter's tape non-negotiable.
Why Caulk Trim at All (And When You Shouldn't)
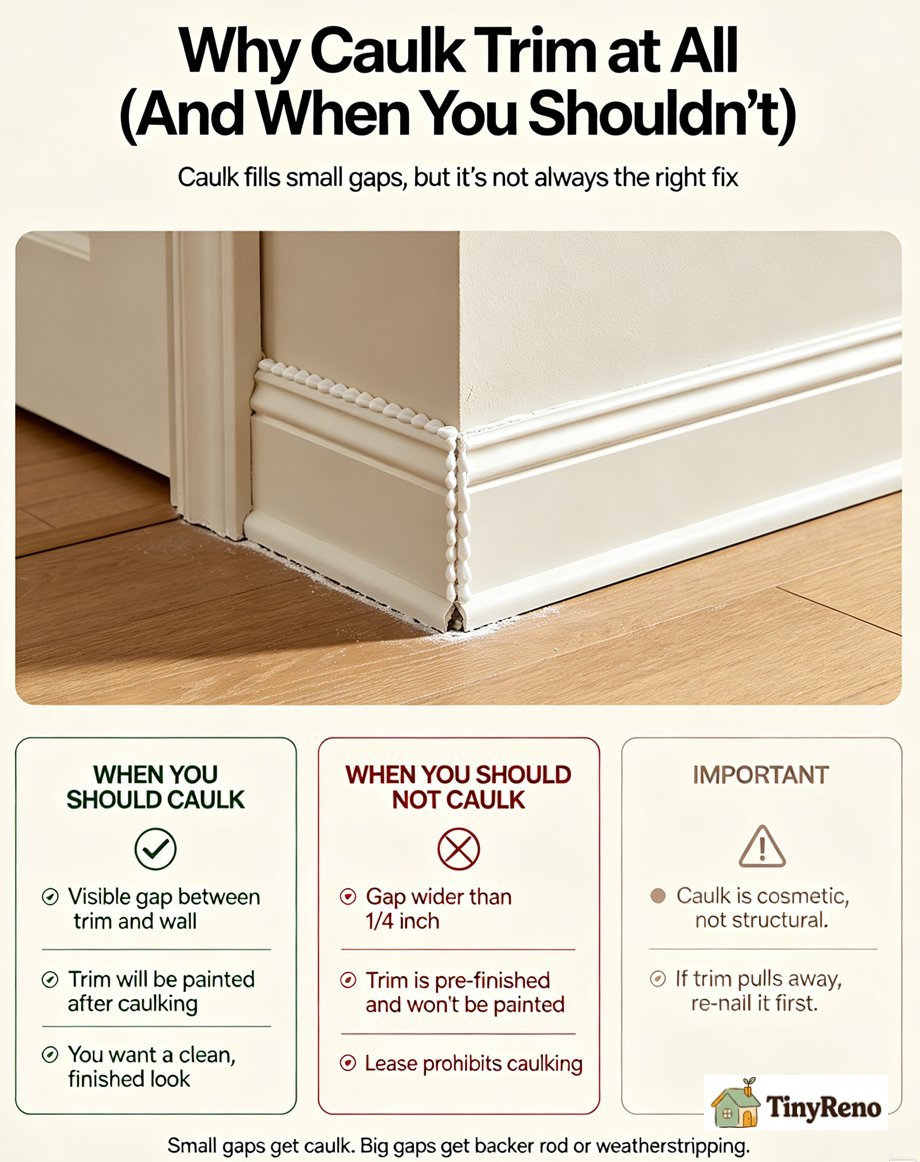
Trim — baseboards, door casings, window casings, crown molding — is rarely installed perfectly flush against the wall. There's almost always a small gap between the trim and the drywall, sometimes 1/16 inch, sometimes 1/4 inch. That gap collects dust, lets bugs in, and looks unfinished. Caulk fills the gap and creates a clean, paintable seal between the trim and the wall.
You should caulk trim when:
- There's a visible gap between the trim and the wall (most rentals have these)
- The trim is being painted (caulk and paint together = invisible seam)
- You want a finished, professional look before photos or guests
You should NOT caulk trim when:
- The gap is wider than 1/4 inch (caulk will sag and crack — use backer rod or weatherstripping instead)
- The trim is pre-finished and you don't plan to paint over the caulk (the caulk line will be visible)
- Your lease specifically prohibits caulking (rare, but check)
The other thing to know: caulk is not a structural fix. If the trim is pulling away from the wall, caulk won't hold it — you need to re-nail the trim first. Caulk is purely cosmetic, and it does cosmetic things very well.
Step 1: Tape the Wall Just Above the Trim
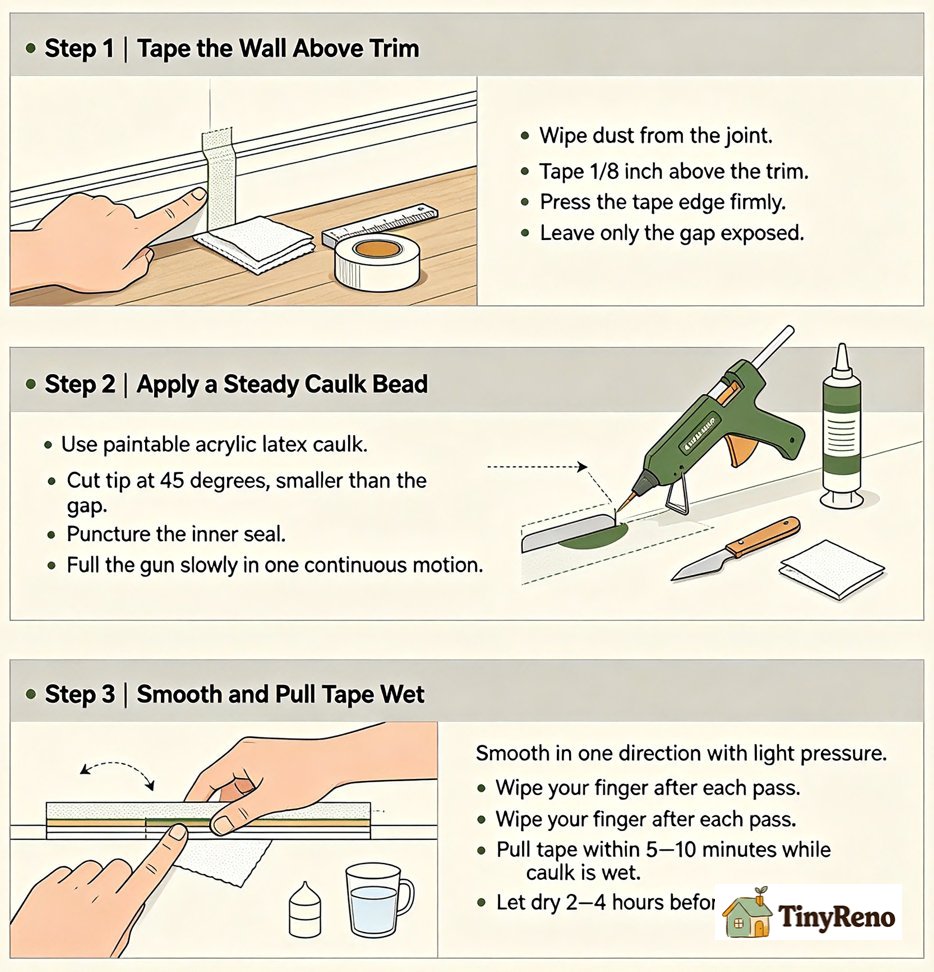
This is the step that separates a clean caulk job from a smeared mess. Painter's tape creates a straight edge for the caulk to run against, and it catches the excess caulk that would otherwise end up on the wall. Without tape, you'll spend 30 minutes scraping dried caulk off the wall with a razor blade, and you'll never get it all off.
What you need:
- 1.5-inch or 2-inch painter's tape (NOT masking tape — masking tape leaves residue)
- Tape measure (optional, for parallel lines)
- Clean cloth
The tape: Run a strip of painter's tape along the wall about 1/8 inch above the trim. The tape should be parallel to the trim, with a consistent gap. Press the tape down firmly along its lower edge (the edge closest to the trim) — this is the edge the caulk will run against, so it needs to be sealed well.
For a 1/4 inch or wider gap, run a second strip of tape along the top edge of the trim, leaving just the gap exposed. This double-tape method is overkill for most renters but it makes cleanup completely effortless on wide gaps.
Wipe the trim and wall along the caulk line with a clean cloth. The tape won't stick to dust, and a quick wipe ensures a tight seal.
Step 2: Apply the Caulk in a Steady Bead
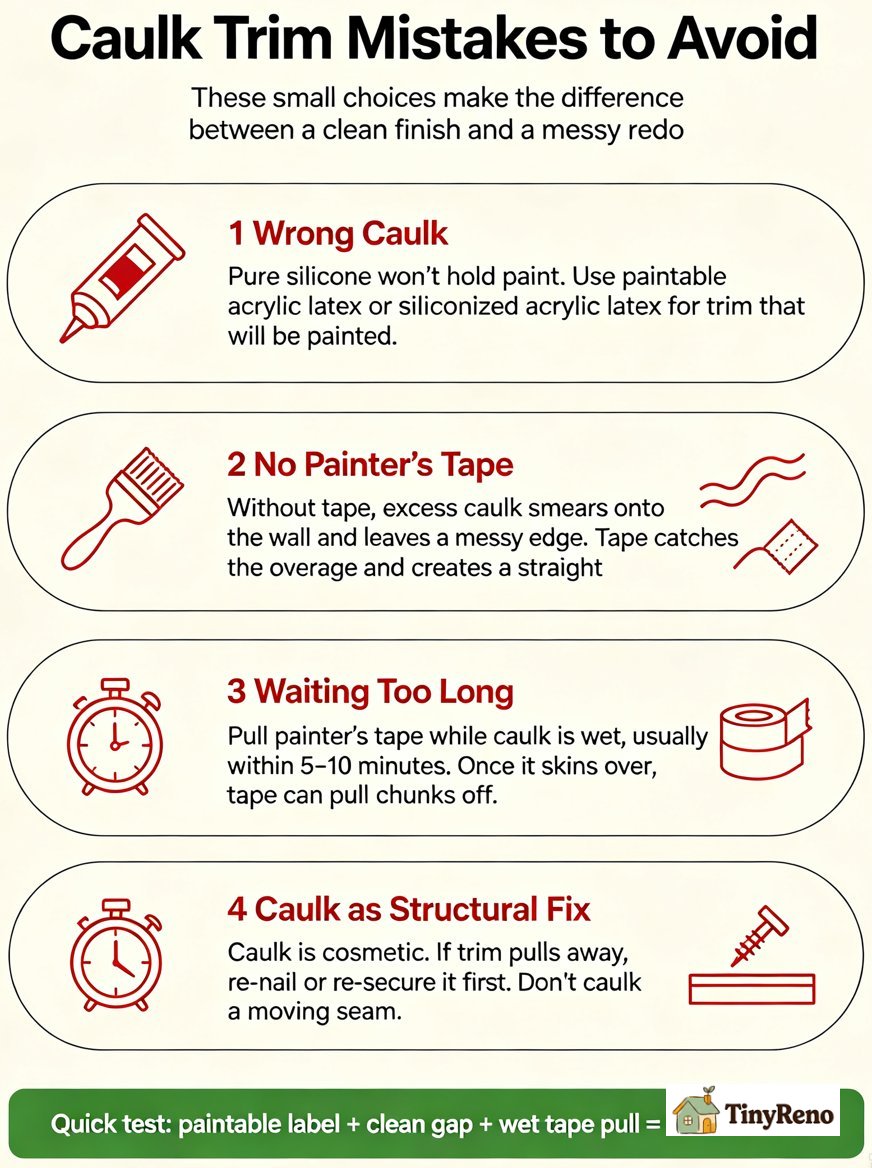
The right caulk for trim is paintable acrylic latex caulk (also called "painter's caulk" or "siliconized acrylic latex"). NOT pure silicone — silicone won't hold paint. NOT butyl rubber — that's for exterior masonry. The label should say "paintable" and "for interior use" and "acrylic latex" or "siliconized acrylic latex."
What you need:
- Paintable acrylic latex caulk (a small tube is enough for one room)
- Caulk gun (the cheap $5 squeeze-trigger kind works fine for occasional use)
- Utility knife or scissors (to open the tube)
- Paper towels or a damp rag
The caulk: Cut the tip of the caulk tube at a 45-degree angle, about 1/4 inch from the tip. The opening should be slightly smaller than the gap you're filling — you can always cut more off if needed, but you can't make the opening smaller. Puncture the inner seal with a long nail or the metal rod on the caulk gun (most guns have one on the side).
Load the tube into the caulk gun. Practice once on a paper towel to get a feel for the trigger pressure — you want a steady, even flow, not bursts. Squeeze the trigger until caulk starts to come out, then release the pressure by pushing the release tab (small lever near the trigger) so the caulk stops flowing when you let go.
Hold the gun at a 45-degree angle to the wall, with the tip pressed lightly against the seam. Squeeze the trigger and pull the gun along the seam in one continuous motion. The caulk should lay down as a continuous bead, about 1/8 inch thick, slightly wider than the gap. Don't stop mid-bead — if you do, you'll get a visible lump when you start again.
For a 10-foot wall, this takes about 30 seconds once you get the rhythm. Speed comes from the second bead, not the first.
Step 3: Smooth the Bead and Pull the Tape
This is the step that transforms a lumpy caulk line into a smooth, professional finish. The trick is to smooth in one direction and pull the tape at the right time — too early and the caulk smears, too late and the tape pulls chunks of caulk off the trim.
What you need:
- Damp rag or paper towel
- Small cup of water
- Your finger (yes, really — bare finger is the best tool for this)
The smooth: Wet your finger with the damp rag (not soaking wet — damp). Press your finger lightly against the caulk bead and drag it along the seam in one continuous motion, applying just enough pressure to push the caulk into the gap and create a smooth concave surface. Wipe excess caulk off your finger with the rag after each pass. Repeat as needed until the bead is smooth and even.
Some people prefer a damp sponge or a caulk-smoothing tool. The bare finger is faster and gives a more natural-looking finish. Just keep wiping your finger clean between passes — dried caulk on your finger is what causes those little black flecks in the smooth bead.
The tape pull: Pull the painter's tape off the wall while the caulk is still wet (within 5-10 minutes of applying). Pull it at a 45-degree angle, away from the caulk line, slowly and steadily. If you wait too long and the caulk skins over, the tape will pull chunks of caulk with it and you'll have to redo the section.
The result after pulling the tape: a perfectly clean caulk line with the excess caulk stuck to the back of the tape. Throw the tape away immediately — don't let it sit in a pile where the caulk can transfer to something else.
Let the caulk dry 2-4 hours before painting. Most acrylic latex caulks are paint-ready in 30 minutes to 4 hours depending on humidity. Check the tube for the exact time.
When to Skip This and Call the Landlord
Three situations where caulking trim goes beyond renter scope:
- The gap between trim and wall is wider than 1/4 inch — caulk will sag, crack, and pull away within months. The fix is backer rod (foam rope) inserted into the gap, then caulked over. That's more of a contractor job than a renter one.
- The trim is pulling away from the wall (nails popping, trim moving when you touch it) — that's a structural issue. The trim needs to be re-secured with new nails or screws before any caulk goes on. Don't caulk a moving seam — it'll just crack.
- There's evidence of water damage or mold behind the trim — black staining, soft drywall, musty smell. The trim needs to come off so the source can be diagnosed. Don't caulk over a water problem.
The first baseboard I caulked in 2018 cost me $40 in cleaning supplies and a 90-minute conversation with the landlord. The 4 baseboards I caulked in 2020 with the painter's tape method cost me 30 minutes total and zero follow-up. Same caulk, same wall, same approach with one critical difference. The tape is not optional. It is the difference between a 30-minute job and a half-day cleanup. Don't be me in 2018.
For everything else — the small gaps at the top of baseboards, the seam between door casing and the wall, the joint between two pieces of trim that don't quite meet — the 3-step method above gets it done in 30 minutes per room with under $15 in materials. The painter's tape is what makes the difference — without it, you'll spend twice as long cleaning up the wall and you'll still have visible smears.
The other thing worth knowing: not all caulk is paintable. Pure silicone caulk (the kind you use in showers) won't hold paint. If your caulk line is going to be painted over (which is the whole point of caulking trim), make sure the label says "paintable" and "acrylic latex." The $3 vs $7 difference per tube is the difference between a paintable caulk line and one that beads up paint like a waxed car.
Drywall inside corner bead repair guide covers the related fix when the gap at the wall-trim junction is actually a damaged corner bead — same tape-and-caulk logic, different material.
How to hang things on walls without nails covers the related prep work for re-mounting trim or shelving before you caulk the seams.


Discussion (0)
Sign in to join the discussion