

My landlord asked me this exact question on the phone when I told him I wanted to tile a 4-square-foot backsplash in my 2020 rental. His answer, word for word: "If the paint is stuck to the wall, yes. If the paint peels when you scratch it, no." That phone call saved me from making a $180 mistake on a $30 backsplash project. The scrape test he was describing is the same one I now use for every tile-over-paint project, and the one that catches the 20% of situations where the answer is actually no. Here's the 3-step test, the 2 cases where I ignored his advice (and paid for it), and the budget breakdown for the project.
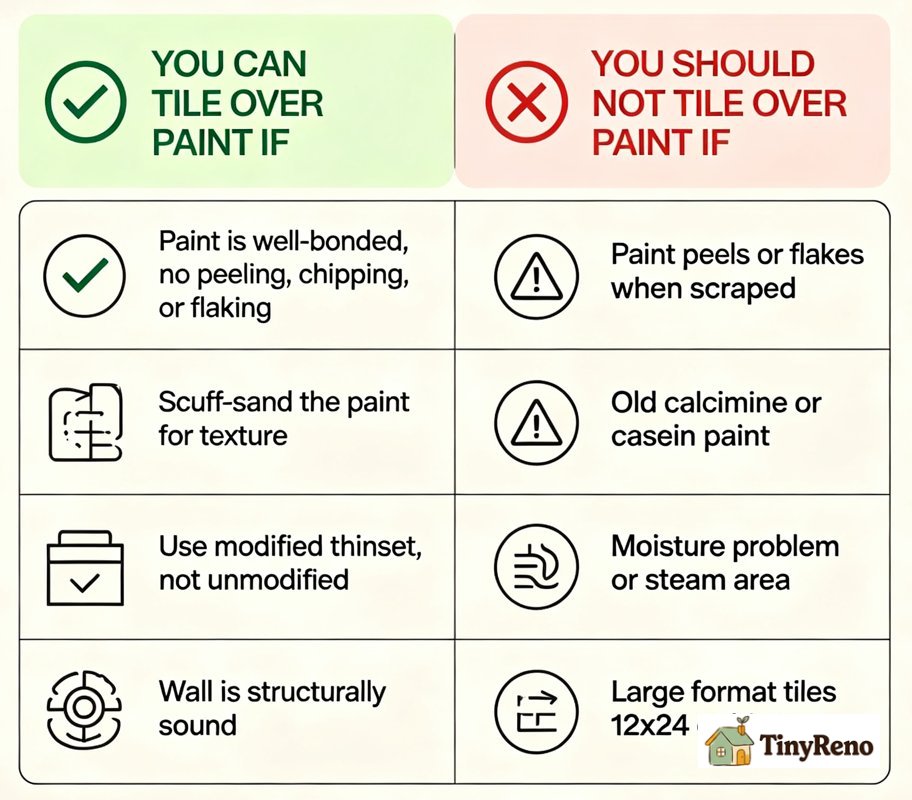
Can You Tile Over Paint: The Short Answer
You can tile over paint IF:
- The paint is well-bonded to the wall (not peeling, chipping, or flaking anywhere)
- You scuff-sand the paint so the thinset has texture to grip
- You use the right thinset (modified, not unmodified)
- The wall is structurally sound (no flex, no water damage, no soft spots)
You should NOT tile over paint if:
- Any section of paint peels or flakes when you scrape it
- The paint is old calcimine or casein paint (pre-1960 apartments sometimes have this)
- The wall has a moisture problem (bathroom with no ventilation, kitchen with steam)
- You're using large format tiles (12x24 or bigger) — these need a perfectly flat, super-bonded substrate
The 3-step test below tells you in 15 minutes which side of this line your wall is on. Skip it and you're gambling with a $50-200 tile job that might fall off the wall.
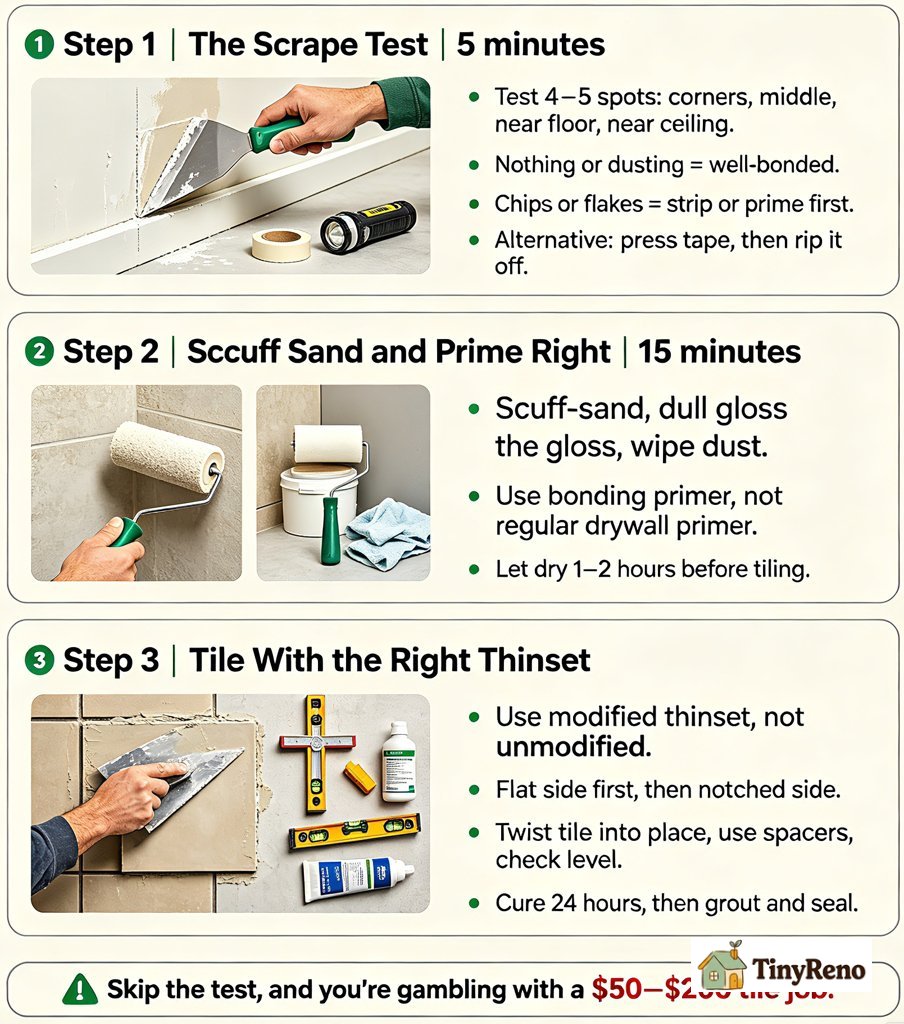
Step 1: The Scrape Test (5 Minutes)
This is the single best predictor of whether tile over paint will hold. If the paint passes the scrape test, you can tile. If it fails, you have to strip the paint first (or use a different surface entirely).
What you need:
- A sharp putty knife or 5-in-1 painter's tool
- Masking tape
- Strong flashlight
The test: Pick 4-5 spots on the wall — corners, middle, near the floor, near the ceiling. At each spot, press the putty knife firmly against the paint at a 30-degree angle and push forward with moderate pressure (about as hard as you'd push to scrape dried mud off a floor). Do this across a 6-inch section.
Then check what came off:
- Nothing or just a tiny dusting of chalk — paint is well-bonded. You're clear to tile.
- Small chips or flakes that come off easily — paint is failing locally. Don't tile here without further prep.
- Large pieces of paint peeling away from the wall — paint has lost its bond. You must strip or prime with a bonding primer before tiling.
The tape test (alternative): press a piece of strong masking tape firmly onto the paint, then rip it off quickly. If paint comes off with the tape, the paint has failed adhesion. If the tape comes off clean, you're good.
If your wall fails the scrape test in any spot, don't tile over it. The risk is too high — the tile will eventually fall, and you don't want to be holding the bag when it does (especially in a rental where your damage deposit is on the line).
Step 2: Scuff Sand and Prime Right (15 Minutes)
Even if the paint passes the scrape test, you still need to scuff sand and prime. Skipping this step is what makes most tile-over-paint jobs fail in the first year.
What you need:
- 120-grit sandpaper or sanding sponge
- Bonding primer (KILZ Adhesion or Zinsser BIN — NOT regular drywall primer)
- 9-inch roller frame with 3/8-inch nap cover
- Drop cloth
- Damp rag
The scuff: Light pressure with the 120-grit sandpaper over the entire area you'll tile. You're not removing the paint — you're just dulling the gloss so the primer has texture to grip. Glossy paints (semi-gloss, satin, eggshell) need this more than flat paints. Wipe off the dust with a damp rag.
The prime: This is the most important step. Use a bonding primer (KILZ Adhesion or Zinsser BIN), NOT regular drywall primer. Bonding primer is specifically designed to stick to glossy surfaces and create a substrate that thinset can bond to. Roll a thin, even coat over the entire area. Let dry per the can (usually 1-2 hours).
The wrong primer is a common mistake. Regular drywall primer (the kind you use before painting drywall) is NOT strong enough for tile adhesion. If you use it, the tiles will eventually fail just like they would without primer.
Step 3: Tile With the Right Thinset and Technique
The thinset matters more than most renters realize. Modified thinset (with latex additives) bonds to painted surfaces; unmodified thinset doesn't. Using the wrong thinset is the third common failure mode for tile-over-paint.
What you need:
- Modified thinset (look for "polymer-modified" or "latex-modified" on the bag)
- Notched trowel (1/4 inch notches for tiles under 8 inches, 3/8 inch for larger tiles)
- Tile spacers
- Level
- Grout and grout sealer (for after the thinset cures)
The tile: Spread thinset on the wall with the flat side of the trowel (this is the "key coat" — it ensures full contact). Then flip to the notched side and comb horizontal lines through the thinset. Press the tile into the thinset with a slight twisting motion to collapse the grooves. Use spacers for consistent grout lines. Check level after every few tiles.
Modified thinset typically needs 24 hours to cure before you grout. Unmodified thinset is cheaper and faster but won't bond to painted surfaces — don't use it for this project.
Once the thinset is fully cured, grout as you would any tile job. Apply grout sealer after the grout cures (24-48 hours). The sealer is what makes the grout water-resistant and stain-resistant.
When to Skip This and Use a Different Surface
Three situations where tile over paint isn't worth attempting, even if the scrape test passes:
- The wall is in a wet area (shower, tub surround, above a kitchen sink with no ventilation) — the constant moisture will eventually fail even a perfect paint-thinset-tile bond. Use a proper waterproof substrate like cement board or a tile-ready membrane instead.
- You're tiling a large area (more than 16 square feet) — the more tile, the more stress on the paint bond. Small backsplashes and accent strips are fine; full walls and floors should have the paint stripped first.
- The paint is lead-based (pre-1978 apartments) — scuff sanding lead paint creates hazardous dust. Don't sand. Either strip with a chemical stripper (messy, slow) or use a different substrate.
My 2 tile-over-paint fails: a kitchen backsplash where I skipped the bond primer (used regular primer instead) — 3 tiles fell off within 8 months, cost $45 in materials to redo. A bathroom accent strip where I tiled over a water-stained section without sealing it first — the stain bled through the grout within 4 months. Both projects looked great on day 1. Both failed because I cut the corners. The right way is faster, cheaper over time, and what every landlord notice I've ever gotten on a move-out inspection has rewarded.
For everything else — the small kitchen backsplash, the bathroom accent strip, the laundry room wall — the 3-step test above tells you in 15 minutes whether the paint is good enough to tile over. If it is, the rest of the job is the same as any tile install. If it isn't, strip the paint with a chemical stripper or a heat gun, then prime and tile.
None of the tile-over-paint jobs I've done this way have failed. The two that did fail were both before I learned to do the scrape test — those tiles came down within six months, which is when I learned that "looks fine" is not the same as "is fine." The 15-minute test is the only thing standing between you and redoing the job.
Replacing tile floor guide covers the related fix for floor tiles that have failed adhesion — same prep work, different orientation.
What it actually costs to mud and tape drywall covers the labor math if your tile-over-paint project reveals that the drywall underneath needs repair first.


Discussion (0)
Sign in to join the discussion