

The first big settlement crack I ever saw was a 2-foot diagonal running from my bedroom window corner in 2016. I panicked, took 47 photos, emailed the landlord at 11pm, and spent the next 3 days convinced the building was collapsing. The crack hadn't grown a millimeter in the 18 months I lived there. The landlord patched it in 20 minutes and never mentioned it again. I now see a settlement crack every 6-9 months in different rentals, and my reaction has shifted from panic to a 5-minute assessment. The crack pattern, the width, and the date-stamped photo are the three things that tell me whether to patch it myself or message the landlord. Here's the system I use, refined over 9 cracks in 3 apartments.
Settlement Cracks in Drywall: What's Actually Happening
Every building settles after it's built. The framing lumber dries out, the foundation adjusts to the weight, the soil under the foundation compresses — and the whole structure moves by a fraction of an inch over the first few years. The drywall itself doesn't crack under that movement, but the mud covering the seams and corners does. The mud is the weakest layer, so it cracks first.
This is why most settlement cracks appear in predictable places:
- Window and door corners — these are natural weak points where the framing has the most stress when the building moves.
- Ceiling-wall corners — the seam between two different planes (vertical wall, horizontal ceiling) is a common crack location.
- Long runs of drywall — the butt joints between drywall sheets crack where the framing flexes most.
- Above and below heavy openings — anywhere a header carries extra load (like a wide window or archway), the surrounding drywall is more likely to crack.
The pattern matters more than the size. A long diagonal crack running from a window corner to a door frame is textbook settlement. A spider-web of cracks, a horizontal crack running along a seam, or vertical cracks in the middle of a wall section are also usually settlement-related. What you're watching for is anything that looks like active structural movement — those are the cracks that mean call the landlord.
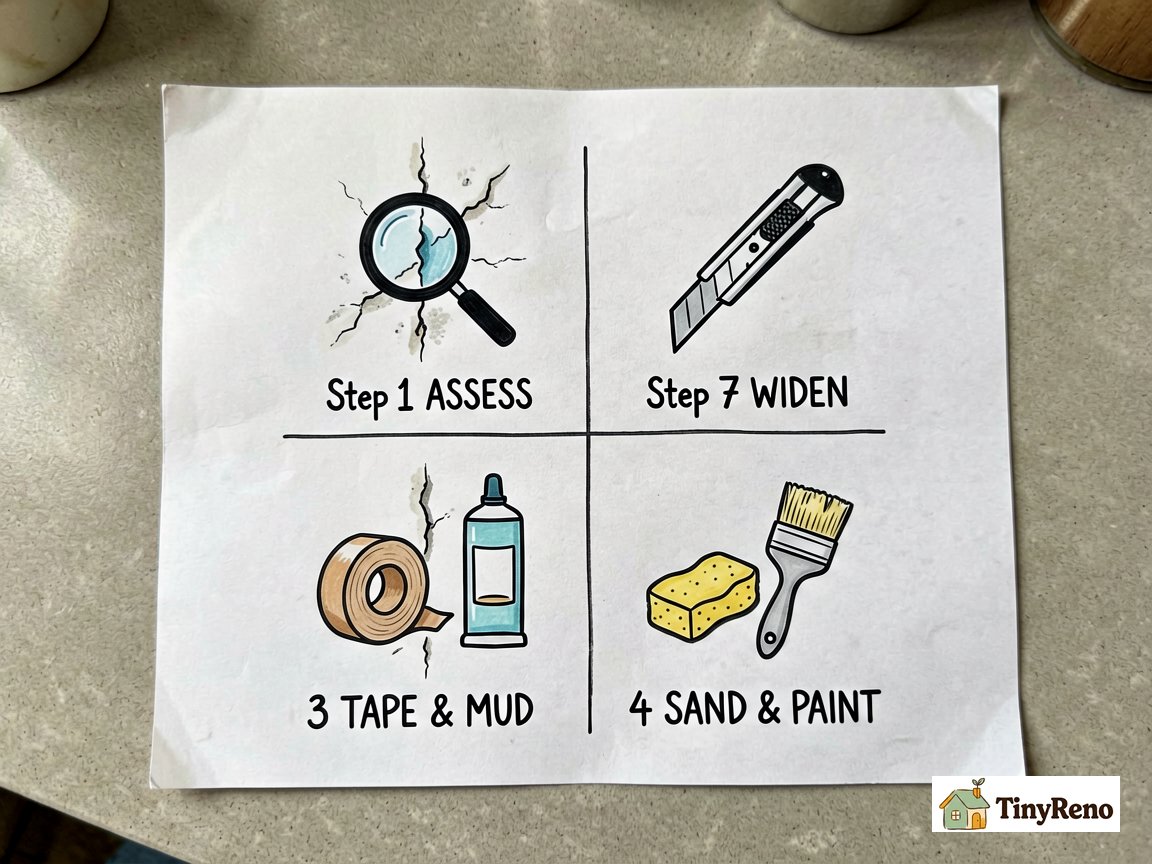
Step 1: Assess the Crack (Pattern, Width, Movement)
Three things to check before you start patching. They take about 10 minutes and tell you whether this is a 2-hour job or a landlord call.
What you need:
- Bright flashlight
- Metal ruler or tape measure
- Smartphone camera (for date-stamping)
- Pencil (optional, for marking the crack ends)
The assessment:
1. Pattern. Diagonal from a corner, stair-step along a seam, or hairline along a ceiling-wall joint = settlement (cosmotic). Horizontal across the middle of a wall with no nearby seam = potentially structural. Multiple cracks converging on one corner of a room = foundation issue worth monitoring.
2. Width. Hold the ruler up to the crack. Under 1/8 inch = cosmetic, easy fix. 1/8 to 1/4 inch = monitor and patch, but message your landlord about the underlying cause. Over 1/4 inch = call the landlord before doing anything.
3. Movement. Take a date-stamped photo today. Wait 2-3 weeks and take another photo. Compare. If the crack has grown longer, wider, or new branches have appeared, the building is still moving and your patch won't last. If it looks identical, the settlement has stopped and you're safe to patch.
For cosmetic cracks (the most common type), you can move to Step 2. For anything else, message your landlord with the photos and let them decide.
Step 2: Widen the Crack to Give the Patch Something to Grip
Same logic as patching a hairline ceiling crack: the mud won't penetrate a tight crack, so you have to open it up first. Don't worry about making the crack bigger — you're making it patchable.
What you need:
- Utility knife (sharp, with a fresh blade)
- Small vacuum or damp rag
- Painter's tape (optional, for protecting the wall finish around the crack)
The widen: Hold the utility knife at a 45-degree angle and run it along the crack, creating a V-shape about 1/8 inch wide at the surface and tapering to nothing at the bottom. You want to remove the loose, crumbly material along the crack edges so the new compound has solid material to bond to.
Vacuum or wipe out the dust. The crack will look worse now than it did when you started — that's expected. The widening step is what separates a patch that lasts five years from one that cracks again in six months.
Step 3: Tape and Mud (Two Coats)
Paper drywall tape (not mesh) is the right choice for settlement cracks. Mesh tape is easier to work with but it's structural only when embedded in setting-type compound, which most renters don't want to mix.
What you need:
- Paper drywall tape (1-7/8 inch wide)
- Premixed all-purpose joint compound (a quart)
- 4-inch taping knife
- 6-inch taping knife (for feathering)
The first coat: Cut a piece of paper tape about 4 inches longer than the crack. Lay the tape over the crack. Now scoop about 1/4 cup of joint compound onto your 4-inch knife and spread it over the tape, pressing firmly so the compound squeezes out from under the tape into the V you cut. Work from the middle of the tape outward to avoid bubbles. Pull the knife back at a 45-degree angle to scrape off the excess compound.
Let this coat dry 4-6 hours (or overnight if you have the time). The first coat will look rough and ridged — that's fine. Don't try to fix it on this pass.
The second coat: Switch to your 6-inch knife. Apply a thinner coat of compound, but feather the edges 4-6 inches wider on each side of the first coat. This wider, thinner layer is what blends the repair into the surrounding wall. Let it dry overnight.
Step 4: Sand and Paint to Match
The final step is what makes the repair invisible. Most renter patches fail at this stage because people either don't sand enough (visible ridge) or sand too much (you sand through the compound and expose the tape).
What you need:
- 150-grit sanding sponge (for the first pass)
- 220-grit sanding sponge (for the finishing pass)
- Damp rag
- Small angled paintbrush (2-inch)
- Matching wall paint
The sand: Light pressure with the 150-grit sponge first, just enough to knock down the high ridges. Hold a bright flashlight parallel to the wall — the shadow will reveal any high spots you missed. Switch to the 220-grit sponge for a smoother finish. Wipe with a damp rag to remove all dust.
The paint: Touch up with your wall paint in thin coats. Let each coat dry before the next. Two coats usually blends the repair into the surrounding wall. If you don't have the original paint, a small sample pot of a close-enough color is usually $5-8.
Sheen matching matters as much as color matching. Most apartment walls are flat or eggshell. If your patch looks shinier than the surrounding wall, you bought the wrong sheen.
When to Stop and Call the Landlord
Three situations where settlement cracks in drywall go beyond renter scope:
- Crack is over 1/4 inch wide — at this width, the framing behind the drywall is moving, not just the surface mud. The fix needs to address the framing, not just the wall finish.
- Multiple cracks are growing over a 2-3 week period — the building is still actively settling. Patching now just means re-patching in 3 months. The landlord should bring in a structural engineer or foundation specialist.
- Doors or windows near the crack have started sticking — that's a sign the framing has shifted enough to warp the openings. This is a structural issue, not a drywall issue.
The other thing to watch for: cracks that reappear in the same spot within 6-12 months of patching. That usually means the underlying movement is ongoing and a one-time patch won't solve it. The landlord may need to bring in someone to address what's causing the building to keep moving.
The 9 settlement cracks I've patched split into 2 categories: 6 were one-time (patched once, never came back), 3 came back within 18 months because the underlying building was still settling. The 3 that came back all had the same sign: new cracks appeared in other rooms within 6 months. If you patch a crack and a new one shows up across the room, the building is still moving. The patch isn't the problem. The fix is a landlord phone call, not more compound.
For everything else — the diagonal crack from the window corner, the stair-step along the ceiling line, the small hairline along the door frame — the 4-step plan above gets it done in a weekend with under $20 in materials. None of the settlement cracks I've patched this way have reappeared, and most are invisible within 6 feet of the wall.
Hairline cracks in ceiling repair guide covers the related fix for settlement cracks that appear on the ceiling instead of the wall — same toolkit, slightly different angle of attack.
What it actually costs to mud and tape drywall covers the labor math if your settlement crack patch ends up being part of a larger repair that needs a handyman.


Discussion (0)
Sign in to join the discussion