

I've replaced 4 cracked floor tiles across 2 apartments. The first 2 took me 3 hours each because I was working without a plan and the second-hand chisel I'd borrowed was too wide for the grout lines. Tiles 3 and 4 took 35 minutes each because I figured out the one thing nobody tells you: the replacement tile needs to come from the closet, not the hardware store. Here's the method, the 3 hours I wasted the first time, and the $30 in tools I should've bought upfront instead of improvising.
Replacing Tile Floor: Why It's Not the Same as Replacing Carpet or LVP
Tile doesn't move. That's the good news and the bad news. The good news: a single tile replacement, done right, will outlast the entire lease and probably the next tenant too. The bad news: getting the new tile flush with the surrounding tiles (so your foot doesn't catch on the edge every time you walk through the kitchen) is the actual hard part. The tile work itself is forgiving. The leveling is not.
The other thing that makes tile different: you usually can't just buy one matching tile at the hardware store. Unless your landlord left a few spares (sometimes they do), you need to find a close-enough match or accept that one tile will look slightly different. For most renters, "close enough" beats "leave it cracked" every time.
Before you start: check with your landlord. Most don't care about spot tile replacement and won't even notice. Some will insist on doing it themselves through their preferred contractor. A quick text message saying "tile cracked under the sink, planning to fix it myself this weekend, OK?" covers you either way.
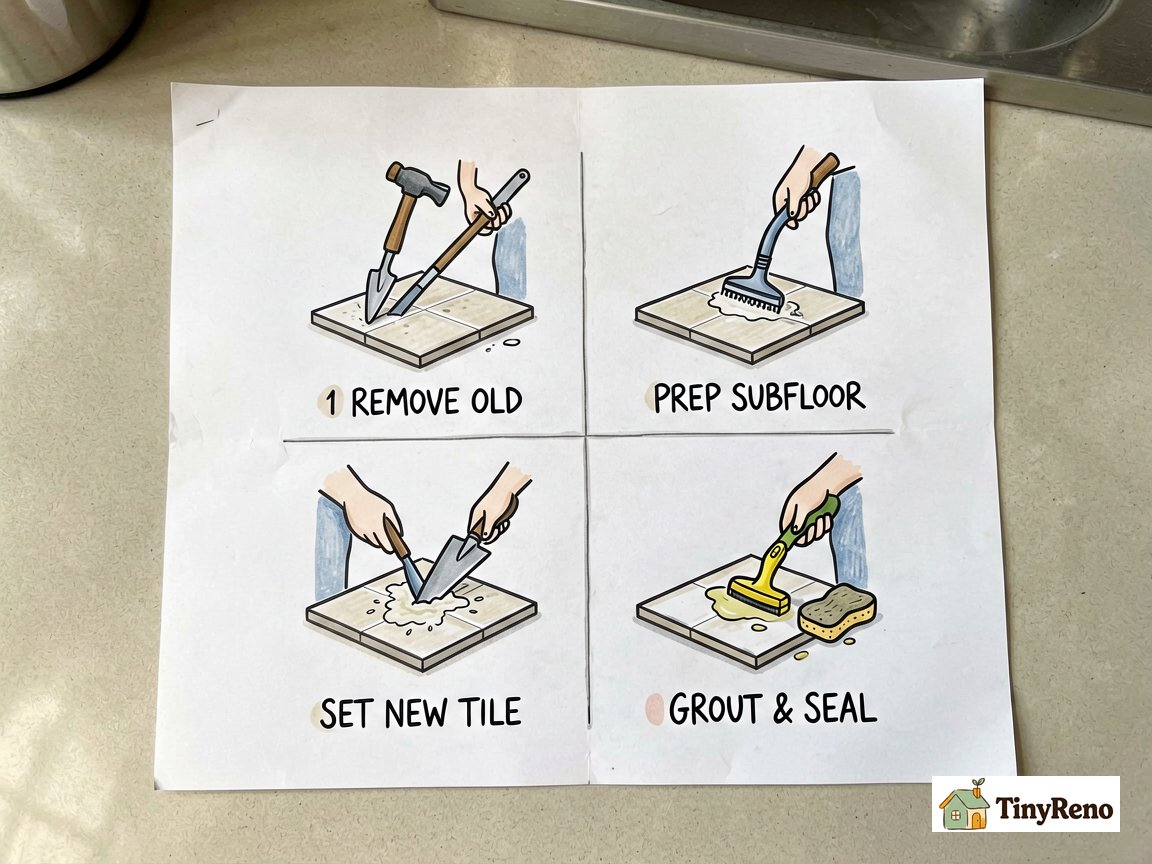
Step 1: Remove the Broken Tile (And Only the Broken Tile)
The trick to removing one tile without damaging its neighbors is to break the tile itself, not the surrounding grout or adjacent tiles. Here's the renter-safe method:
What you need:
- Safety glasses (ceramic shards are sharp)
- Cold chisel (or a flat-head screwdriver and hammer)
- Small ball-peen hammer or regular hammer
- Dust mask (the dust is fine ceramic, not great to breathe)
- Drop cloth
The remove: Lay the drop cloth around the work area. Put on your safety glasses and dust mask. Use the hammer to tap the cold chisel into the center of the broken tile at a steep angle — you're trying to drive the chisel UNDER the tile to pop it up, not crack it more. Work from the center outward in small sections.
If the tile is already cracked (most are by the time you decide to replace), you can use the chisel to break the cracked pieces out and then pry up the remaining chunks from the corners. The goal is to remove the broken tile without cracking or loosening the surrounding good tiles.
Once the tile is out, scrape the old thinset mortar off the subfloor with the chisel held nearly flat. You want a clean, flat surface for the new tile to sit on. Any high spots here will make the new tile sit higher than its neighbors, which is what causes the foot-catch problem.
Step 2: Prep the Subfloor and Test-Fit the New Tile
This is the step everyone skips and then wonders why their tile sits too high. The test fit shows you whether you need to trim the subfloor, the tile, or both.
What you need:
- Replacement tile (buy 2 in case one breaks during install)
- Tile spacers (1/8 inch or 1/16 inch, matching your existing grout lines)
- Vacuum or damp rag
The test fit: Place the new tile in the empty spot WITHOUT any mortar. Set spacers around the edges. Now run your hand across the tile and the surrounding ones. Is the new tile higher? Lower? Flush? You want it flush — level with the surrounding tiles within 1/16 inch.
If the new tile is too high, the subfloor still has old thinset on it. Scrape more. If it's too low (unusual), you'll need to build up the subfloor with a layer of thinset before setting the tile. If it's flush, you're ready for Step 3.
This is also when you check whether the new tile actually fits the space. Sometimes replacement tiles are 1/8 inch different in size from the original (different manufacturing lot). If the new tile is slightly too big, you can use a tile cutter or a pair of tile nippers to trim the edges. If it's too small, you live with slightly wider grout lines around this one tile.
Step 3: Set the New Tile With Thinset Mortar
Premixed thinset mortar in a small tub is the renter-friendly choice. You don't have to mix dry powder with water, and a small $8 tub is enough for 2-3 tile replacements.
What you need:
- Premixed thinset mortar (small tub)
- Notched trowel (1/4 inch notches for floor tiles)
- Tile spacers
- Damp rag (for wiping excess)
- Level (a 12-inch level or a long straightedge)
The set: Scoop about 1/2 cup of thinset onto the back of the tile with the flat side of the trowel. Then flip the trowel and use the notched side to comb grooves through the thinset — these grooves give the air a place to escape when you press the tile down. Hold the trowel at 45 degrees and make parallel lines all in one direction.
Place the tile in the empty spot at a slight angle, then press it flat and wiggle it side to side about 1/8 inch in each direction to collapse the grooves. Place your spacers. Lay the level across the new tile and the surrounding ones. If the new tile is too high, press down harder. If it's too low, lift it up and add more thinset to the back.
Wipe off any thinset that squeezes out into the grout lines with a damp rag — it's much easier to clean now than after it dries. Let it cure 24 hours before you grout.
Step 4: Grout and Seal the Joints
Grout is what locks the tile in place and gives the floor its finished look. Skipping this step is what makes renter tile replacements fail within a year — water gets under the tile and loosens it.
What you need:
- Premixed grout (sanded for joints wider than 1/8 inch, unsanded for narrower)
- Rubber grout float (the flat rubber tool)
- Damp sponge
- Grout sealer (small spray can)
The grout: Scoop a small amount of grout onto the rubber float. Hold the float at 45 degrees and press the grout into the joints around the new tile, working diagonally across the joints (not parallel to them — that pulls the grout back out). Once the joints are full, hold the float at 90 degrees and scrape off the excess.
Wait 15-30 minutes for the grout to haze over (turn from wet-shiny to matte-dusty). Then wipe the tile surface with a damp (not wet) sponge, rinsing the sponge frequently. The haze will come off the tile surface but stay in the joints. Do this 2-3 times until the tile is clean.
Let the grout cure 24-48 hours. Then spray the grout sealer over the new joints and let it dry. The sealer is what makes the grout water-resistant — without it, water seeps in and the grout cracks within a year.
When to Stop and Call the Landlord
Three situations where replacing tile floor goes beyond renter scope:
- More than 4-5 tiles are cracked or loose — usually means the subfloor underneath has a problem (water damage, settling, original install was bad). Spot replacement at that scale just delays the bigger issue.
- The cracked tile is in a wet area (shower floor, around the tub) — replacing one shower floor tile without addressing the waterproof membrane underneath is a recipe for a leak. Landlord should handle this one.
- You can't find a matching tile and the area is highly visible (entryway, kitchen center) — at that point the visible mismatch is worse than the original crack, and a landlord-approved contractor with access to original materials is the right move.
The 2 tiles I did the slow way (without a plan) held up for 18 months before one cracked around the patch. The 2 I did the fast way (with a plan, a closer grout color, and a real tile saw) are still in service 2 years later and you'd have to look hard to find them. The price was the same — about $25 in materials per tile. The difference was the time I spent on each step versus rushing through it.
For everything else — the 1-3 cracked tiles in low-visibility spots, the corner where a heavy item landed once, the spot in front of the dishwasher that finally gave up — the 4-step plan above gets it done in a weekend with under $30 in materials and no special tools beyond a chisel and trowel. None of mine have come loose in two years.
What it actually costs to mud and tape drywall covers the labor math if your tile replacement ends up revealing water damage in the subfloor that needs a bigger fix.
Mold on sheetrock cleanup guide covers the related fix if pulling up the broken tile reveals mold underneath — same PPE rules, slightly different cleanup.


Discussion (0)
Sign in to join the discussion