

It was 9:30pm on a Tuesday when I decided to repaint the popcorn ceiling in my 2019 Berkeley rental. The paint was yellowing, I had a guest coming Friday, and the landlord was in no hurry to fix it. I expected a 2-day project, a rented sprayer, and probably a fight with my roommate about the overspray. What I didn't expect: just 3 hours of actual rolling, a $9 roller, and a finish that looked better than the original. The rest was prep and drying time, so the whole project fit neatly into a single weekend. The trick was the roller, not the technique. Here's the afternoon I spent repainting a popcorn ceiling, and why I now recommend it to anyone with a yellowed ceiling and a free weekend.
Repainting Popcorn Ceiling: Why It's Different From Flat Ceilings
Popcorn texture is basically a layer of styrofoam-like material sprayed onto the ceiling to hide imperfections and dampen sound. When you roll a regular paint roller on it with normal pressure, two things happen: the roller grabs the high points of the texture and pulls them off, and the pressure pushes paint into the low points in a way that makes the whole ceiling look splotchy when it dries.
The solution is a thick-nap roller (3/4 inch or longer) combined with almost zero pressure. The thick nap pushes paint into all the nooks of the texture without grabbing it, and the light pressure lets the texture stay exactly where it is. Pair that with a stain-blocking ceiling paint (Zinsser or Kilz makes renter-friendly versions) and you'll get even coverage in two coats.
The thing you DON'T want to do: use a flat-nap roller, use a regular wall paint, or push hard on the roller. Any one of those will give you the peeling-texture look that makes popcorn ceilings so notorious.
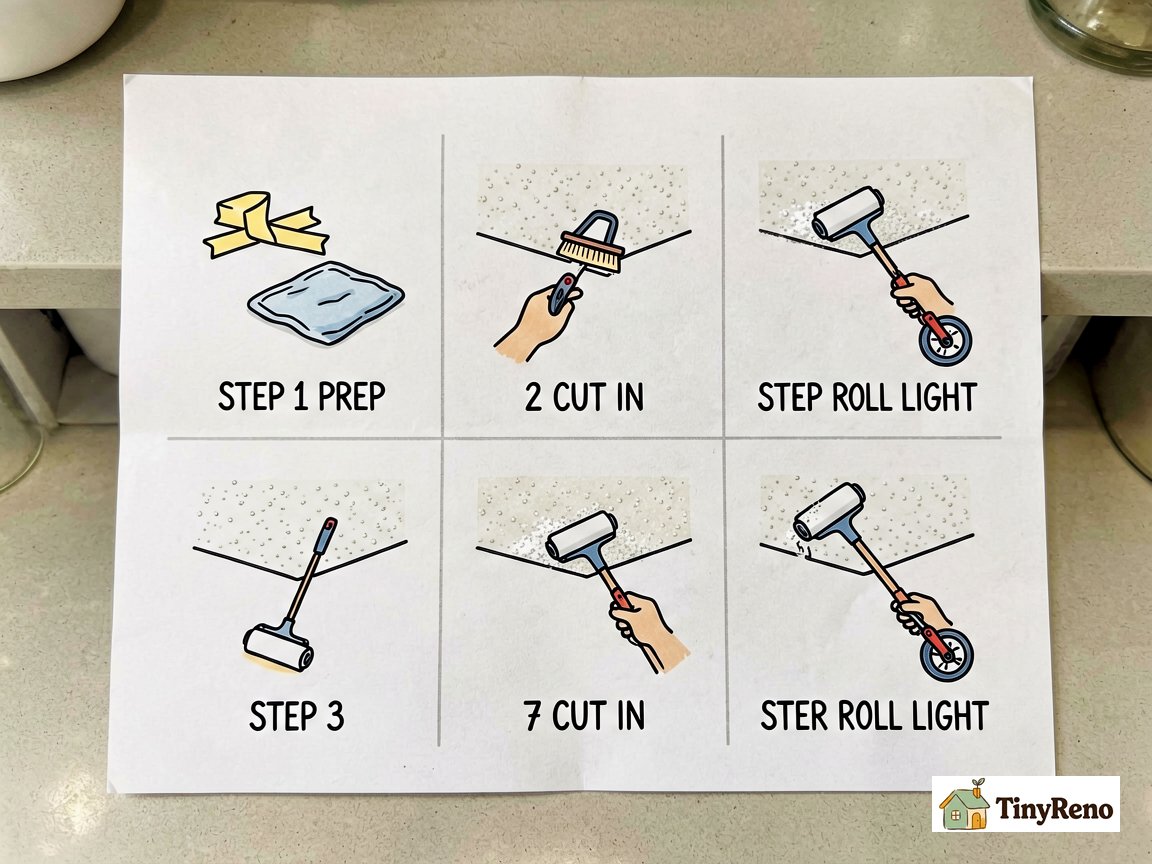
Step 1: Prep the Room (This Is 80% of the Job)
Popcorn ceilings are messy because any pressure on the texture releases tiny dust and texture particles. Prep means containing the mess before you start rolling.
What you need:
- Brown paper or canvas drop cloth (NOT plastic — paint bleeds through)
- Painter's tape (1.5 inch works better than 1 inch for textured edges)
- Safety glasses
- Old clothes or a disposable painting coverall
- A box fan in the window pulling air OUT of the room
The prep: Move all furniture out if possible. If not, push it to the center of the room and drape it in plastic. Lay the drop cloth across the entire floor and tape it to the baseboards so it doesn't shift. Run painter's tape along the wall-ceiling edge on every wall — push it firmly into the corner with your finger to seal it against the texture (this is where most of the bleed-through happens if you skip).
Take down any ceiling fans or light fixtures you can safely remove. Anything you can't remove, wrap tightly in plastic and tape it shut. The pop-corn dust gets into everything.Critical safety step: Flip the circuit breaker for the ceiling fixtures at the electrical panel BEFORE touching any wiring. Test that the power is off by flipping the switch — if the light stays off, it’s safe to proceed. Never skip this step.
Pre-test first: Roll a 6-inch square of the ceiling in a hidden spot (inside a closet, behind a door) with your thick-nap roller and zero pressure. Wait 4 hours to see if the texture stays intact. If it flakes off, stop and call your landlord — the ceiling was pre-painted with the wrong product and will not hold new paint.
Step 2: Cut In the Edges With an Angled Brush
"Cutting in" means painting the 2-inch border along the wall-ceiling edge with a brush before you roll. This is the part of the job where most of the mess happens if you're sloppy — paint bleeds onto the wall and stays there.
What you need:
- 2.5-inch angled sash brush
- Paint container (a small bucket or the paint tray)
- Damp rag (for wiping mistakes immediately)
The cut-in: Dip just the tips of the brush bristles into the paint — about 1 inch deep. Tap off the excess against the side of the container, don't wipe. Hold the brush like a pencil and press the bristles flat against the wall about 1 inch below the ceiling line, then drag upward into the corner. You want paint in the corner, not on the wall.
Work in 2-3 foot sections. If you accidentally get paint on the wall, wipe it off with the damp rag before it dries (water-based ceiling paint wipes off easily if you catch it within 30 seconds).
The reason you cut in first is that rollers can't get close enough to the wall without bumping it. Cutting in first gives you a buffer zone to roll against.
Step 3: Roll With a Thick Nap and Almost Zero Pressure
This is the part that takes practice. The instinct is to press the roller against the ceiling the way you would a wall. With popcorn, you have to fight that instinct.
What you need:
- 3/4-inch or 1-inch nap roller cover (the foam-y kind, not the smooth kind)
- 9-inch roller frame
- Extension pole (4-6 feet, so you're not on a ladder)
- Paint tray with a liner
- Stain-blocking ceiling paint (Kilz or Zinsser brands, flat white)
The roll: Load the roller by rolling it through the paint tray, then rolling it back and forth on the tray's ramp 3-4 times to distribute evenly. The roller should be saturated but not dripping — if paint drips off, it's too loaded.
Attach the extension pole. Starting at one end of the ceiling, place the roller against the popcorn texture and let it glide across with barely any pressure at all. The roller should feel like it's just kissing the ceiling. Move in 3-4 foot sections, overlapping each pass by about 30%.
You'll see the texture darken as the paint soaks in. That's normal — the first coat always looks splotchy because the popcorn absorbs paint unevenly. Let it dry 4 hours (check the paint can for exact time). Apply a second coat the same way. Two coats usually gets full, even coverage.
The big mistake: pressing harder when you see the splotchy first coat. Pressing hard is what pulls the texture off. The splotchiness disappears as the second coat goes on.
What to Do If the Texture Starts Falling Off
Even with perfect technique, sometimes a popcorn ceiling has been painted before with the wrong paint (usually high-gloss wall paint) and the texture pops off in chunks no matter what you do. When that happens:
- Stop rolling the moment you see chunks coming off — pressing harder will only make it worse
- Let the area dry completely (usually 1-2 hours)
- Vacuum up the loose texture with a hose attachment
- Switch to a spray method for that section — A $20 Wagner handheld paint sprayer from Home Depot is a last resort for tiny patches only — it requires practice to avoid over-spraying, which can saturate the texture and make it fall off. For 95% of renters, stick to the thick-nap roller; only use a sprayer if texture is already crumbling despite perfect roller technique
If the texture is coming off across large sections of the ceiling (more than 20% of the surface area), that's a sign the ceiling was never properly sealed before texturing. Stop the project and message your landlord — this is a pre-existing problem, not a paint problem.
When to Skip This and Call the Landlord
Three situations where repainting a popcorn ceiling is the renter's wrong move:
- Water stains covering more than a few square feet — usually means a leak from above that needs to be fixed before any paint goes on. Patching over water stains just hides the problem and the stain bleeds through within weeks.
- Texture is sagging or peeling in sheets — the bond between the texture and the drywall has failed. The whole ceiling likely needs to be re-textured, which is a pro job.
- You don't know if the ceiling has asbestos — popcorn ceilings installed before 1980 may contain asbestos. Don't sand, scrape, or disturb them. The landlord should test before any work happens.
For everything else — the yellowed popcorn ceiling in a living room, the water-stained patch under a bathroom that's been fixed, the patchy touch-up that didn't match — the 3-step method above gets it done in a weekend with under $50 in supplies. The trick really is the roller-and-pressure thing — once you feel it, the whole job becomes obvious.
Hairline cracks in ceiling repair guide covers the related fix for the cracks you'll often find in popcorn ceilings once the paint is off — same toolkit, slightly different prep.
What it actually costs to mud and tape drywall covers the labor math if your popcorn ceiling repair ends up needing a section of drywall re-texturing by a pro.


Discussion (0)
Sign in to join the discussion