

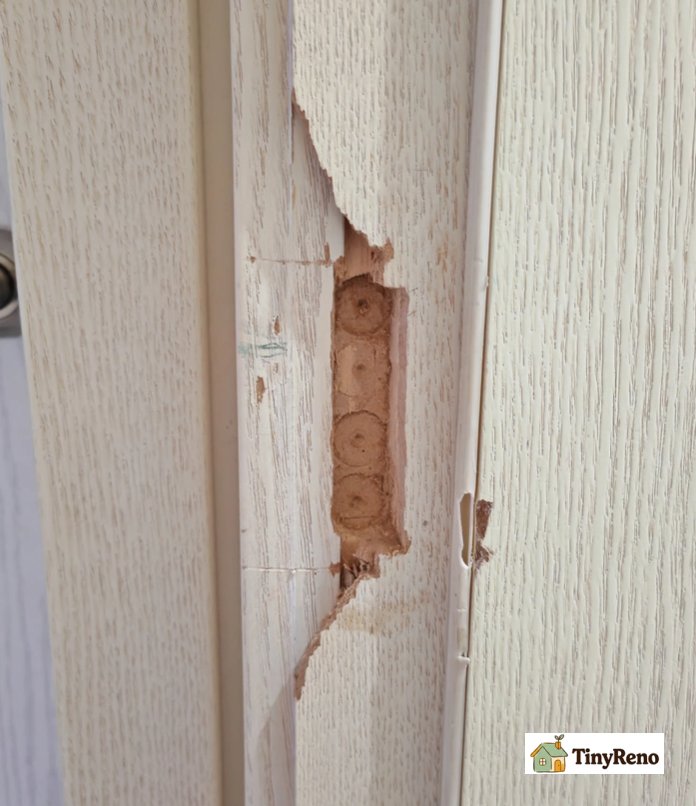
I once kicked my bedroom door open when the lock jammed, and a chunk of the door frame came off with the lock. The landlord's inspection was 9 days away. My security deposit was on the line. I grabbed the cheapest wood filler at the hardware store, the squeezy tube kind, and went to work.
That tube failed completely. The filler ran out of the hole before it set. It shrank as it dried. The next day it cracked. I was back to square one, with 8 days left.
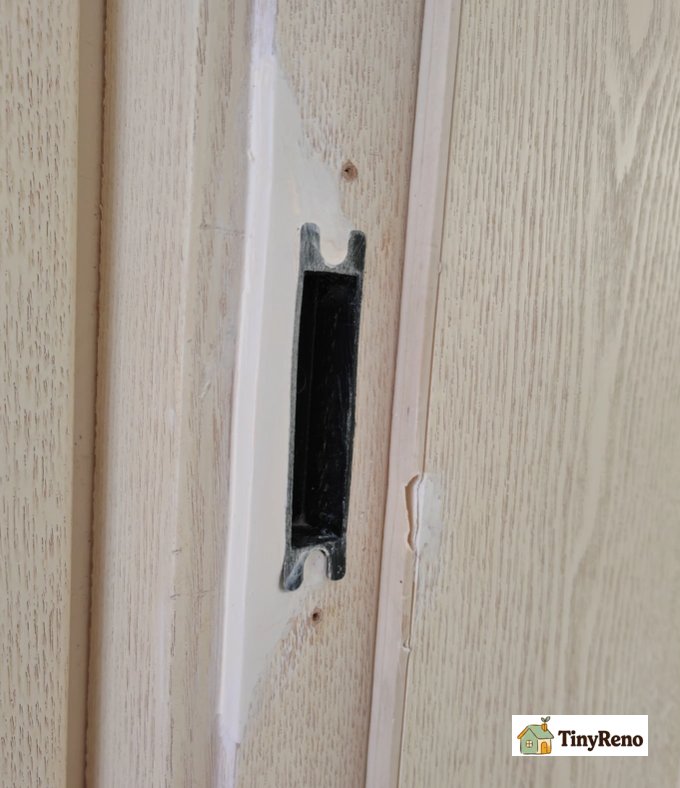
Then I found a different kind of wood filler. It came as two separate putties I had to knead together like dough. It cost $13. It fixed the lock housing, two hinge screw holes, and a chipped door frame in under an hour. That was three years ago. The repairs are still holding.
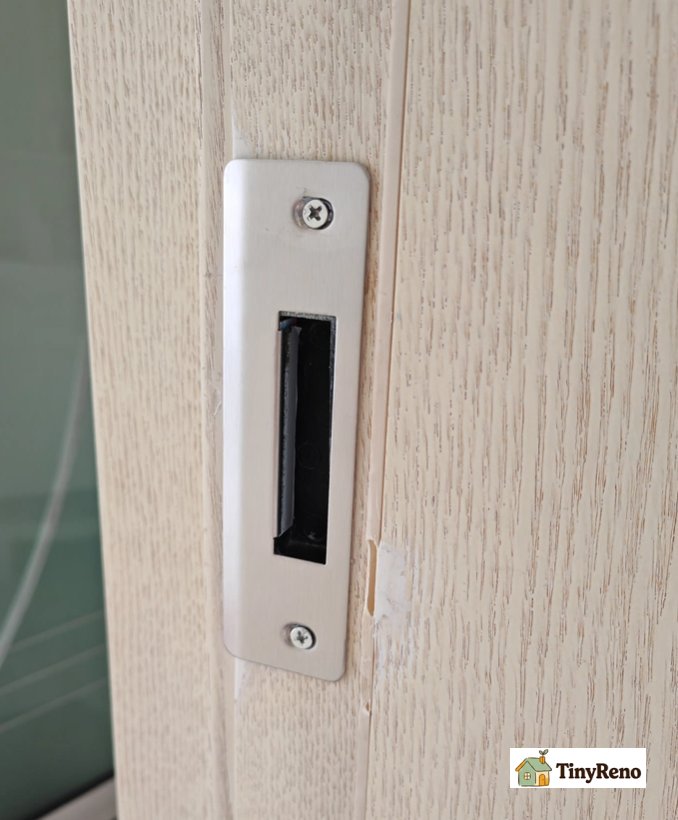
If you've been burned by squeezy-tube wood filler and given up, this is for you. Here are the four mistakes I made, and what actually works.
The 30-Second Mistake That Wasted My First Tube
The squeezy tube wood filler is the default. It's latex-based, white, and water-cleanup. It's great for one job: filling a shallow nail hole or scratch where nothing structural is happening.
The problem is when you try to use it for structural damage. A door lock housing that's broken out. A hinge screw that keeps loosening. A chunk of door frame that's missing. These need a filler that:
1. Stays where you put it (doesn't run) 2. Builds up to fill a 1cm+ deep void (not shrink as it dries) 3. Cures hard enough to hold a screw (not just cover a surface scratch) 4. Bonds to bare wood, not just paint
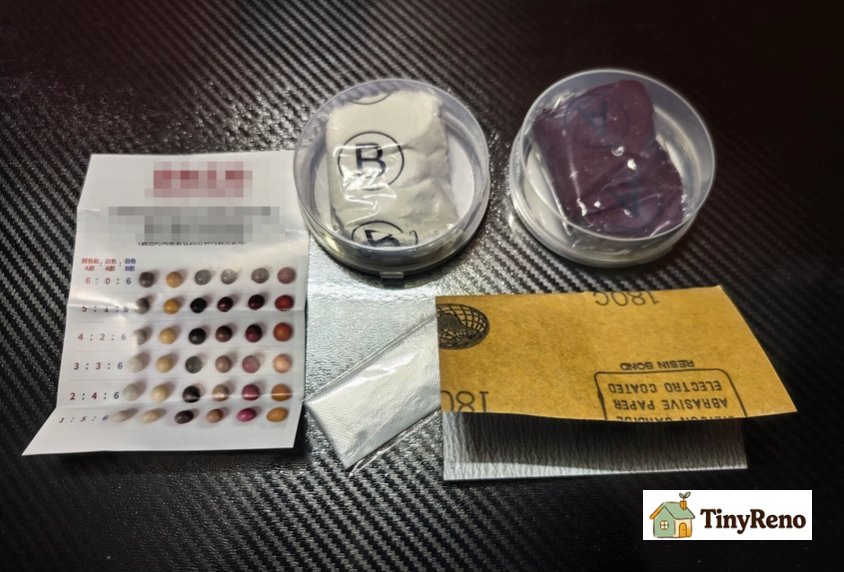
That's a two-part kneadable wood filler, sometimes called AB putty or wood repair paste. It comes as two separate colored putties you slice off, knead together until uniform color, then press into the damage. Once cured, it's harder than the surrounding wood and can be sanded, drilled, and screwed into.
Quick decision rule: - Shallow scratch, nail hole, won't be touched after repair → squeezy tube latex putty - Lock housing, hinge screw, door frame chunk, anything that takes load → two-part kneadable putty
4 Things This Wood Filler Does That Putty Can't
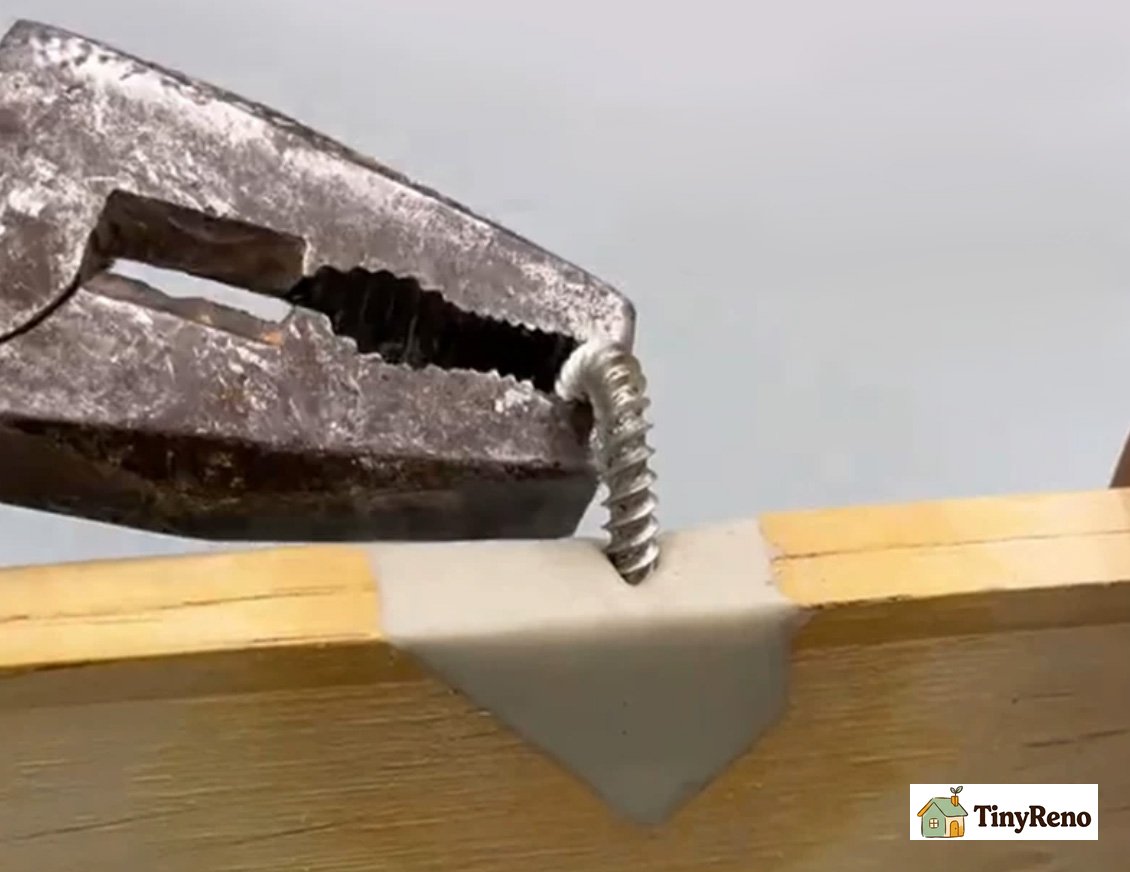
If you've only used the squeezy tube kind, the two-part stuff will feel weird at first. Here's why it's worth the switch:
1. It hardens into something you can screw into. This is the headline feature. The product I'm using markets it as "Threadable screw" — you can drive a screw back into the cured filler and it actually grips. I tested this on a hinge that kept pulling out. Two years later, the hinge is still solid. The squeezy tube stuff crumbles the moment you try to screw into it.
2. You can match your door or furniture color. The product I bought came in 15+ colors — white, oak, walnut, teak, mahogany, beige, gray, black. I picked the closest match, then painted over it with a matching touch-up paint. The repair was invisible from 2 feet away.
3. It doesn't shrink or crack as it cures. Squeezy tube putty loses volume as the water evaporates. Two-part putty cures by chemical reaction, not drying, so it stays exactly the volume you placed. Deep fills don't crack on day 3.
4. It handles temperature swings. The label says "resists high and low temperatures without cracking" — resistant to high and low temperatures without cracking. My front door gets afternoon sun in summer and below-freezing in winter. The filler around the lock hasn't moved.
The 4-Step Method That Actually Holds
This is the order that matters. Skip a step and you'll redo it.
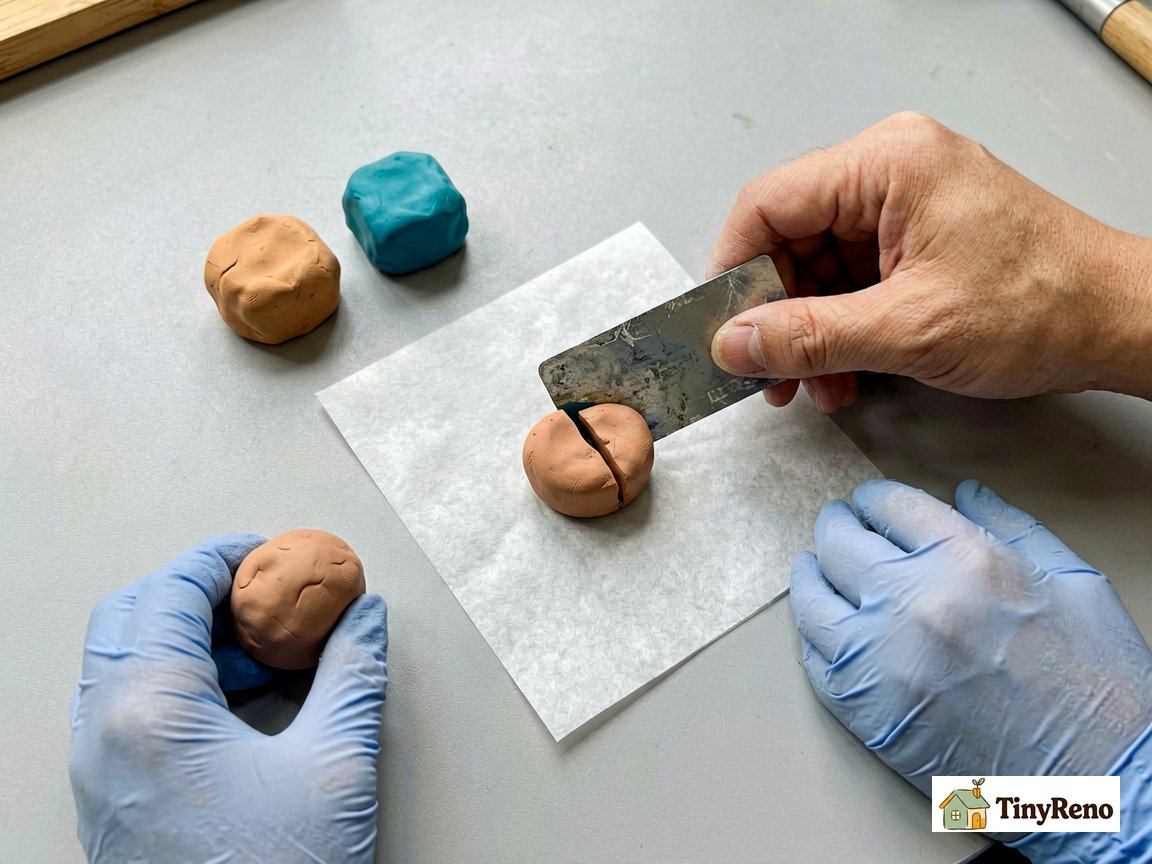
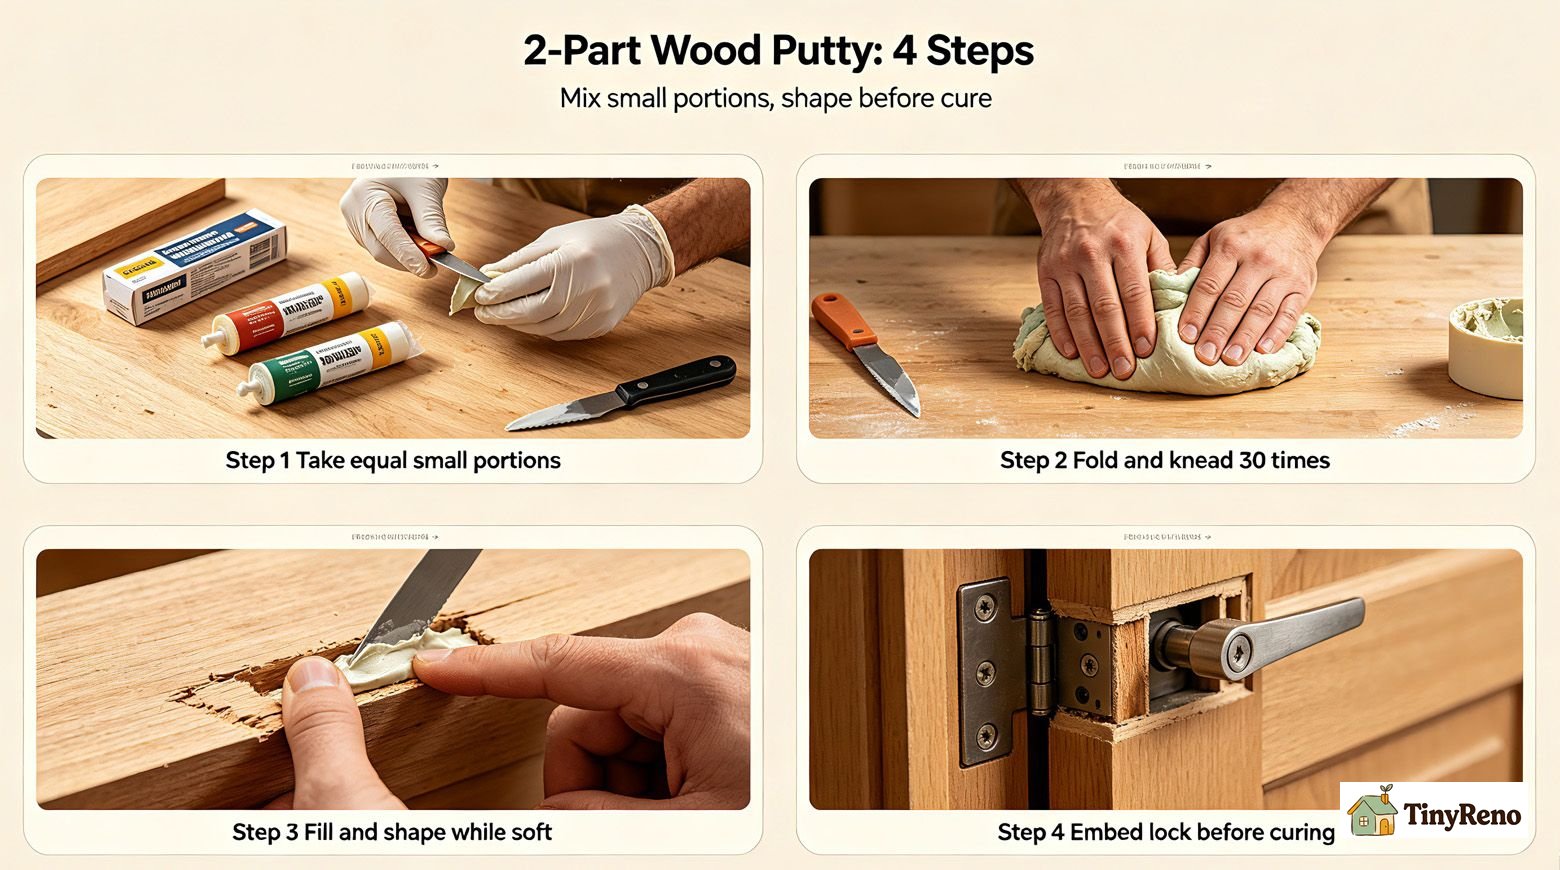
Step 1: Pull off only what you'll use, in equal parts. Both putties are reactive. The moment they touch, the clock starts. If you slice off a big hunk and use a quarter of it, the rest cures in your hand and goes in the trash. Commenters warn about this constantly: "Do not mix the entire batch at once."
Step 2: Fold and knead 30 times until the color is uniform. Don't just smash them together. Fold, press, fold again. The chemical reaction needs even distribution. You'll see streaks of the two colors. Keep folding until they're gone and the putty is one consistent shade. If you stop too early, parts of the putty won't cure properly.
Step 3: Press into the damage while soft, and shape it immediately. This is the part I got wrong twice. The putty is clay-like for about 5-10 minutes. During that window, you can press it in, smooth it with a wet finger or a plastic card, and shape it close to flush. Once it starts to firm up, leave it alone. Trying to reshape cured putty is like trying to sand a brick.
Step 4: For lock housings, set the lock in place BEFORE the putty cures. If you're rebuilding a door lock housing, push the lock mechanism into the cavity first, then pack putty around it. Let the putty cure with the lock positioned correctly. If you fill the cavity first and try to install the lock later, you'll be chiseling cured putty out with a knife. Commenters hit this mistake repeatedly — cured and expanded, the lock won't fit.
4 Mistakes I Made That You Can Avoid
Mistake 1: I didn't wear gloves the first time. The putty bonds to skin as well as it bonds to wood. It took me half an hour to remove it by scrubbing my hands with dish soap, hand soap, and alcohol. Wear nitrile gloves, not the loose plastic food-prep kind — they snag on the putty and make it worse.
Mistake 2: I tried to sand it smooth after it cured. Big mistake. Once fully cured (24 hours), this stuff is harder than the wood around it. One reviewer tried an angle grinder on a lump they didn't flatten in time. The grinder threw sparks. The lump didn't budge. Save yourself: shape it soft, or plan to leave it slightly raised and live with it.
Mistake 3: I skipped the touch-up paint. The color match from the putty alone is close, not exact. After 6 months of oxidation, the surrounding wood shifts color and the putty stands out. One coat of matching touch-up paint solves this. The brand I used sells it as a set with the putty.
Mistake 4: I patched an active leak. My bathroom door frame had water damage from a slow leak I hadn't fixed yet. I patched over the soft, damp wood. The putty cured fine, but three months later the wood behind it kept rotting and the patch fell off. Fix the source first, let the wood dry out completely, then patch.
My Repair Kit for $15
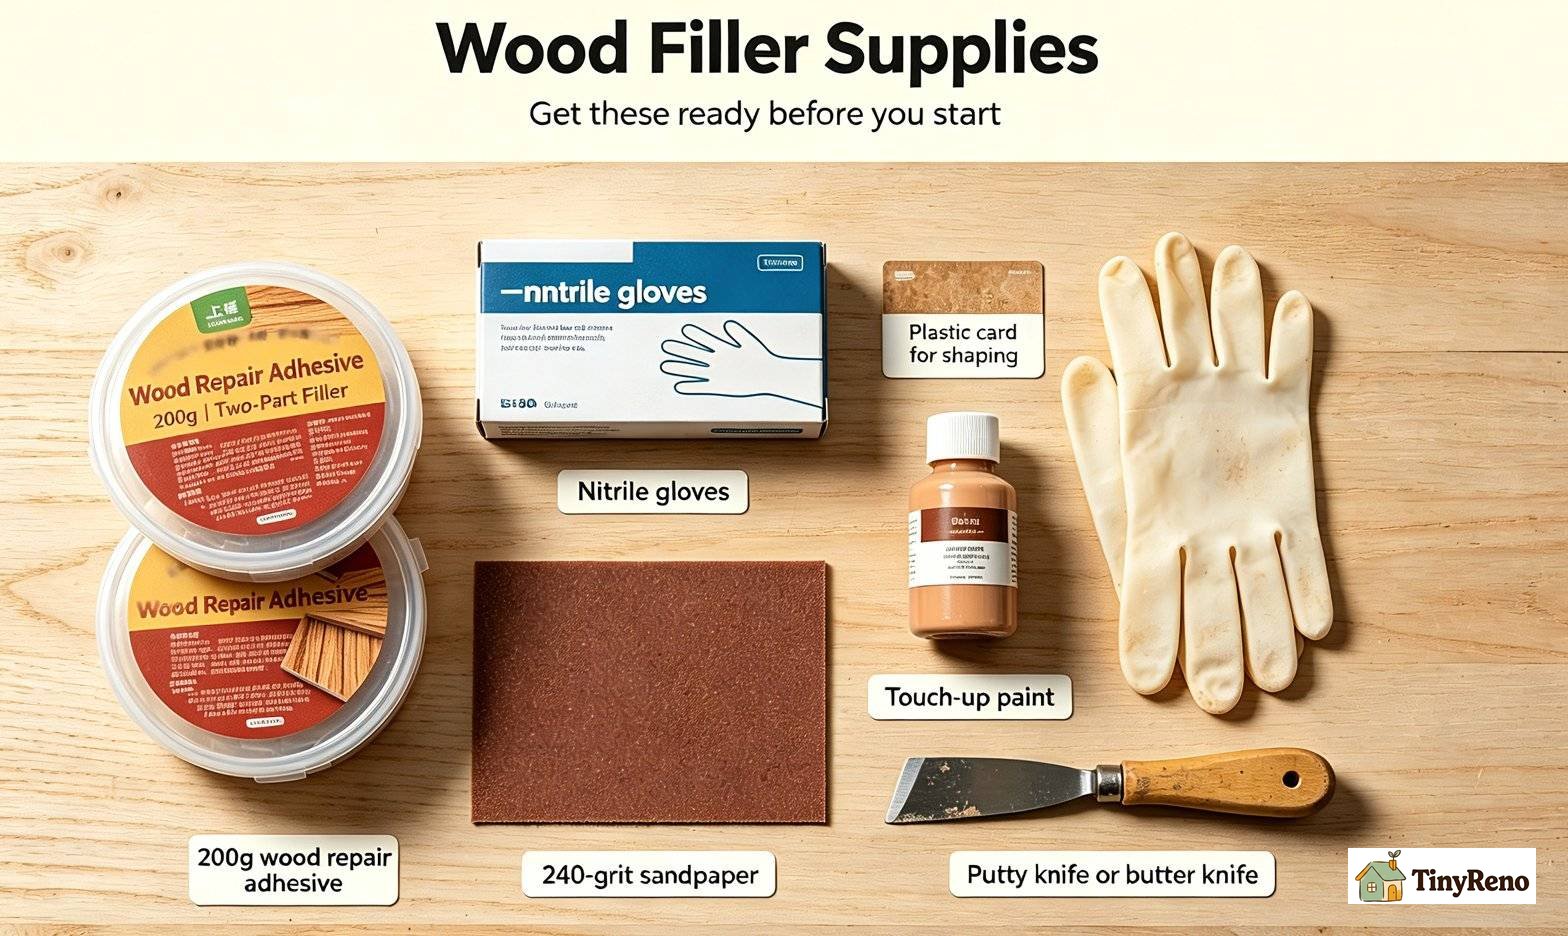
You don't need anything fancy. Here's what actually goes in the box:
- One 200g two-part wood filler (enough for 2-3 lock housings or 5-6 hinge screws) - A box of nitrile gloves (the cheap disposable kind) - A plastic card (old credit card, hotel key, expired gift card) for shaping - A small jar of matching touch-up paint - A sheet of 240-grit sandpaper for any rough edges after cure - A putty knife or old butter knife if you have one — a plastic card works in a pinch
Total: about $15 if you buy everything new. Half that if you already have sandpaper and a plastic card lying around.
When Wood Filler Won't Work
This stuff is good, but it has limits. Skip the repair if:
- The wood is broken across more than a third of its cross-section. A chair leg that's snapped halfway through won't hold under load even with filler. Replace the piece or the whole item. - The damage is from active termites or carpenter ants. Filling the surface doesn't kill the colony. Call pest control first. - The substrate is MDF, particleboard, or pressed cardboard. These materials don't have real wood grain for the filler to bond to. The patch will pop out within weeks. - The wood is still wet or actively rotting. Dry it out first, fix the moisture source, then patch.
Why This Beats Calling a Carpenter (For a Renter)
Here's the math that made me try this instead of calling someone:
A locksmith or handyman visit: $80-150 for the visit, plus $20-50 in materials, plus scheduling around their availability. They'd need to come back 24 hours later for a second coat or to test the lock.
The two-part filler kit: $13 for the putty, $5-7 for the touch-up paint, plus an hour of my time across two evenings. Apply at 8pm, leave to cure overnight, sand and paint the next evening.
Multiple reviewers report the same calculation: "a handyman quoted them a few hundred dollars for the visit; the putty and paint kit cost around fifteen."
For a renter, the bigger win is timing. You can patch the morning of an inspection. You can't always get a handyman to show up on three days' notice.
If you're staying in the rental long-term, fixing the door yourself also keeps your landlord from finding out there's an issue. Many landlords will patch with cheap materials anyway and charge you double. Doing it yourself with quality filler costs less and looks better.
FAQ
How long does two-part wood filler take to fully harden?
About 24 hours in normal indoor temperatures (65-75°F). It cures faster in warm weather and slower in cold. One reviewer in a hot climate reported it cured in 8 hours. A reviewer in a cold garage left it for 48 hours. Wait the full 24 hours before sanding or driving screws into the repair.
Can you really drive a screw into cured wood filler?
Yes. This is the headline feature of two-part kneadable fillers. The cured putty is harder than the surrounding wood and grips screw threads. I tested this on a hinge that had been pulling out of a door frame for two years. The filler took the screw, and the hinge has been solid for three years since. Multiple reviewers confirm this works.
Can I paint over wood filler to match the door color?
Yes, and you should. The filler color match is close but not exact, and surrounding wood will shift color over time while the filler doesn't. Use a matching touch-up paint sold as a set with the filler, or take a chip of your door to a paint store for a custom mix. One coat of touch-up paint makes the repair invisible.
How I Patched My Door (The Actual Steps)
Step 1: Slice off equal parts of A and B putty. A putty knife or the edge of an old credit card works. Start small — you can always mix more, but you can't un-mix what you've already kneaded.
Step 2: Fold and knead for about 30 seconds. Press, fold, press, fold. Stop when the putty is one uniform color with no streaks. If it's still streaky, it won't cure evenly and you'll get soft spots.
Step 3: Press the putty into the damage and shape it flush. You have about 5-10 minutes of working time. Use a wet finger, a plastic card, or a putty knife to smooth the surface as close to flush as you can get it. Don't wait — once it firms up, it stops taking shape.
Step 4: For lock housings, position the lock in the putty before it cures. Push the lock mechanism into the wet putty so it sets in the right spot. If you're just filling a screw hole or surface chip, skip this step.
Step 5: Wait 24 hours, then sand and paint. After full cure, sand any high spots with 240-grit paper. Brush on matching touch-up paint. Let the paint dry. The repair should be invisible from arm's length.
---
If you want the renter's full SOP for refreshing paint over patched wood (so the paint doesn't peel off the filler), my paint room order guide walks through the prep steps. And if you've got smaller holes and gaps — picture-frame dents, furniture nicks, the kind under 5mm — super glue with sawdust fills those cheaper and faster than this two-part putty.


Discussion (0)
Sign in to join the discussion