

I learned to cut in by painting my bathroom ceiling three times in one weekend. The first time I tried to roll right up to the wall and got paint on the wall. The second time I taped everything off and the tape let bleed through anyway. The third time I grabbed an angled brush, loaded it the way a guy at Home Depot showed me, and managed to brush a line about two feet long before the paint started dragging and I had to reload. The line was ugly. But it was my ugly line, and I learned more from those three failures than from any of the YouTube tutorials I watched beforehand.
That ceiling eventually got a fourth coat, and that fourth coat is when something clicked. Cutting in isn't really a skill — it's a rhythm. Once you have the rhythm, you stop thinking about the line and start thinking about the room. Before that, every stroke feels like defusing a bomb.
This article is about the rhythm part. Not the part where you tape off the entire room and pretend you're being careful. The part where you can brush a clean line along trim, ceiling, and corner in one pass, without tape, and have it look like a person who knew what they were doing did it.
Why Most People Hate Cutting In (And Why It's Mostly the Brush)
When I asked the Home Depot guy why my lines looked terrible, he didn't even ask to see my technique. He asked what brush I was using. I pulled out a 3-inch flat brush from a multi-pack. He handed me a 2.5-inch angled sash brush, said "this one," and walked away.
That brush is the entire answer to about 80% of cutting-in problems.
Flat brushes are for rolling walls, edges, and big flat surfaces where the bristle tip doesn't matter. Cutting in requires precision at the very edge of the paint stroke, and a flat brush doesn't have a precise edge — it has a wide blunt one. Every stroke with a flat brush leaves a soft, fuzzy margin where the bristles splay out, and that's why your lines look like they were drawn with a marker held sideways.
Angled sash brushes have bristles cut at a slant so the tip is sharp. When you hold the brush so the long bristles touch the wall and the short bristles face the trim or ceiling line, the line you paint is the line you intended. There's a learning curve to holding the brush at the right angle, but once you have it, the difference is night and day.
The other thing about the brush is the size. 2.5 inches is the sweet spot for most trim and corner work. Anything smaller and you're making dozens of strokes to cover a single wall-to-ceiling run. Anything bigger and you can't control the edge. Buy a decent one — a $10 angled sash brush from Purdy or Wooster will last 5+ years if you clean it. The 99-cent ones shed bristles into your paint and have floppy tips that won't hold an edge.
Two more things that matter before we get to technique:
Quality of paint matters more for cutting in than for rolling. Cheap paint drags, sags, and dries unevenly. A $35-per-gallon paint flows off the brush and self-levels into a clean line. You can hide a lot of sins with a good brush and bad paint. You can't hide anything with a bad brush and good paint.
Don't cut in cold paint. If the can has been in the garage, let it come to room temperature for a few hours. Cold paint is thicker, drags more, and shows every brush mark.
The "Loaded Brush, Drained Brush" Rhythm
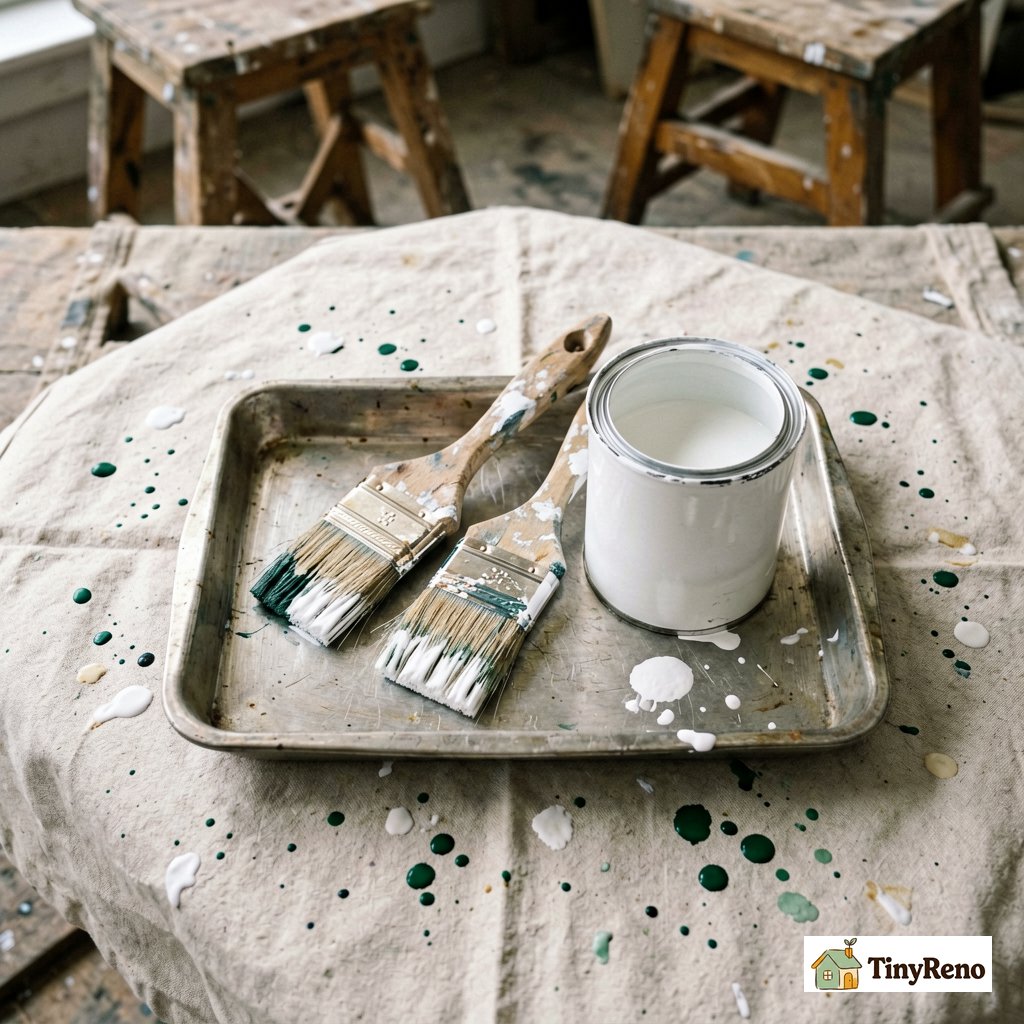
Once you have the right brush and paint, cutting in is two moves repeated over and over. The first move loads the brush with paint. The second move drains most of that paint off in a controlled stroke along the line you're cutting in. Then you reload.
Here's the rhythm:
Load. Dip the brush into the paint, about 1 to 1.5 inches deep. Pull it out and tap — don't wipe — both sides of the brush against the inside of the can to remove the excess. You want the brush fully loaded but not dripping. A dripping brush is too much paint, and too much paint is what causes the runs and sags that show up under the line.
Position. Hold the brush like a pencil, not like a broom. Your index finger should be near the ferrule (the metal band that holds the bristles), with light pressure. The brush handle should sit at roughly a 45-degree angle to the wall, with the long bristles pointing toward the wall and the short bristles pointing toward the trim or ceiling line.
Stroke. Touch the long bristles to the wall about half an inch away from the line you're cutting in. Pull the brush toward the line in one smooth motion, letting the bristles flex and the short edge form the actual line. The stroke should be about 12 to 18 inches long before you reload — long enough to be efficient, short enough to keep the line clean.
Reload. Dip, tap, position, stroke. Dip, tap, position, stroke. After about 20 minutes of this, you'll stop thinking about the individual moves and start feeling the rhythm.
The mistake everyone makes is trying to load too much paint at once and then trying to "spread it" along the line by going back and forth. Don't do that. Each stroke should be a fresh deposit of paint, not an attempt to stretch one deposit as far as possible. Back-and-forth strokes are how you get thick spots, thin spots, and visible lap marks where one stroke overlaps another.
One thing to accept: your first session will produce 70% good lines and 30% lines you'll need to touch up. The 30% is normal. Touching up is faster than agonizing over each stroke, and nobody but you will ever see the difference at normal viewing distance.
Ceiling Line First, Then Walls, Then Trim
Most people cut in the trim first because trim is the most visible part of the room. That's the wrong order.
The reason: paint drips. When you cut in a ceiling line, small amounts of paint will get onto the wall below the line. When you cut in a wall-to-trim line, paint will get onto the trim. If you do ceiling first, the wall paint you roll on later covers the wall marks. If you do trim first, the wall paint gets on the trim and you have to wipe it off before it dries.
The order that minimizes cleanup is:
- Cut in the ceiling line (where wall meets ceiling).
- Cut in any inside corners (where two walls meet).
- Roll the walls.
- Cut in the trim (where wall meets baseboard, door frame, window frame).
- Paint the trim with a brush or pad.
Some people skip step 4 entirely and just use a brush to paint the trim directly. That's fine if the trim is the same color as the walls, but if it's a different color (which is most rooms), you have to cut in at the wall-trim line to keep the wall color off the trim.
This is also the order that matches what the paint dries against. Paint drips onto an unpainted surface are easy to wipe. Paint drips onto a freshly painted surface either smear or pull up the paint underneath. Doing ceiling first means any ceiling paint that gets on the wall is covered by the wall paint later. Doing trim last means any wall paint that gets on the trim is wiped off while still wet, before you start painting the trim itself.
If you only remember one thing from this article, remember this order. It will save you more time than any brush or technique upgrade.
The 3 Cuts That Always Look Bad (and How to Fix Each)
Even with the right brush and the right order, three specific cuts trip up almost everyone. Here's how to handle each.
Outside corners. This is where two walls meet at a 90-degree edge — the corner of the room that sticks out toward you. Cut in one wall first, stopping just short of the corner. Then cut in the second wall, brushing away from the corner with the tip of the brush. Don't try to do both walls in one stroke. The brush tip can't reach the very edge of the corner if you're approaching from one side, and you'll get a gap that's hard to fill cleanly.
Inside corners. This is where two walls meet going away from you — the back corner of the room. Same logic in reverse: cut in one wall, then the other. The trick on inside corners is to cut in the second wall by stroking toward the corner with the tip of the brush, not away from it. Going away leaves a gap right at the seam.
Long straight ceiling runs. A 10-foot ceiling-to-wall line is the hardest single cut in any room. The temptation is to do it all in one stroke. Don't. Break it into 3 to 4 foot segments. Pull the brush toward you along the line, then stop, reload, and start the next segment so it slightly overlaps the previous one. Slight overlap is fine if the paint is wet; big overlap causes lap marks.
There's one more cut that always looks bad the first time: around light fixtures, outlet covers, and window latches. The fix for these is to unscrew the cover plates before you paint, paint around the box with the brush tip, then put the cover plate back on. It looks 10x more professional and takes about 30 seconds per outlet. If you're renting, keep the cover plate screws in a baggie so you don't lose them.
When You Should Just Use Tape (and Stop Pretending You Don't Need It)
Cutting in without tape is a fun skill to learn and a useful one to have. It is also not always the right choice. There are four situations where tape is genuinely the better tool, and pretending otherwise is just stubbornness:
Dark color on a light wall, or vice versa. The contrast between the colors makes any line wobble or imperfection show up as a visible color shift. Tape gives you a clean line that you literally cannot brush by hand on the first try. For accent walls, tape is the right call.
Gloss or semi-gloss paint. Higher sheen shows every brush mark and every wobble in the line. Satin and eggshell are more forgiving. Flat and matte are the most forgiving. If you're using gloss, tape.
Textured walls (popcorn, knockdown, orange peel). The brush tip catches on the texture and leaves a jagged line no matter how good your technique is. Tape against a textured ceiling or wall gives you a line that follows the texture instead of fighting it.
Long runs without breaks. If you have a 20-foot wall with no windows or doors to break it up, the eye will catch even a 1/16-inch wobble in the line. Tape gives you a perfectly straight reference. For a 6-foot wall between two windows, you can brush it freehand and it'll look fine.
I've done all of these without tape. I've also done them with tape. The without-tape versions took longer and looked worse. The with-tape versions took less time and looked better. Use the right tool for the job.
Cleanup That Doesn't Ruin the Brush
If you're using latex (water-based) paint, cleanup takes about 90 seconds if you do it right after you finish painting. If you let the brush sit overnight, the paint dries in the bristles and the brush is basically dead.
Here's the routine:
- Wipe the brush on the rim of the can or on a piece of cardboard to remove as much paint as possible.
- Rinse under warm running water, working the bristles with your fingers from ferrule to tip. Don't start at the tip and work backward — that pushes paint deeper into the brush.
- Add a drop of dish soap, work it into the bristles, then rinse until the water runs clear.
- Shake out the excess water and reshape the bristles with your fingers back to the original angle.
- Hang the brush upside down or lay it flat — never stand it on its bristles, which bends them permanently.
A brush cleaned this way will last years. A brush left soaking in a jar of water overnight will be unusable within a month because the ferrule rusts and the bristles start falling out.
If you're switching colors mid-project (say, painting the walls one color and the trim another), wrap the brush in a damp rag and seal it in a plastic bag. It'll stay usable for 2 to 3 hours. For longer pauses, rinse the brush and re-wrap it.
Discussion (0)
Sign in to join the discussion