

I patched eight nail holes and two doorknob dings in my last apartment the night before move-out. The landlord's walkthrough the next morning took about three minutes. She stopped once, pointed at one of the larger patches, and said, "You can still see that one." I could. She didn't charge me for it, but the deposit took three weeks longer to come back than the lease said it would.
Most of the drywall patching tutorials online cover the tools and the technique — the patch compound, the sanding, the primer, the second coat. Those are all fine. None of them cover the actual reason your patch stands out, which is that the color doesn't match. The hole gets filled. The wall doesn't look the same. That mismatch is what landlords notice, and it's what this article fixes.
1. The Patch Everyone Can See (And Why)
About 90% of the patches I've done wrong were wrong for the same reason. I filled the hole. I sanded it flat. I painted it. It still looked patched. Not because the patch was bad — because the paint on the patch was a slightly different color than the paint around it.
Wall paint fades over time. The patch you just painted is the original color from the can. The wall around the patch is six months or six years of UV light, humidity, and dust. Those two colors don't match, no matter how carefully you painted. Most landlords and tenants assume the difference comes from poor technique. It usually doesn't. It comes from the wall getting older and the patch being new.
This is fixable. Not 100% — you'll never make a patch truly invisible unless you repaint the whole wall. But to the point where the landlord doesn't point at it? That part is fixable, and it's mostly about color, not technique.
2. The Three Sizes (Why They Need Different Fixes)
Drywall damage isn't one thing. The repair method changes completely based on the size of the hole, and so does the color-matching difficulty.
- Small nail holes (≤ 1/4 inch). The kind left by a picture hanger. A pea-sized dab of pre-mixed patch compound, pressed in with a putty knife, sanded flat, painted over. About 5 minutes per hole. The color match is easiest here because the patch is small — any color close to the wall reads as "wall" from arm's length.
- Medium holes (1/4 to 2 inches). The kind left by doorknobs, picture hooks that pulled out, or accidents with furniture. Self-adhesive mesh patch ($3 to $5) sticks over the hole, then two coats of patch compound, sanded, painted. About 30 minutes plus 24 hours drying. The color match is hardest here because the patch is large enough to notice but small enough that you can't repaint the whole wall.
- Large holes (> 2 inches). Need a backing piece of wood, a piece of new drywall screwed in, three coats of compound, sanded, primed, painted. This is pro territory for most renters — call the landlord.
Color matching gets harder as the patch gets bigger. Most renter damage is the middle category, and that's the focus here.
3. The Color Match (What the Tutorials Skip)
Four real ways to get the color closer than the can-of-paint-on-the-wall approach:
- Take a paint chip to the store for a custom match. Most paint stores (not big box hardware stores, the actual paint stores) will color-match a chip for $5 to $15 per quart. Bring in a 1-inch square chip cut from inside a closet where the damage is minimal. Lead time is 1-3 hours. This is the most accurate method.
- Sponge blending on the second coat. Instead of brushing the second coat in straight strokes, dab it on with a damp sponge in a stippling motion that matches the surrounding texture. The randomness of the dab breaks up the edge between the patch and the original paint. Works well on eggshell and satin. Doesn't work well on flat.
- Wall patch pen or marker. A small bottle of touch-up paint in a marker tip ($4 to $8). Generic color selection, so a 70% match at best. Good for emergencies where you have hours, not days. The color fades faster than wall paint.
- Texture spray for textured walls. If your wall has any kind of texture, the patch will read as "different texture" even with perfect color. A can of spray texture ($8 to $15) matched to your wall pattern, applied in light coats, hides the texture difference. Practice on cardboard first.
The fastest method is the patch pen. The most accurate is the paint chip match. For most renters, the paint chip match is worth the extra hour.
4. The Five Details That Make a Patch Disappear
Even with good color, a patch can read as "patched" if the texture or gloss is slightly off. Five details that close the gap:
- Gloss level. Satin and eggshell are common wall finishes. Patch with flat paint over a satin wall and the patch looks matte against the slightly-shiny original. The difference reads as "different color" even when it's the same color. Buy paint in the same gloss level as the original. Look at the wall at an angle to the light — flat looks chalky, eggshell has a soft sheen.
- Brush stroke direction. If the wall was rolled in vertical strokes, brush your patch in vertical strokes. Brush stroke direction is visible on close inspection.
- Drying time. Each coat of compound needs at least 24 hours to fully cure. Sand it early and you get a chalky mess that doesn't take paint evenly. Paint it early and the patch shrinks visibly within a week, creating a depression that looks like a new hole.
- Second paint coat. The first coat almost always looks slightly different from the wall around it. The second coat blends it. Don't skip the second coat because the first looked "close enough."
- Wet-edge blending. When painting the second coat, work from the patch outward into the surrounding paint while the edge is still wet. If the edge dries before you blend it, you'll see a hard line where the patch ends.
I missed the gloss level on one patch in my second apartment — patched with flat, wall was eggshell. The patch was the exact right color, but it still stood out because it was matte against the surrounding sheen. Landlord didn't deduct, but did mention it. Took the security deposit return an extra week.
5. Which Patch Kit is Renter-Friendly
Three kits I've used, ranked from most renter-friendly to most overkill:
- DAP DryDex Dry Time Indicator. About $6. Pre-mixed compound that goes on pink and dries white, so you can see when it's ready to sand. The indicator feature means no guessing on drying time. Best for first-time patchers.
- 3M Patch Plus Primer. About $9. Compound with primer mixed in, so the first paint coat doesn't soak in unevenly. Saves one step. Slightly harder to sand than DAP.
- Pro Grade multi-pack. About $15. Five-gallon bucket of dry mix you mix yourself. Designed for contractors doing whole-house patches. Massive overkill for a renter patching 3-5 holes.
Color matching is the same across all three — the compound doesn't carry color. The kit is just the filler. Paint is separate.
6. Texture Walls: The Hardest Case
Textured walls (orange peel, knockdown, popcorn) are the worst case for invisibly patching. The reason is that the patch is flat, the wall around it is textured, and that difference shows up regardless of how good your color match is.
Three workarounds, none of which are 100%:
- Spray texture in light coats. Aerosol cans of wall texture ($8 to $15) come in different patterns — fine, medium, heavy. Match the can to your wall. Spray in light passes from about 18 inches away. Practice on cardboard first.
- Sponge stippling. Dip a sponge in thinned compound and dab it onto the patch to mimic the surrounding texture. Takes practice and rarely matches perfectly. Better than nothing.
- Accept 80% invisibility. The honest answer for most renters. The patch will be visible if you know where to look. It will not be visible at normal viewing distance during a walkthrough. Most landlords don't lean in with a flashlight looking for texture mismatches.
One case where you should not DIY: popcorn ceiling patches. The texture is hard to match and the ceiling is harder to reach. If your damage is on a popcorn ceiling, this is the time to ask the landlord if they have a preferred contractor.
7. The 24-Hour Walkthrough Timeline
Patch compound needs 24 hours to fully cure between coats. If your move-out is on a Sunday, here's how to back-time the patching:
- Friday evening: Apply the first coat of patch compound to all holes. Let dry overnight.
- Saturday morning: Light sanding, second coat of compound where needed. Let dry through the day.
- Saturday afternoon: Final sanding, primer if needed, first coat of paint.
- Saturday evening: Second coat of paint on the patches that need blending.
- Sunday morning: Final visual check, touch up anything that shows.
This assumes you have the paint already. If you need to take a chip to a paint store for a custom match, add 2-3 hours on Friday morning for the round trip and the wait.
What if you don't have 48 hours? Patch only the largest 3-5 holes. The rest, you can ask the landlord in writing to deduct a small amount from the deposit instead. Most landlords prefer $20 off the deposit to dealing with a half-done patch job.
8. What You Don't Patch (Deposit Strategy)
Three classes of damage I don't patch when I move out:
- Pin holes (≤ 1/8 inch). The kind left by small finishing nails. These are invisible at arm's length and most landlords don't even look for them. I leave them. If the landlord points one out, I'll patch it, but I won't pre-emptively chase them.
- Pre-existing paint damage. Chips, peels, and fade that were already there when I moved in. Photographed during move-in (you did this, right?), so they aren't my problem at move-out. I photograph them again during walkthrough.
- Color mismatches outside my unit. If the wall was painted a slightly different color from the rest of the apartment and the patch makes that mismatch more obvious, that's the landlord's paint problem, not mine.
The strategy here is that patching well takes time, and time at move-out is limited. Spend the time on the holes that a landlord will actually notice (medium holes, large holes, holes in obvious places like behind the front door). Skip the ones that take as much time to patch as they're worth.
9. The Mindset (Perfect Is the Enemy of Done)
The one thing I've learned after patching holes in four apartments: trying to make the patch 100% invisible almost always makes it more visible.
The reason is attention. A small, slightly-off-color patch in a wall that otherwise looks normal reads as "wall with a small thing on it" — fine, ignorable. A perfectly-done patch that took three hours and six coats of compound reads as "wall that someone spent hours on" — which makes the landlord wonder what happened there in the first place. They're more likely to inspect it. Which makes any imperfection more visible.
The honest strategy is: patch to "I wouldn't notice if I wasn't looking." That's about a 90% color match and a 95% texture match. Most landlords don't lean in with a flashlight. They're checking for big damage — gouges, stains, missing fixtures. A medium patch that blends into the wall at arm's length passes the walkthrough.
If you do want 100% invisibility, you have to repaint the whole wall corner-to-corner. That's a weekend of work for one wall and a security deposit deduction of maybe $30 if you don't do it. The math doesn't usually work out.
10. The $20 Kit That Fixes 90% of Renter Holes
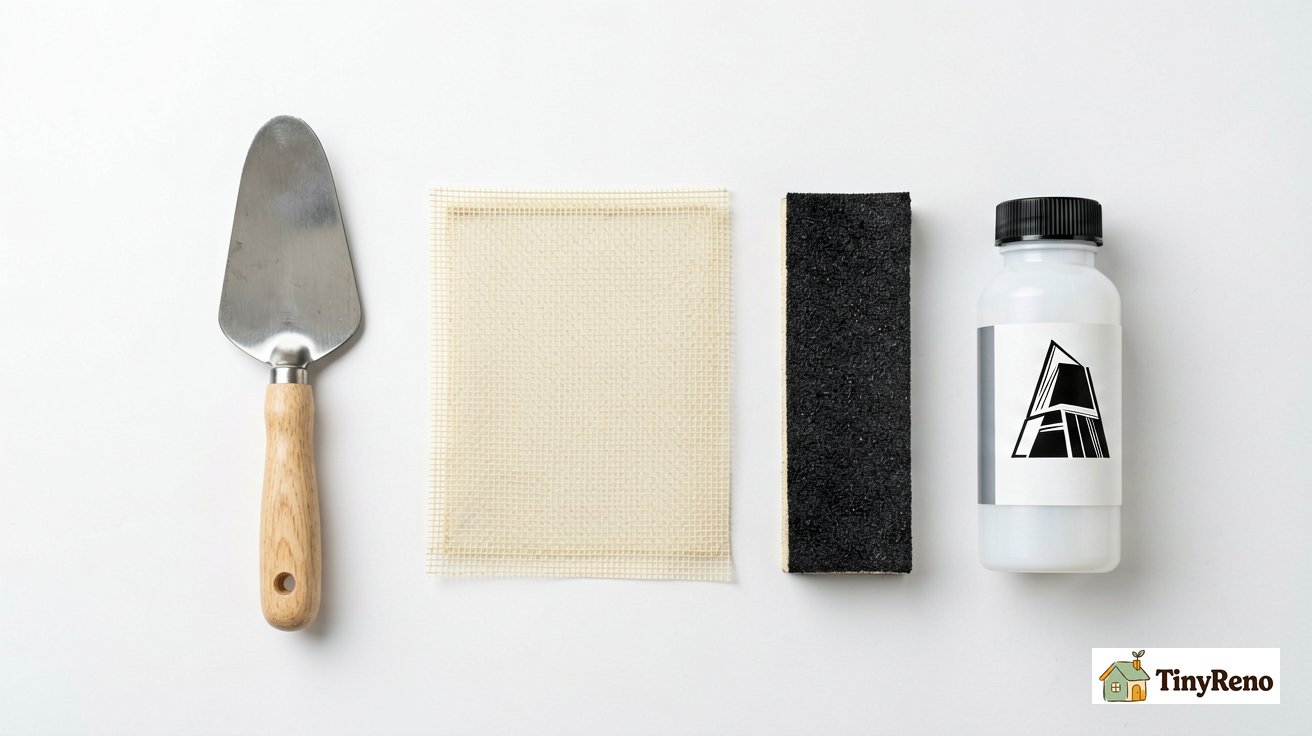
The kit I keep for move-out:
- One small tub of DAP DryDex patch compound (about $6)
- One 3-inch putty knife (about $4)
- One pack of self-adhesive mesh patches in 4-inch and 6-inch (about $5)
- One small foam sanding block (about $2)
- One sample-size can of paint matched to the wall (about $5 if the color is generic; up to $15 if I need a custom match)
- One 2-inch angled brush for paint (about $4)
Total: $26 to $36 depending on the paint. Time to patch a typical 1-bedroom apartment (8 nail holes, 2 doorknob dings, 1 small accident): about 4 hours spread across a Friday evening and Saturday. The 24-hour drying time between coats means I start on Friday for a Sunday walkthrough.
In my last apartment, I patched eight holes plus two doorknob dings the night before. The walkthrough took three minutes. The landlord pointed out one patch (which I knew was visible), didn't deduct anything. The deposit came back in full, three weeks later than the lease said but in full. The $30 kit and the four hours were worth more than the $200 I would have lost to deductions.
The patch never goes fully invisible. It goes invisible enough that nobody looks twice. That's the goal. That's the whole game.


Discussion (0)
Sign in to join the discussion