

My first window AC didn't cool the room for the first three days. I thought the unit was broken. My landlord walked by, looked at it for about ten seconds, and said, "You didn't seal the side panels, did you." I hadn't. The hot air was pouring in around the accordion panels faster than the AC could pull it out. Once I jammed some foam tape in there, the temperature dropped about five degrees in an hour.
That was the start of three summers of figuring out what actually works in a window AC, and what the manufacturer doesn't tell you. This is the renter version — no drilling into the window frame, no losing your deposit, no annoying the downstairs neighbor with compressor noise at 2 a.m. Most of these hacks are under $10 each. None of them take more than an hour.
1. Why Your Window AC Isn't Cooling (And It's Probably Not the Unit)
About 90% of the time someone tells me "my window AC doesn't work," it's one of four things, and only one is the actual unit:
- The side gaps aren't sealed. The accordion panels leak air like a screen door. You need foam tape on top of them.
- The sun is hitting the condenser. The hot side is in direct afternoon sun. The compressor works twice as hard and cools half as much.
- The filter is clogged. Two weeks of dust and the cooling output drops by half.
- The temperature sensor is wrong. If the AC's thermostat is right next to the unit, it shuts off before the far side of the room cools. A $5 remote thermometer fixes this.
Don't buy a bigger unit. Don't call a repair person. Check these four first.
2. The Foam Seal (The One Thing Nobody Does)
Out of the box, most window ACs come with accordion side panels that close the gap on the sides of the unit. They look like they fit. They don't. The gap between the panel and the window frame is usually about half an inch on each side, and hot outdoor air flows through that gap like it's not even there.
The fix is 1-inch closed-cell foam tape, $5 to $10 a roll. Cut it to fit, press it into the gap between the accordion panel and the window frame on each side, and stuff a smaller strip along the top. I skipped this the first time and spent three days wondering why my AC was basically a fan. The second time, with the foam, the room was noticeably colder within an hour.
Two notes. Closed-cell foam (the dense, harder kind) holds up to weather and doesn't soak up water. Open-cell foam (the squishy kind) is cheaper but turns into a sponge after the first rain. Get closed-cell. The tape comes off cleanly when you pull it slowly, so it doesn't damage the window frame at move-out.
3. The Sun Shade Trick (Cuts Cooling by 15-20%)
The condenser (the part of the AC that sticks out the window) generates heat. That's how the cooling works — it pulls heat out of the room and dumps it outside. If the sun is hitting that part directly, you're fighting the sun. The compressor runs longer, the room stays warmer, and the electric bill creeps up.
I tested three sun-blocking setups in the same south-facing bedroom over three summers. The cheapest worked almost as well as the most expensive:
- Bed sheet or blackout curtain over the outside of the window. Free if you have one. Cuts about 10% of the cooling cost. The downside is it looks ugly from the street and your landlord might complain.
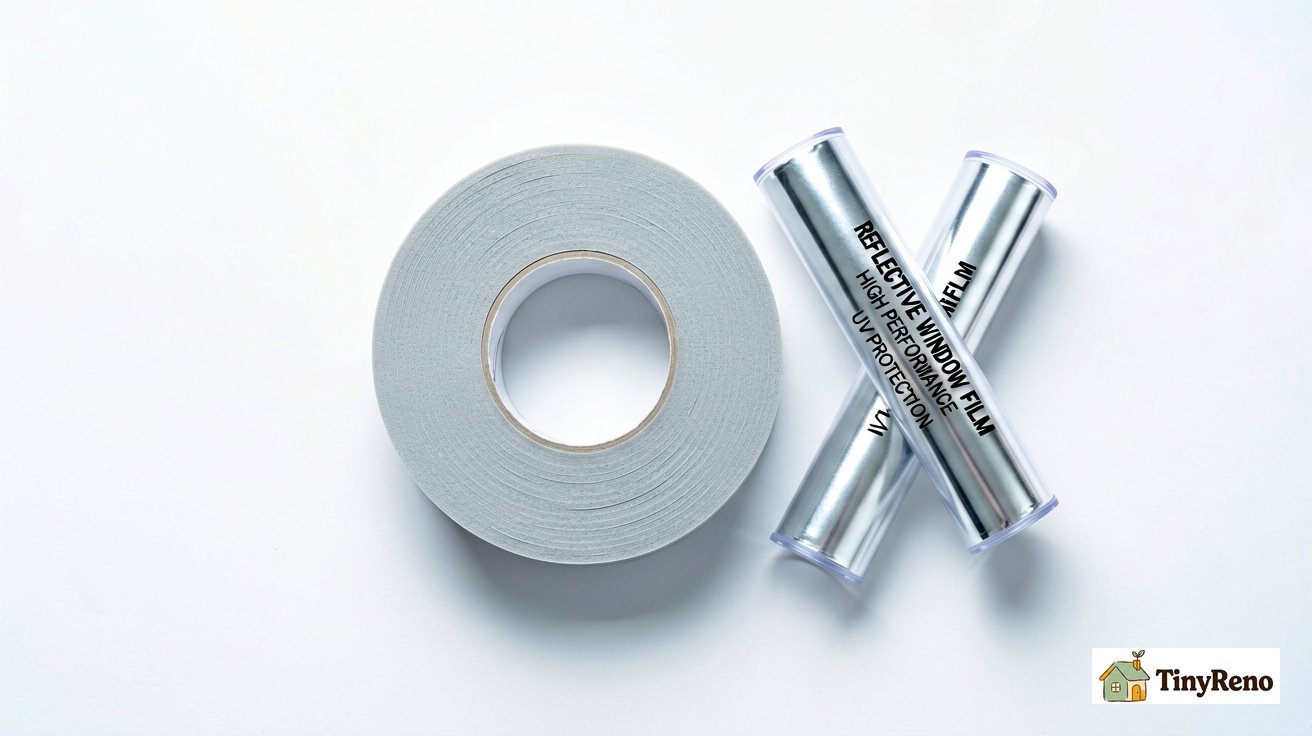
- Reflective window film on the inside of the glass. About $15 for a roll that does a whole window. Cuts about 15%. Looks clean from outside. Stays on at move-out if you peel slowly and use a hair dryer to soften the adhesive.
- External awning or rigid sun shade. The most effective but also the most likely to violate your lease.
If you only do one of these, do the reflective film. It's the only one that actually works, looks fine from outside, and removes cleanly when you move.
4. The Condenser Hacks (Clean + Tilt = 30% More Cool)
Three small things on the condenser side that the manual mentions once and most people ignore:
- Clean the filter every two weeks. Slide it out, rinse it under the faucet, let it dry, slide it back. A clogged filter can cut cooling output by 50%.
- Vacuum the condenser fins once a season. The metal fins on the back collect dust and lint. A vacuum cleaner with a brush attachment works. Don't use a pressure washer, don't use anything wet.
- Tilt the unit 1/2 inch toward the outside. This is for drainage, not cooling — but if water pools inside, it can corrode the coils. A folded piece of cardboard under the front edge gets you the right tilt without buying anything.
I skipped the filter cleaning for about six weeks one summer and the room stayed around 80°F no matter how low I set the thermostat. Cleaned the filter, room dropped to 74°F in 20 minutes. Added a phone reminder after that.
5. The Noise Problem (Your Neighbor Hears It Too)
This one I learned from getting a complaint. The downstairs neighbor texted me at 11 p.m. one August to say the compressor vibration was keeping her up. I hadn't thought about it because the unit was on the second floor and the vibration didn't bother me. It transferred through the window frame into the wall and down.
Five things that actually reduce window AC noise, ranked by how much they helped:
- Rubber anti-vibration pads under the unit. About $6 for a pack of four at any hardware store. The single biggest improvement — the compressor vibration stops transferring into the window frame. Drops the noise by about a third.
- Set the AC to "low" or "sleep" mode overnight. Most units run the compressor at a lower RPM in this mode. Cools slightly less but the noise drop is significant.
- Add a fan in the room. Counterintuitive — adding noise makes the AC noise less noticeable. A cheap box fan on medium does this.
- Wrap the side panels with a thin moving blanket. The accordion panels rattle when the compressor cycles on and off. A moving blanket tucked around them (held with a couple of clothespins) dampens the rattle without restricting airflow.
- Check the window lock. A loose window frame vibrates. Locking the window firmly tightens the whole assembly and reduces rattle.
What doesn't work: putting the AC on a foam pad inside the room. The vibration travels through the window frame, not the floor.
6. The Drainage Problem (The Drip on the Sill)
Window ACs pull moisture out of the air as they cool. That water has to go somewhere. Most units drip from the back onto the ground outside. A few don't drain properly and the water ends up on the inside window sill, then on the floor, then on the downstairs neighbor's ceiling.
Three real fixes:
- Tilt the unit 1/2 inch toward the outside. Most units have a built-in drain on the back. If the unit is level or tilted inward, water pools inside and drips out the front. I had this problem twice and both times the fix was adjusting the tilt.
- Attach a drain hose to the back. Some units have a drain port. A 1/2-inch vinyl tube (about $3) attaches and runs to a small bucket or out a window crack. The downside is emptying the bucket every few days.
- Put a folded towel on the inside sill. The 30-second emergency fix when you notice a drip and don't have time to adjust the unit. Replace the towel daily so it doesn't grow mildew.
Pooled water in the pan under the unit is also where mosquitoes breed in summer. Empty the water if it's not draining.
7. The Window Lock + Bracket (The Deposit Line)
Most leases require that windows can be locked while the AC is running. The window frame has to close onto the AC, but the AC has to hold the window in place so a thief can't just push the AC in. That's what the bracket is for — it screws into the window sash and the sill to keep the window from being opened from outside.
The standard install is a metal L-bracket with two screws into the window sash and one into the sill. The renter-friendly no-drill version is a heavy-duty zip tie looped through the window lock and a small piece of wood wedged into the sash channel. The zip-tie version doesn't satisfy a strict lease, but it works in a pinch.
At move-out, the bracket comes off with a screwdriver. Two small screw holes get a dab of spackle, a light sanding, and a quick paint touch-up. About 10 minutes per hole.
8. When Window AC is the Wrong Answer
Three cases where I stopped trying to make a window AC work:
- Sliding windows (not double-hung). Most window ACs are designed for double-hung windows (the kind that slide up and down). Sliding windows don't have a sill for the AC to sit on. Side-load window ACs exist but they're expensive and most landlords haven't seen them, which triggers a conversation I'd rather not have.
- North-facing rooms in cold climates. I lived in one apartment where the bedroom window faced north and got no direct sun, ever. The room stayed under 75°F all summer. The electric bill for the AC was $80 over three months and the room was never below 78°F when I had it on. I should have just bought a fan.
- Leases that ban window units. Some buildings, especially older ones with central air, prohibit window ACs in the lease. Breaking this rule is a fast way to lose part of your deposit. If your lease is unclear, ask the landlord in writing before you install one.
In any of these cases, a portable AC (with a vent hose to the window), a tower fan, or an evaporative cooler (in dry climates) will outperform a window AC. The portable units cost more and cool less, but they don't violate any leases.
9. The 7-Hack Quick Start (Today)
If you only have one afternoon and $50, this is the order I'd do things in:
- 5 minutes, free: Pull out the filter, rinse it, let it dry. Pull the plug while it dries.
- 10 minutes, $8: Buy a roll of 1-inch closed-cell foam tape. Run it along the side accordion panels and the top gap. This is the biggest single improvement.
- 5 minutes, free: Adjust the tilt. Fold a piece of cardboard under the front edge until the unit leans about 1/2 inch toward the outside.
- 30 minutes, $15: Apply reflective window film to the inside of the glass over the AC. Use a hair dryer to work out the bubbles.
- 20 minutes, $6: Drop rubber anti-vibration pads under the four corners of the unit.
- 10 minutes, $5: Buy a remote thermometer ($5 at a dollar store) and put the sensor on the far wall from the AC. Adjust the AC's setpoint based on what the remote reads, not what the unit's built-in thermostat says.
- 30 minutes, $10: Install the L-bracket to keep the window locked. If drilling, two screws into the sash and one into the sill. If no drilling, the zip-tie-and-wedge approach works in a pinch.
Total: $44, about two hours, and the room should drop 4-7°F within the first day. The biggest improvement is the foam seal — nothing else comes close.
10. Move-Out: Take It All Down in 20 Minutes
The foam tape, the filter, the anti-vibration pads — none of that goes with you. The unit stays. What you take down is the bracket and the film, and what you clean is the window and the sill. In order:
- Unplug the AC and let it sit for 10 minutes. The compressor needs to settle before you move it.
- Remove the bracket. Two screws out, bracket in your hand. The screw holes get a dab of spackle, a light sanding, and a quick paint touch-up. Five minutes per hole.
- Peel the reflective film off the glass. Use a hair dryer on low to warm the adhesive as you peel. If any sticky residue remains, glass cleaner and a razor blade (held flat, not at an angle) takes it off in a minute.
- Wipe down the window frame and sill. The foam tape leaves a faint compression mark but no residue. A damp cloth wipes off any dust.
- Slide the AC out and store it. Most units are 40-60 pounds. Get a friend to help if it's a second-floor install.
When I did this in my last apartment, the window looked exactly like it did before I installed the AC. The bracket holes were spackled and painted, the foam tape left no mark, the film peeled clean. Twenty minutes of work, full deposit back.
The foam seal is the one that turns a window AC from "fan that hums" into actual cooling. Everything else is layering on top of that.


Discussion (0)
Sign in to join the discussion