

The kitchen in my last apartment had six cabinets and one drawer. Six sounds like a lot until you put a single bag of rice and a stack of mugs in each one and realize you've used 12% of the available space. The cabinets were the kind that are technically "fine" but practically hostile: no drawer dividers, no shelf risers, no way to reach the back corner without unloading the front. Most renters I've talked to have the same problem.
This is about fixing the inside of the cabinets without losing a cent of deposit. No drilling, no permanent adhesive, no paint, no "14-hour Pinterest weekend project" — just organizers you can buy for $5 to $30 each and remove in under five minutes when you move. Once the cabinets are working, the next obvious dead zone is the gap above the fridge — covered separately in this fridge-top rundown.
1. The Three Measurements That Come Before Anything Else
The single biggest mistake with cabinet organizers is buying before measuring. Cabinet interiors are not standardized — one cabinet might be 12 inches deep, the next 14. Three numbers to write down before you order anything:
- Cabinet interior depth (back wall to inside of the door, not the outside frame). Anything you put in has to clear the door.
- Interior width and shelf-to-shelf height. This decides whether a shelf riser clears the shelf above.
- Door swing direction and how far it opens. Some rental cabinet doors only open 90 degrees. Anything mounted inside has to clear at full open.
Write the three numbers on masking tape stuck inside the cabinet door. Every renter I know who bought in a hurry has returned at least one organizer because they didn't measure door-swing clearance.
2. The Under-Sink Cabinet (The Hardest One)
Under-sink cabinets are the most underused and the most awkward. The plumbing takes up the back third, the trash can takes another third, and what's left is a U-shaped footprint that doesn't fit any standard organizer. Three setups that work:
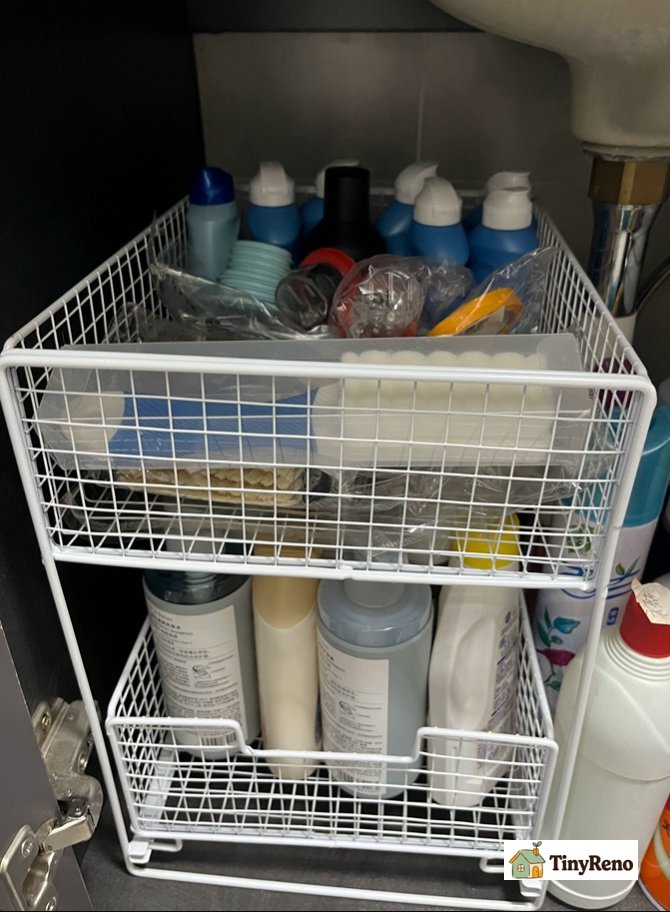
- A two-tier tension-rod shelf. Two short tension rods spanning front-to-back under the sink, with a flat plastic tray resting on top. The tray sits above the P-trap and gives you a second usable layer for dish soap, sponges, and the small bottles that usually end up on the floor.
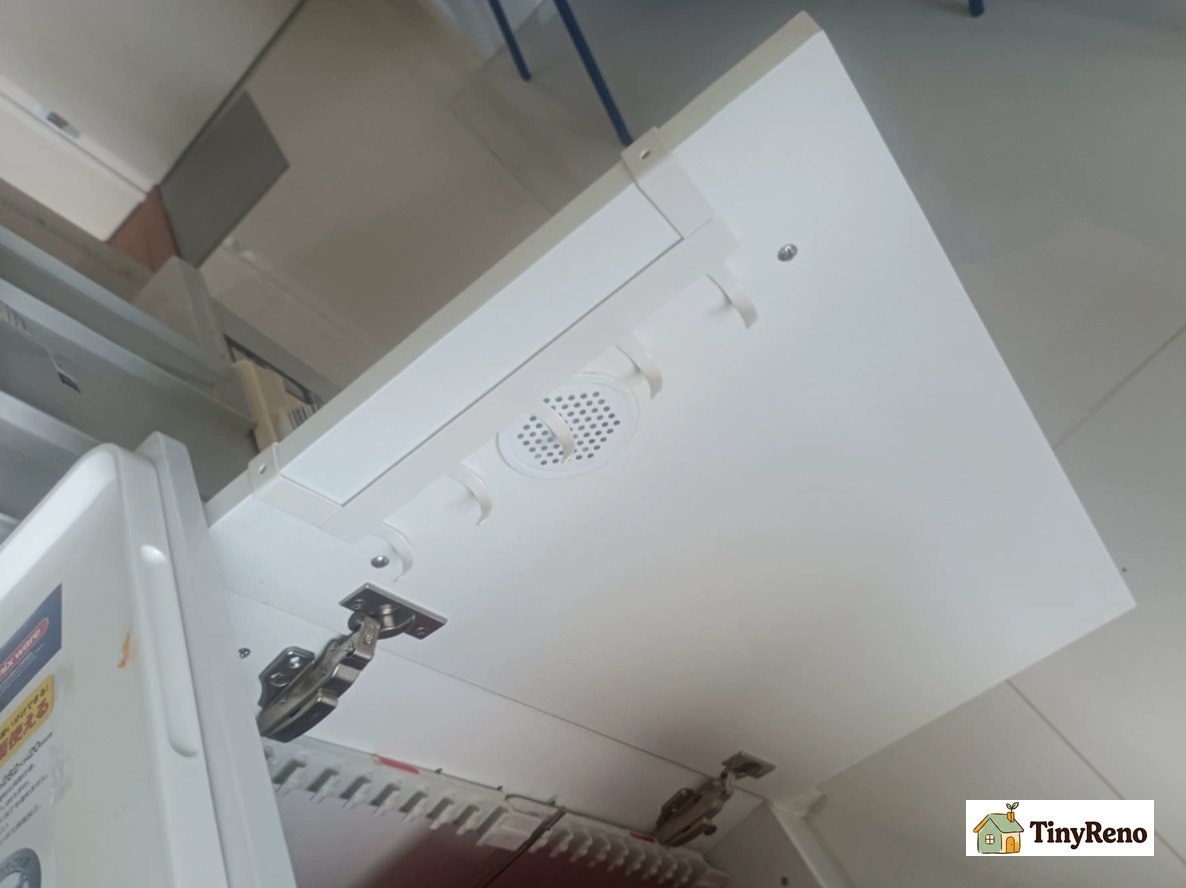
- An over-the-door caddy. Hooks slide over the top of the cabinet door. Holds spray bottles, gloves, and the things you want to reach without bending down.
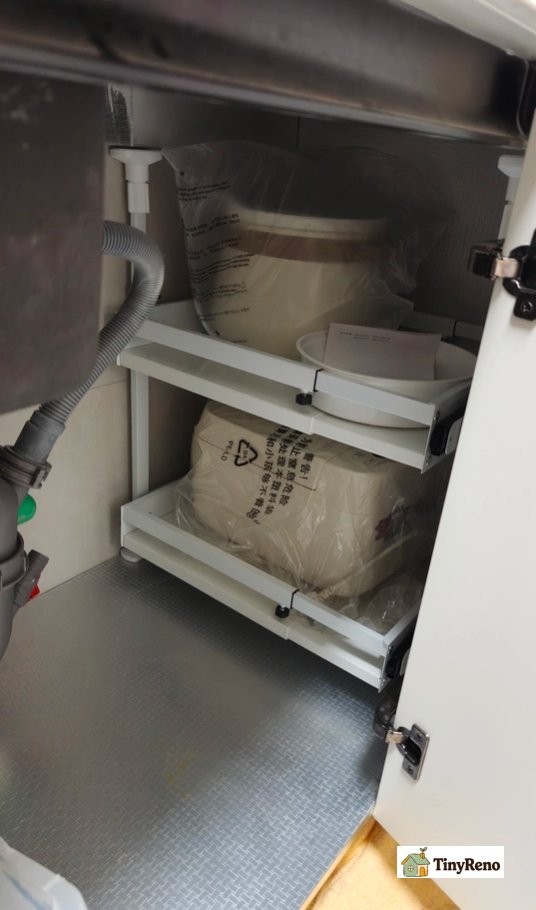
- A pull-out basket on a tension-rod frame. The only solution that gets you drawer-style access to the back. The frame is two rods and four corner brackets; the basket sits on the frame and slides front-to-back. About $35 total.
What doesn't work: any organizer that requires bolting to the cabinet floor, any organizer that requires the P-trap to be moved, and any organizer that's wider than 14 inches because it won't clear the door.
3. The Upper Cabinet Vertical Layer (Shelf Risers)
Standard upper cabinets have 11 to 14 inches between shelves, which is enough room for one row of cereal boxes and a lot of dead air above. A shelf riser is a small wire or bamboo shelf that sits on top of your existing shelf, doubling the usable vertical space. They cost $8 to $15 each and take about 10 seconds to install.
The riser has to fit your shelf width exactly. A 24-inch cabinet needs a 24-inch riser. A 22-inch cabinet needs a 22-inch riser. The 1-inch-off models wobble. I learned this with a riser that slowly migrated forward until the cereal boxes slid off and woke up my partner.
What goes on top of the riser: things you don't reach for often. The bag of rice you open once a month. The backup cereal box. What stays on the bottom shelf: things you reach for every day. Risers are useless if daily-use items go above them, because reaching over the riser every morning is more annoying than the storage you gained.
4. The Pantry Narrow Gap (Where 6 Inches Goes to Waste)
Most apartment pantries have a 4 to 8 inch gap somewhere — beside the fridge, between the wall and the pantry door. A slim rolling cart turns the gap into three or four usable shelves.
The cart has to be narrower than the gap by at least 1 inch on each side, otherwise it scrapes when you roll it. Measure the gap with the door open and closed — sometimes the door trim makes the effective gap smaller when the door is in its resting position.
What goes on a pantry cart: canned goods, spice jars, the snack bags your household goes through every week. What doesn't: anything heavy enough to make the cart tip when you pull out the top shelf, and anything that needs to be perfectly level (a cake will slide off a tilted cart).
5. The Drawer Dividers (If You Have Drawers)
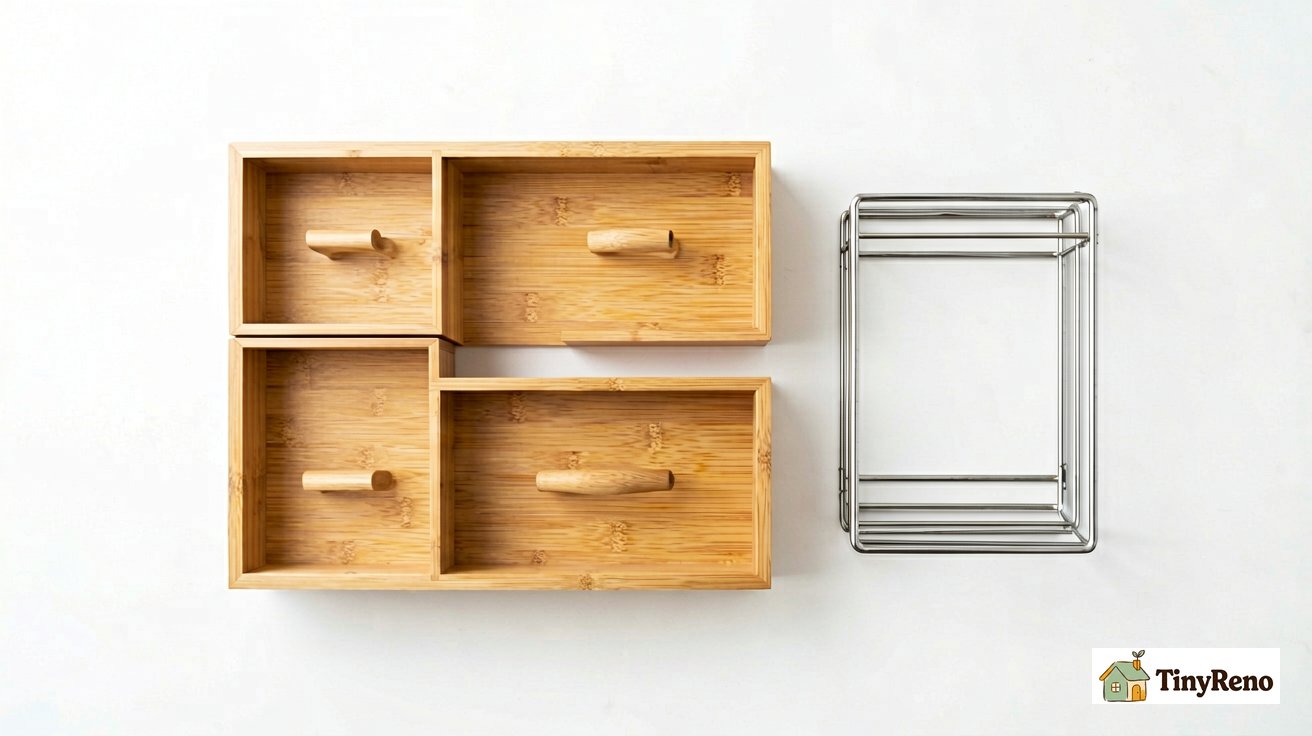
Most rental kitchens have at least one drawer — usually next to the sink for utensils. Bamboo drawer dividers with adjustable pegs cost $12 to $25 and turn one chaotic drawer into 4 to 6 organized sections. They install by sliding the pegs into pre-drilled holes. No adhesive, no screws.
The dividers work best when you commit to one section per category: forks in the back left, knives in the back right, spoons in the front, the small utensils in their own section. If you mix categories, you end up with the same chaos you started with, just with more dividers.
What doesn't work: plastic drawer liners with adhesive backing (the adhesive leaves residue), and any divider that requires screwing into the drawer sides (creates holes).
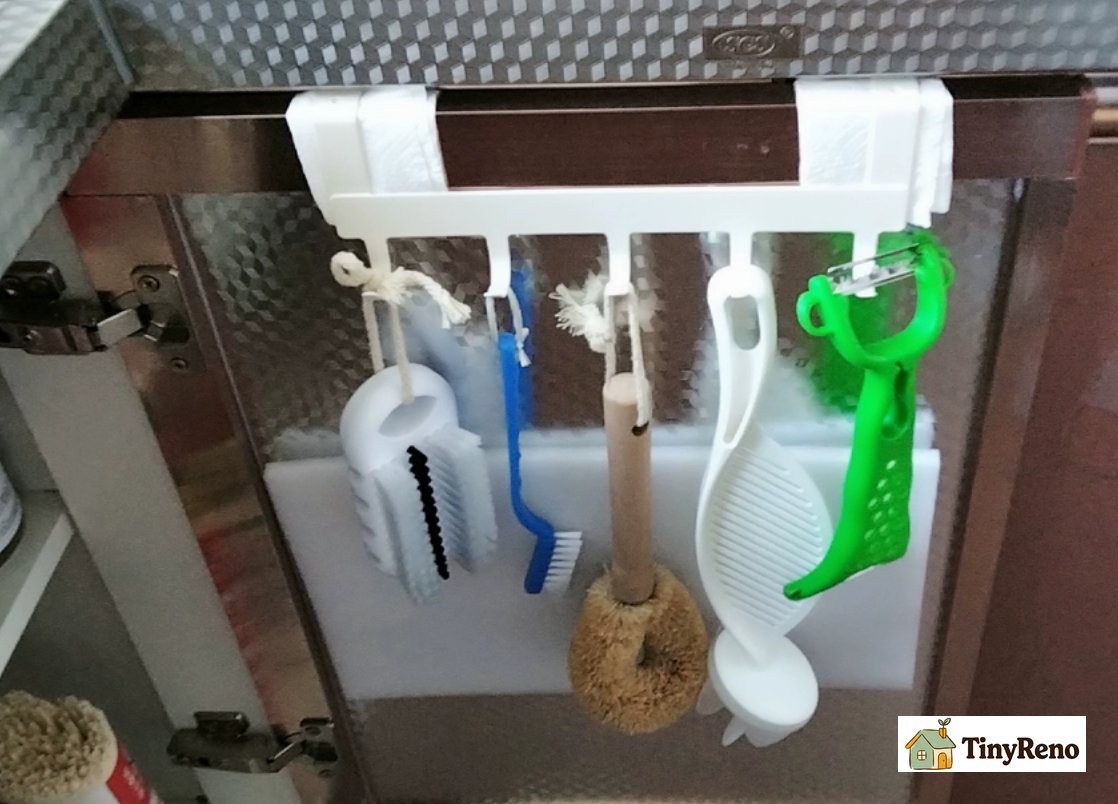
6. The Inside of the Cabinet Door
Cabinet doors are an underused 12 to 18 inches of vertical storage per door. The inside of the door is flat and most renters never use it. Two upgrades that don't damage the door:
- Over-the-door wire racks. The small wire shelves that hook over the top edge of the cabinet door. They sit on the inside of the door and hold cutting boards, baking sheets, or pot lids.
- Adhesive hooks rated for cabinet interiors. Command hooks and similar removable hooks work for lightweight items inside a cabinet — small bags of plastic wrap, spare rolls of aluminum foil, cleaning cloths. The adhesive holds up for 6 to 12 months inside a cabinet (no direct sunlight, no humidity spikes). When you move out, the hooks come off with the adhesive strip in one piece, no residue.
What doesn't work: anything that requires screwing through the cabinet door. The door is thin MDF or particle board, and screws split the wood at the edges.
7. The Real Setups: 9 Renters' Cabinets
Six sections on tools, this one on how they actually get used. Nine setups I've seen work over four years of renting:
- Solo renter, galley kitchen: under-sink pull-out basket, single shelf riser in the upper cabinet, bamboo drawer divider in the utensil drawer, over-the-door rack on the inside of the pantry door for cutting boards. About $90 total.
- Two-person household, full-size kitchen: two shelf risers in upper cabinets (one for dry goods, one for glasses), rolling pantry cart beside the fridge, over-the-door caddy under the sink, no drawer dividers (drawers were too shallow).
- Family of four, small kitchen: rolling pantry cart between fridge and wall, two-tier tension-rod shelf under the sink, four shelf risers across all upper cabinets, drawer dividers in the utensil drawer plus a separate one for kid snack utensils.
- Studio apartment, kitchen in a closet: single shelf riser in the one upper cabinet, no under-sink storage (the cabinet was too shallow), all overflow storage moved to a 12-cube shelf like the one in this cube bin rundown.
- Renter with no pantry: a slim rolling cart tucked between the fridge and the wall, used for everything a pantry would normally hold (cans, dry goods, snacks). 6 inches wide, 4 feet tall.
- Renter with a deep corner cabinet: a lazy susan on the bottom shelf, two shelf risers on the upper shelves. The corner cabinet was 24 inches deep and the lazy susan was the only way to reach the back.
- Renter with all-glass upper cabinets: only used shelf risers that matched the cabinet width exactly. Other organizers showed through the glass and made the kitchen look cluttered from the living room.
- Renter with a deep drawer under the oven: a single bamboo divider split the drawer in half — one side for baking sheets, the other for pot lids.
- Renter who cooks a lot: stackable drawer bins on the counter for daily-use utensils, shelf risers for dry goods, under-sink pull-out for cleaning supplies. The counter bins meant the drawers were reserved for silverware and weekly tools.
The pattern across all nine: one big organizing tool per cabinet, not five small ones. A single shelf riser changes a cabinet's usable space by 80%. A single rolling cart changes a useless gap into a pantry. Trying to do everything at once is the fastest way to end up with organizers you don't actually use.
8. What Not to Buy or Install
Five things marketed heavily to renters that don't work in rentals, and I've tried all five:
- Strong double-sided tape or "permanent" adhesive organizers. Adhesive inside a cabinet fails within 6 to 12 months because of the temperature swings between a closed cabinet and an open kitchen. The adhesive softens, the organizer tilts, and the residue costs more to clean than the organizer was worth.
- Drilled-in drawer slides or pull-out shelves. Drilling into the cabinet sides creates holes that show at the walkthrough. The cost of patching and repainting inside a cabinet often exceeds the deposit you'd lose.
- Magnetic strips inside cabinets. The inside of a cabinet door is rarely metal — usually MDF with a melamine coating. Even when the cabinet has a metal frame, the magnets migrate. By month three, your spice jars are at the bottom in a pile.
- Heavy glass jars as organizers. Glass is heavy. A row of glass jars on a shelf riser can exceed the riser's load rating, and when a jar falls inside a cabinet it cracks the shelf.
- Custom-cut shelf inserts. Custom means permanent. The cabinet shop cuts the insert to your exact cabinet, you install it with screws, and at move-out you can't take it with you.
If an organizer requires a drill, a permanent adhesive, or custom cabinet dimensions, it's not a renter organizer. It's a homeowner organizer. Pass.
9. Move-Out: How to Take It All Down Without Losing Deposit
The organizers don't help if you leave residue, adhesive, or small holes when you move out. Five things to do in the last week of your lease:
- Photograph every cabinet interior before removing anything. The landlord's move-out inspection goes faster if you can show what the cabinet looked like before your organizers went in.
- Remove adhesive hooks first, slowly. Pull the adhesive strip straight down (not out) for 30 seconds. The hook comes off with the strip in one piece, no residue.
- Wipe every shelf with a dry cloth. Shelf risers and tension-rod shelves leave rubber dust or metal dust on the cabinet shelves. Wipe once and the shelf looks new.
- Patch any pin holes in cabinet doors. Even small pin holes show at the walkthrough. A dab of spackle, sanded flat, painted over with a matching marker, takes 5 minutes per hole.
- Don't take shelf risers or tension-rod shelves with you if they're cheap. The $8 riser isn't worth risking cabinet damage on removal. The $35 rolling cart and the $30 under-sink organizer are worth taking. The $8 riser is not.
A two-hour move-out sweep through the kitchen with a spackle tube, a damp cloth, and a trash bag covers about 90% of the issues. The other 10% is the stuff that was already there when you moved in — photograph those areas when you move in, before you install anything.
10. The One-Hour Setup That Solves Most Cabinets
If you only have an hour and an $80 budget, here's the sequence that solves the most problems in the most rental kitchens:
- Measure all six cabinets. Write the depth, width, and shelf-to-shelf height on tape inside each door.
- Buy two shelf risers (one for dry goods, one for glasses), one under-sink tension-rod organizer, and one over-the-door rack for the pantry door.
- Install the shelf risers first — 30 seconds each. Daily-use items on the bottom, occasional-use items on the riser.
- Install the under-sink organizer. Put dish soap, sponges, and cleaning supplies on top. Leave the P-trap area clear.
- Install the over-the-door rack. Put cutting boards and pot lids in it. Test the door swing.
Total cost: $70 to $85. Total time: 60 minutes. Total removal at move-out: 15 minutes, no residue, no patches, no deposit deductions. The shelf risers can stay or go. The under-sink organizer and the over-the-door rack come with you.
The cabinets will work the way they were always supposed to. The landlord's cabinets don't change. The landlord's deposit doesn't change. The amount of stuff you can actually fit in them changes a lot.


Discussion (0)
Sign in to join the discussion