

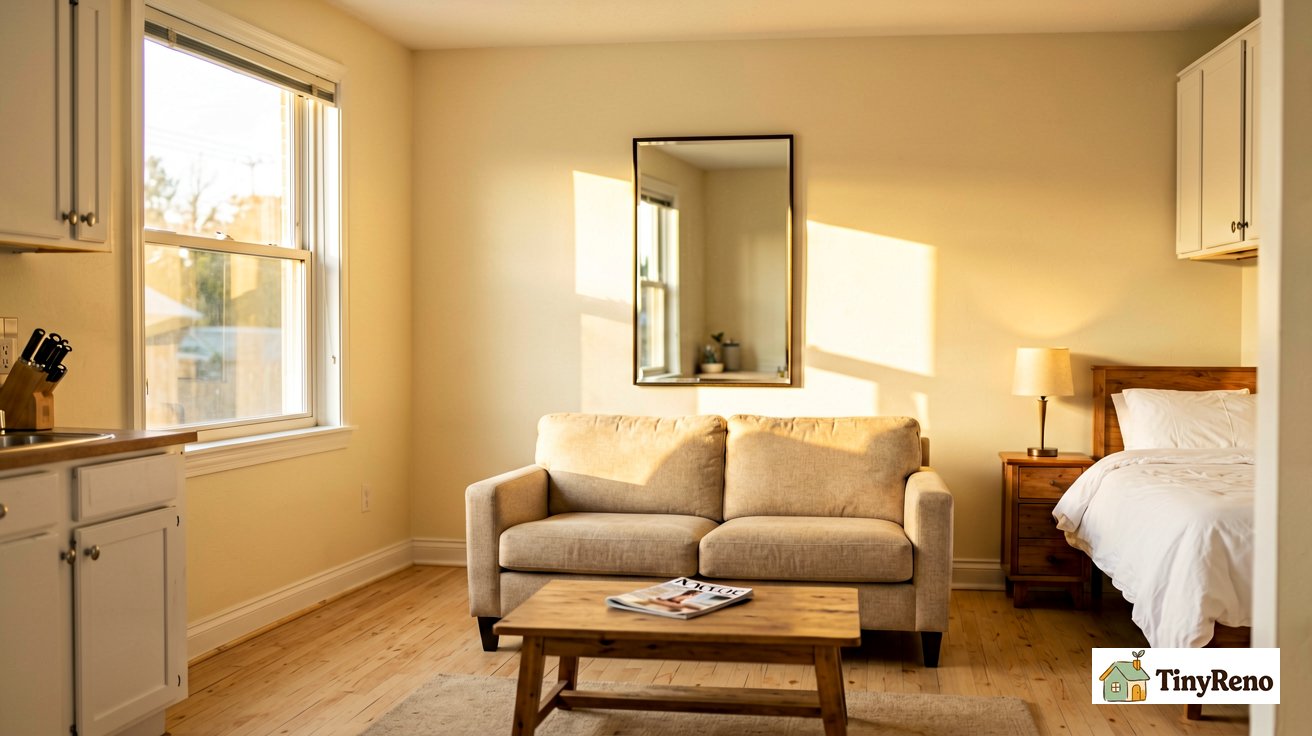
Real-estate stagers know something most renters do not: a mirror in the right spot does more for a small apartment than a $2,000 piece of furniture in the wrong spot. The stagers I have spoken to about this all say the same thing — they will spend $14 on a mirror from IKEA and put it in one specific place before they will spend $400 on a chair that nobody will sit in. The reason is simple. The mirror does work that the room cannot do on its own. It bounces light where light does not reach. It extends a sight line that physically ends at a wall. It makes a 400-square-foot studio read as 600 to a person walking in for the first time.
But here is the part nobody talks about: most renters put mirrors in the wrong place. They hang a mirror above the sofa because the wall is empty. They prop a mirror behind the door because that is where it fits. Neither position does what they think it does. A mirror above the sofa reflects the ceiling and the back of the person on the sofa. A mirror behind the door reflects a blank wall and a doorknob. Both positions make the room feel smaller, not larger, because the eye registers clutter and emptiness twice.
The fix is not buying a bigger mirror. The fix is putting the mirror in one of three specific positions.
Why Position Beats Size (The Counterintuitive Part)
The conventional advice on mirrors for small spaces is "bigger is better." That advice is half right and half wrong. A big mirror in the wrong place is just a big reflection of a blank wall. A small mirror in the right place is a focused light bounce, a sight-line extension, a focal point. The variable that actually changes how big the room feels is what the mirror reflects, not how large the mirror is.
Think of a mirror as a window you can place anywhere. The point of a window is not the window itself. The point of a window is the view. A mirror that faces a wall reflects a wall. A mirror that faces a window reflects the outside — or at least the light from the outside. The first mirror costs you square-footage perception because it confirms the room ends where the wall starts. The second mirror buys you square-footage perception because it implies the room extends past the wall into somewhere brighter and larger.
This is also why designers tend to put one large mirror in a small space rather than several small mirrors grouped together. One well-placed mirror reads as an architectural feature. Three small mirrors read as decor. The eye registers the first as "this room has depth." The eye registers the second as "this room has stuff."
The 3 Mirror Placements That Actually Work
Position 1 — Opposite the Window (The Light Doubler)
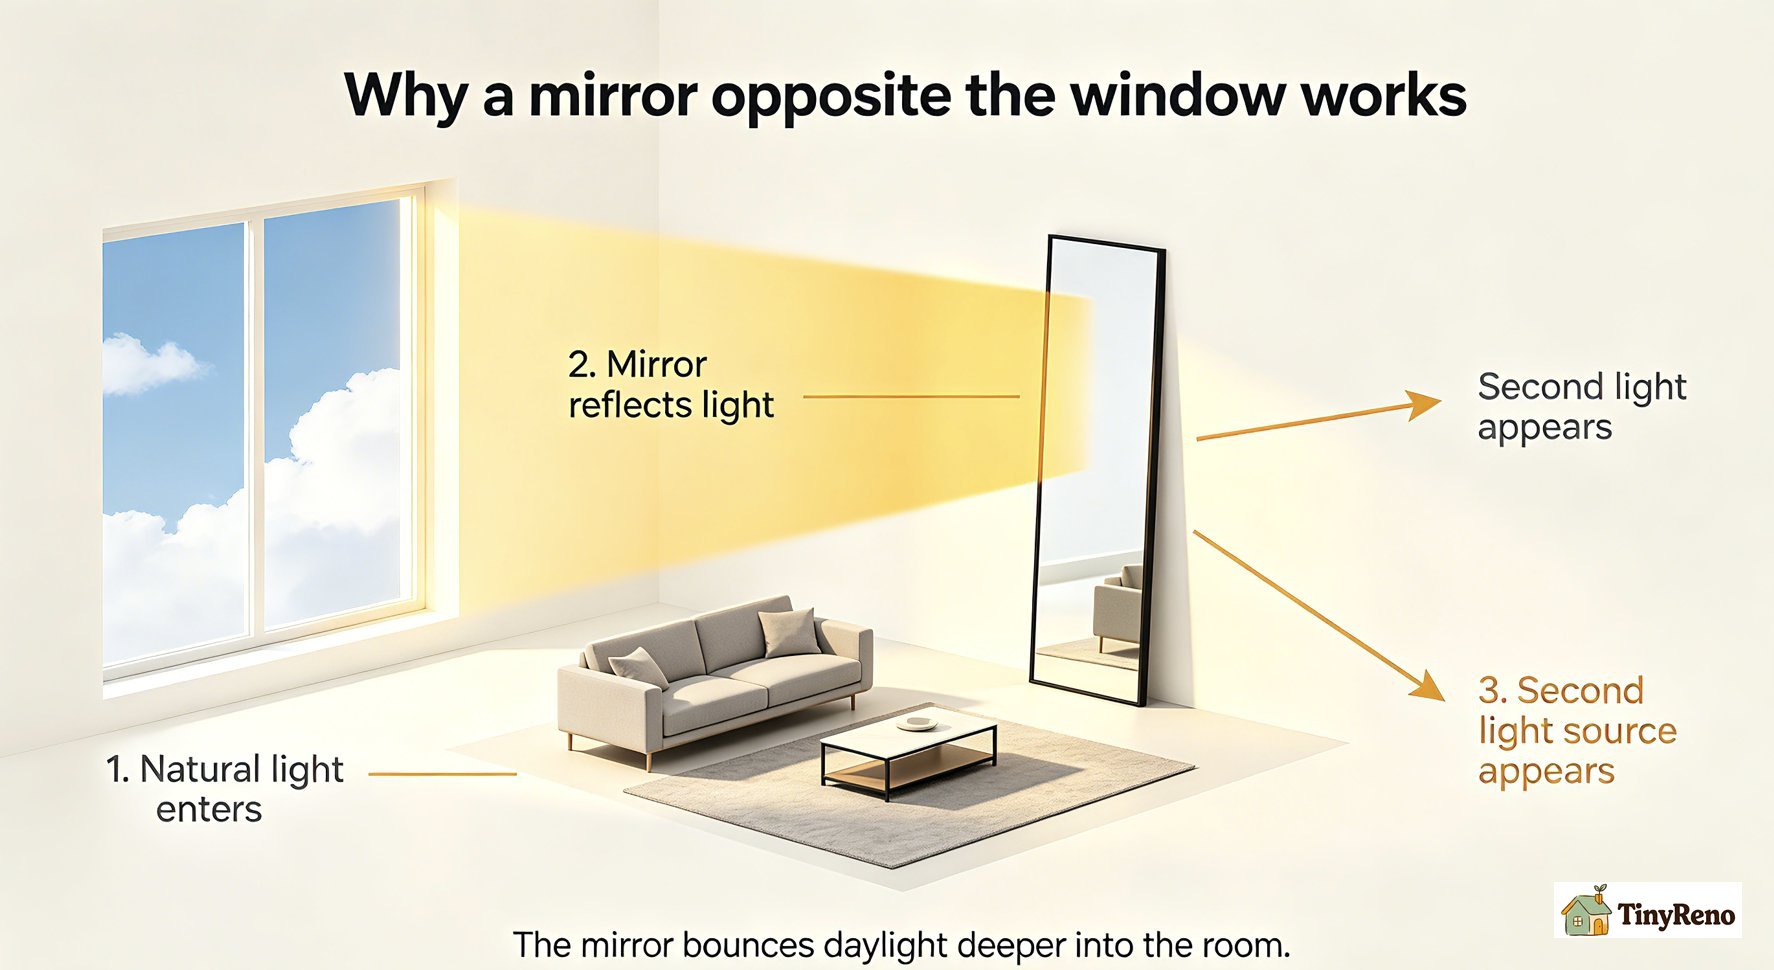
This is the single most effective mirror position in any studio. Place a tall mirror on the wall directly across from the largest window in the room. The mirror catches the incoming natural light and bounces it back across the room, creating a second light source that did not exist a moment ago.
The physics is straightforward. A 36-inch by 24-inch mirror opposite a window does not literally double the light in the room, but it doubles the perceived light source. Walk into the room and the eye sees two bright zones — the actual window and the mirror reflecting it — instead of one. The brain registers the room as having two sources of daylight, which is the same trigger that makes larger homes feel spacious.
The mirror needs to be tall enough to catch the full vertical span of the window. If the window is 48 inches tall, the mirror needs to be at least 36 inches tall. If the mirror is shorter than the window, the bounce is partial and the effect is weaker. Mount or lean the mirror so its center sits at the same height as the window's center — usually 48 to 60 inches off the floor.
For renters, the easiest installation is to lean a tall mirror against the wall opposite the window, with the bottom edge 4 to 6 inches off the floor. Use a small anti-tip strap if you have a cat or a curious dog. No drilling, no anchors, no deposit risk.
Position 2 — At the End of a Hallway or Narrow Corridor (The Sight-Line Extender)
The second-best position is at the far end of any narrow corridor that leads into the studio — the entryway hall, the galley-kitchen strip, the path between the bed and the bathroom door. A mirror placed here does not bounce light (the corridor is usually dim). What it does is extend the sight line. The eye enters the corridor and sees the mirror at the end. The mirror shows another stretch of space beyond the corridor. The brain reads "this hallway is longer than I thought" — and in a studio, "longer than I thought" translates to "more space than I thought."
This is the same reason department stores put mirrors at the end of clothing aisles. It is also the reason galley kitchens in apartments feel cramped — they end at a flat wall with nothing to extend the visual path. A 24-inch by 36-inch mirror at the far end of any narrow passage in your studio changes the perception of the entire passage.
The mirror does not need to be huge. A 24-by-36 mirror at the end of a 6-foot hallway reads as the hallway continuing into another room. A 36-by-60 mirror in the same spot reads as the hallway continuing into a ballroom. Both work. Smaller is cheaper and equally effective for sight-line extension.
Position 3 — Behind a Floor Lamp (The Light-Path Amplifier)
The third position is the one most renters have never considered. Place a small mirror directly behind a floor lamp — usually a tripod lamp or a slim uplight in a corner. The mirror catches the light that the lamp throws at the ceiling and redirects it back down and out into the room. A lamp that was lighting a 6-foot circle becomes a lamp that lights an 8- or 10-foot circle.
This works best with uplights (lamps whose shade opens upward, throwing light at the ceiling) and arc lamps (lamps whose bulb points back toward the wall). Place the mirror 6 to 12 inches behind the lamp's head, angled slightly to catch the light path and redirect it. The bounce is subtle but measurable — the wall behind the lamp will visibly brighten during evening hours when the lamp is the primary light source.
This is the position that pairs naturally with a layered-lighting setup. If you have already added ambient, task, and accent lights as separate sources, a mirror behind the main task lamp turns that single lamp into a small ambient source without buying another lamp.
The 3 Mirror Mistakes That Make a Studio Feel Smaller
These three placements work. Everything else is a coin flip, and some common placements actively make the studio feel smaller.
Mistake 1 — Above the sofa or bed. A mirror centered above the sofa reflects the ceiling and the back of whoever is sitting on the sofa. A mirror above the bed reflects the ceiling and the back of the bed. Both reflections are uninteresting, and the eye registers "wall above the sofa" as the primary content. The mirror becomes decoration, not amplification. Move the mirror to a wall opposite a window, not a wall behind furniture.
Mistake 2 — Reflecting the kitchen or a cluttered corner. A mirror that reflects a stack of dishes, a recycling bin, or a tangled cable corner visually doubles the clutter. The eye does not distinguish between real clutter and reflected clutter — it just sees clutter. Place the mirror only where it reflects something visually expansive: light, open floor, a tidy wall, a view.
Mistake 3 — Multiple small mirrors grouped together. Three or four small mirrors in a gallery wall arrangement reads as decor, not depth. The eye sees the arrangement as objects and stops registering the reflections. One large mirror in the right position reads as architecture and the reflection integrates into the room's perceived volume.
The $14 IKEA Mirror That Beats Every Designer One
The cheapest effective mirror for studio placement is the 24-by-36 IKEA NISSEDAL mirror. As of mid-2026 it sells for $14 in the United States, and it is the right size and weight for all three of the placements above. The frame is thin black metal. The glass is clear (not antiqued or tinted, which would defeat the light-bounce purpose). It is flat enough to lean against a wall or mount with a single nail in a stud.
What to look for in a studio mirror beyond brand:
Flat glass, not beveled. Beveled mirrors are designed for decoration, not light bounce. The beveled edge warps the reflection at the corners and reduces the effective bounce area. Flat glass gives you a clean reflection across the full surface.
Clear glass, not smoked or antiqued. Tinted glass cuts the light transmission by 30 to 50 percent. The mirror still reflects, but the bounce is dimmer than a clear mirror. For light bouncing, you want maximum transmission.
Thin or no frame. Thick frames look like furniture. Thin or frameless mirrors disappear into the wall, which is what you want for the room to read as expanded rather than decorated.
Floor leanable weight. If you are renting and do not want to drill, a mirror in the 8-to-15-pound range leans against the wall without tipping. Anything over 20 pounds needs an anti-tip strap regardless of where you put it.
The NISSEDAL hits all four. It is also the mirror I keep coming back to in my own apartments, which is why it is the only specific product I am willing to name in an article like this.
The Light Bounce Test (How to Verify Before You Drill)
Before you commit to a mirror position, run a five-minute verification test that costs nothing and tells you exactly how much bounce you will get.
Step 1 — Wait for the time of day when the room is brightest. Usually mid-morning or early afternoon, when the window is in direct or near-direct sun. Turn off any interior lights so you are measuring only the natural light contribution.
Step 2 — Hold a hand mirror (or your phone with the front camera on) at the proposed mirror position. Aim the mirror toward the window. Look at the wall opposite the mirror. You should see a clear bright patch where the reflected light lands. The patch should be at least the size of a dinner plate.
Step 3 — Move the mirror 6 inches in any direction and watch what happens to the bright patch. If the patch grows, you are moving in the right direction. If it shrinks or disappears, you are moving the mirror off the optimal angle. The best position is wherever the patch is largest.
Step 4 — Have a friend walk into the room from the door. Do not explain where the mirror is or what it is for. Ask them, after 30 seconds in the room: does this room feel bigger than you expected, smaller, or about what you expected? Their honest first impression is the metric that matters. If they say "bigger," you have the right position. If they say "smaller" or "about right," move the mirror and try again.
This test takes 5 minutes and tells you more than any product review or interior design article. Trust the friend. They are the stand-in for every guest who will walk into your studio and form an impression in the first 30 seconds.
When Mirror Placement Will Not Save Your Studio (The 3 Layouts That Break It)
Mirror placement is a perception trick. It works when the underlying room has something worth reflecting. There are three studio layouts where even perfect mirror placement does not help, and recognizing them saves you from buying a mirror that will not work.
Layout 1 — Long and narrow, under 10 feet wide. If your studio is more than twice as long as it is wide, the room reads as a corridor regardless of mirror placement. The narrowness is structural. The fix is not a mirror — it is to subdivide the room visually with a bookshelf, a curtain, or a room divider that creates a sense of "front" and "back" instead of one continuous stretch. Layering rules apply here, not mirror rules. The technique I cover in detail in my 5-layer guide for 600 sq ft apartments is the right starting point for this layout.
Layout 2 — Ceiling under 8 feet. A low ceiling compresses the room vertically. Mirrors reflect the side walls and the floor — neither of which addresses the ceiling height. The fix is vertical lines (floor-to-ceiling curtains, tall bookshelves, vertical-stripe wallpaper) to draw the eye up. A mirror above the sofa in a low-ceiling room is the worst-case placement because it reflects the low ceiling back at you.
Layout 3 — Window faces a brick wall or another building 3 feet away. If the window looks out at a brick wall or another building close enough to read individual bricks, the "view" is functionally a wall. A mirror reflecting this view is reflecting a wall. The bounce is minimal because there is no actual daylight coming through that window — just dim ambient light. The fix here is to add a stronger interior light source (a daylight-spectrum floor lamp) and accept that mirror placement will not compensate for a window with no real view.
For every other studio — the typical 400-to-600-square-foot rectangle with one good window and reasonable ceiling height — the three mirror positions above will do more for perceived square footage than any single furniture purchase. I have moved four times in eight years and the mirror has come with me every time. The chair, the sofa, the bed, the bookshelves — those change with each apartment. The mirror stays.
That is the test of any small-space strategy. If you keep doing it across moves, it works. If you only did it once, it was probably not the right move.
Discussion (0)
Sign in to join the discussion