

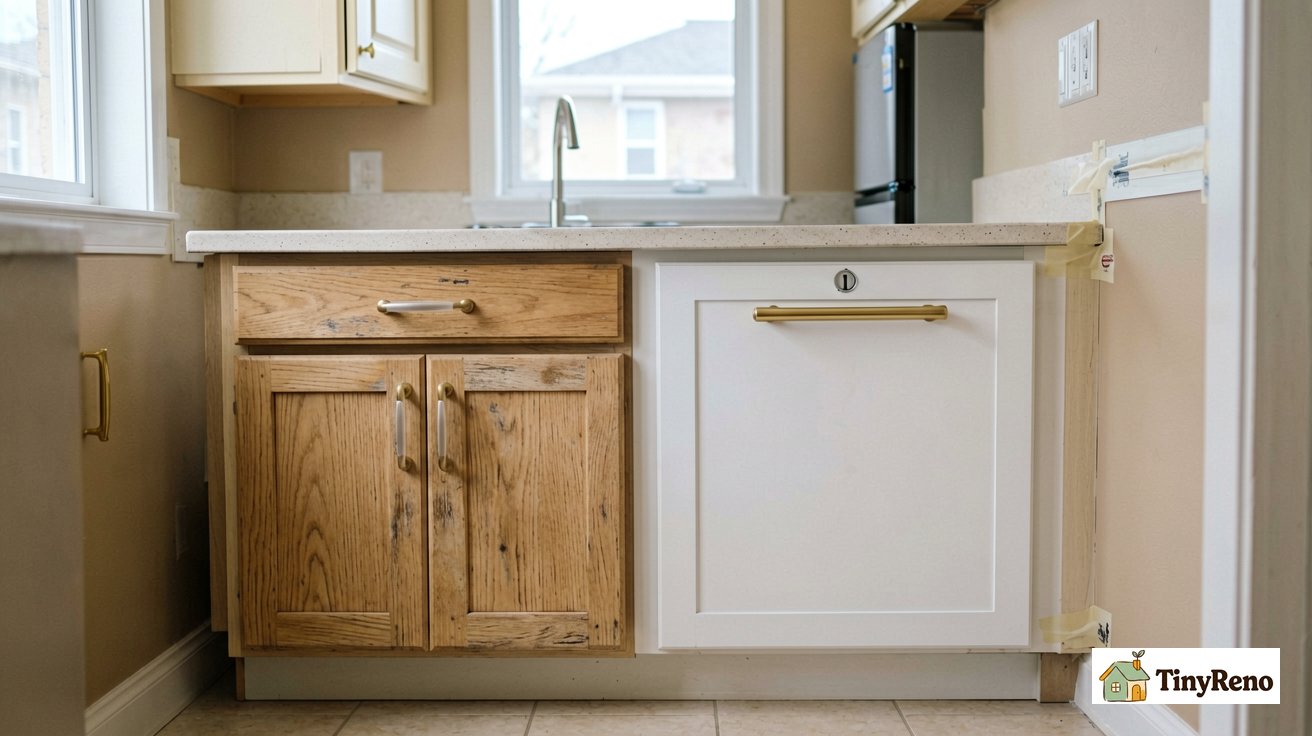
My kitchen had the kind of cabinets that come free with the lease. Honey-oak, raised panel, brass pulls from 2003. The kind that you stop noticing after week one and start resenting by month three. I lived with them for a year before I painted them. Then I painted them in two days for $147, and I wish I had done it the week I moved in.
This is the method I used. It is not the only method. It is the one that holds up to the daily abuse a kitchen takes — grease, steam, fingerprints, the occasional slammed door — and that still comes off cleanly at move-out if you ever want to strip it back to the original.
Read Your Lease First — The Clause 90% of People Miss
Before you buy anything, pull out your lease and find the section usually titled "Alterations" or "Modifications." In most U.S. standard leases, painting cabinetry is treated as a reversible cosmetic change — not a structural alteration. The clause that matters is the one about "normal wear and tear." A fresh coat of paint in a neutral color (white, cream, light gray) is almost always accepted at move-out as long as it covers evenly and does not bleed onto adjacent surfaces.
The thing that 90% of people miss is the part about color. Some leases allow painting but specify that the original color must be restored at move-out. That means you either commit to repainting back to oak before you leave, or you pick a color close enough to common builder oak that the landlord does not notice. White over oak is borderline — most landlords are happy with white because it is cheaper for them to leave than to make a tenant repaint oak. Bright teal or matte black is riskier and may need to come off.
Photograph every cabinet face, inside and outside, before you start. Date-stamped photos are your evidence if there is ever a deposit dispute. This takes ten minutes and has saved me more than once across apartments.
The Method Almost Every Tutorial Gets Wrong
Most cabinet painting guides online skip one step, and that step is why their finished surfaces peel within six months. The skipped step is the bonding primer.
Regular wall primer (the white stuff in the five-gallon bucket) does not stick to the factory finish on most cabinets. Cabinets are usually sealed with a catalyzed lacquer or a thermoset coating that wall primer simply cannot bond to. You will sand, prime with wall primer, paint carefully, and three months later the paint starts flaking off in sheets when someone opens the door with wet hands.
Bonding primer is different. It is designed to adhere to slick, sealed, or previously painted surfaces without aggressive sanding. Two products that work: Zinsser BIN (shellac-based, fast-drying, strong odor, dries in 30 minutes) and KILZ Adhesion (water-based, low odor, dries in 60 minutes). For kitchen cabinets I use KILZ Adhesion because the smell dissipates by the time the topcoat goes on.
The other thing most tutorials get wrong is recommending brush-only application. A brush leaves texture. Cabinets catch light from windows and overhead fixtures, and any brush texture will show up as visible streaks. Use a 4-inch foam roller on flat surfaces. Reserve a 2-inch angled brush only for corners, recessed panel edges, and inside corners. The roller leaves a finish that looks sprayed-on when dry.
The $147 Shopping List — Itemized, With What to Skip
Here is the actual receipt from my last kitchen. Prices are mid-2026 averages at Home Depot or Lowe's in a mid-sized U.S. city.
Bonding primer (KILZ Adhesion, 1 gallon): $24. One gallon covers roughly 12 cabinet doors plus the face frames and end panels of an average 10-foot galley kitchen. You will not use it all — the leftover keeps for two years in a sealed can.
Topcoat (Benjamin Moore Advance or SW Emerald Urethane, 1 gallon): $42. These are water-based alkyd enamels that level out to a hard, cabinet-grade finish. Avoid wall paint (eggshell, satin) — it is too soft. Avoid true oil-based enamel unless you want a 6-hour dry time and a house that smells like a hardware store for a week.
4-inch foam roller + tray: $15. Buy the tray and two roller covers. The first cover is for primer, the second for topcoat — do not cross-contaminate.
2-inch angled brush: $8. One brush is enough for corners and edges.
220-grit sanding sponge: $6. You sand before priming. You do not sand off the factory finish — you just scuff it so the primer has tooth.
Painter's tape (1.5-inch blue): $8. One roll. Tape the wall edges around the cabinet boxes so you do not bleed paint onto the backsplash.
Degreaser (Krud Kutter or simple TSP substitute): $10. Cabinets are the dirtiest surface in a kitchen. If you skip degreasing, the primer sticks to grease, not to the cabinet, and the paint peels in the spots you missed.
New hardware (12 brass bar pulls, 5-inch): $30. Optional but the single biggest visual upgrade. New pulls on painted cabinets read as "renovation" instead of "paint job." Amazon, Amazon Basics, or any home center will have these for $2.50 each.
Drop cloth + screws for re-hanging doors: $4. You will remove doors. You will lose at least two of the original screws in the process. Buy a small pack of #6 x 5/8 cabinet screws as backup.
Total: $147. That is the full number. No surprise costs, no specialty tools, no spray rig rental.
Day 1 — Prep + Prime (The 4-Hour Job Most People Rush)
Budget four hours for Day 1. The actual hands-on work is two hours. The rest is waiting and doing it in the right order so the primer cures properly.
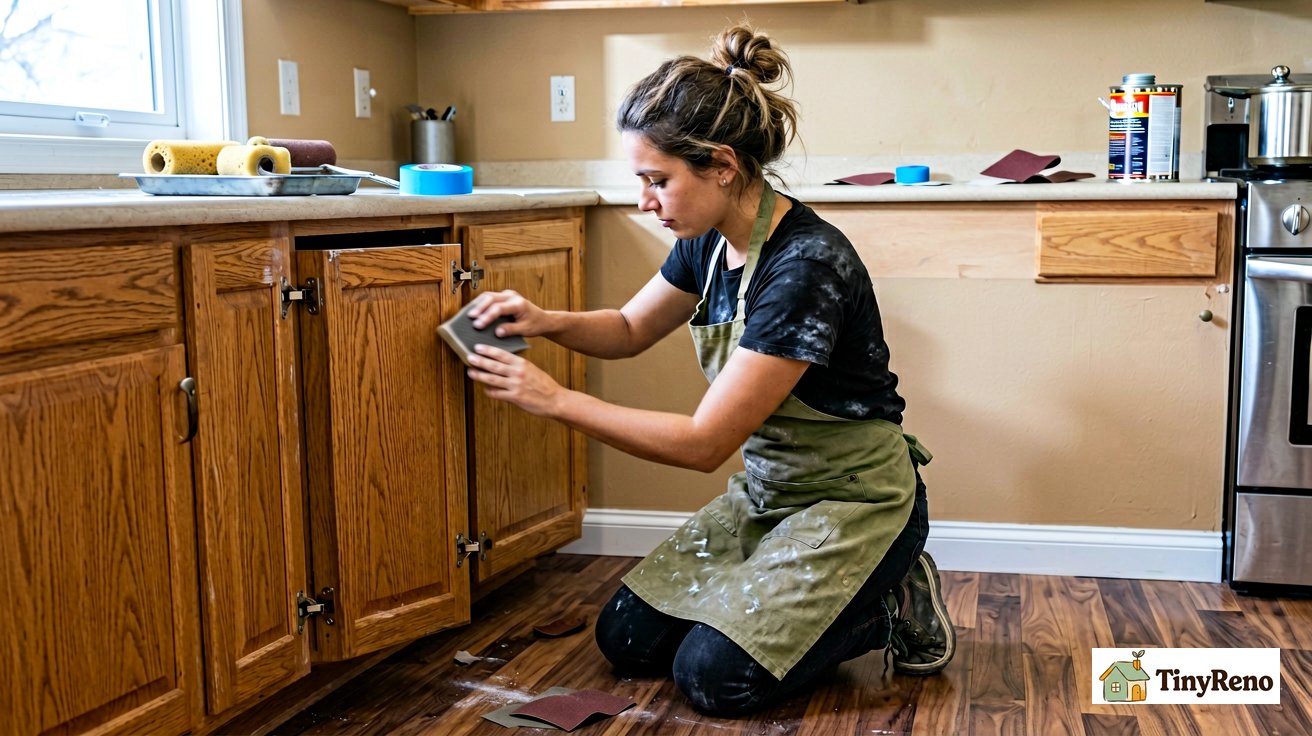
Step 1 — Remove doors and hardware (30 minutes). Number each door with painter's tape on the back (1 through however many you have) so reinstallation goes back to the same spot. Remove hinges with a drill or screwdriver. Set doors flat on a workbench, a folding table covered with a drop cloth, or the floor if you have a clean corner. Pull off the old hardware — saves, discard, or replace.
Step 2 — Degrease everything (20 minutes). Spray Krud Kutter on every cabinet face, frame, and end panel. Wipe with a clean rag. Do this twice — kitchen cabinets have an invisible oil film from years of cooking that does not show until you paint over it and the paint beads up.
Step 3 — Light scuff sand (30 minutes). Use the 220-grit sponge on every surface you plan to paint. You are not removing the factory finish. You are giving it tooth. The surface should look dull and slightly hazy when you are done, not stripped to raw wood.
Step 4 — Dust and tape (15 minutes). Wipe everything with a tack cloth or a damp microfiber. Tape the wall edges where cabinets meet drywall or backsplash. Tape the inside of cabinet boxes if you only want to paint the doors and frames (recommended — most landlords do not care about cabinet interiors).
Step 5 — Bonding primer (45 minutes, plus 1 hour dry). Stir the primer thoroughly. Roll the flat surfaces with the foam roller. Cut in corners with the angled brush. Thin, even coat. Do not try to cover the original color in one pass — that is what topcoats are for. The primer should look slightly translucent or uneven after one coat. That is correct.
Let the primer dry for one full hour (KILZ Adhesion) or 30 minutes (Zinsser BIN). Touch a hidden spot with your finger — if it does not drag, you are ready for Day 2. Actually, Day 2 — primer cures overnight.
Day 2 — Paint + Hardware Swap (Why Foam Roller Beats Brush)
Day 2 is shorter — about three hours of hands-on time, mostly because you are waiting between coats.
Step 1 — Light sand the primer (10 minutes). The primer will have raised the grain slightly on wood cabinets. Quick pass with the 220-grit sponge knocks it smooth. Dust off with the microfiber.
Step 2 — First topcoat (45 minutes, plus 4 hours dry). Stir — do not shake — the Benjamin Moore Advance or Emerald Urethane. Shaking introduces bubbles that end up as bumps in your finish. Use the foam roller on doors laid flat. Roll in one direction, then lightly cross-roll perpendicular to lay off any roller texture. For the cabinet boxes still on the wall, work top-down so any drips catch below your brush.
Step 3 — Second topcoat (45 minutes, plus overnight dry). After four hours, the first coat is dry to the touch but not cured. Lightly sand with 220-grit if you see any dust nibs. Apply the second coat the same way. This is the coat that gives you the color depth and the durable finish.
Step 4 — Re-hang doors with new hardware (30 minutes). The next morning. Drill new holes if your new pulls have a different center-to-center measurement than the old ones — most modern pulls are 5-inch or 3.75-inch, which is rarely what the originals were. Fill the old holes with a wood filler stick (color-matched if you can find it), sand flat, then mount the new pulls. The filled holes will be hidden behind the new hardware.
Total weekend time investment: roughly 7 hours of hands-on work spread across two days.
The Cabinet Door Trick That Saves 3 Hours
The decision everyone wrestles with: do you remove the doors or paint them in place? Here is the rule I use.
Remove the doors if you have 12 or fewer doors and a flat surface (table, workbench, floor with drop cloth) to lay them on. The finish is dramatically better because you can roll without brush marks and you can flip the door to paint the back without waiting for the front to dry.
Paint in place if you have 20+ doors, no flat workspace, or you cannot lose access to your kitchen storage for 24 hours. Use a 2-inch angled brush for recessed panel details and a 4-inch foam mini-roller (the 4-inch size, not the 6-inch) for the flat rails and stiles. Work one door at a time — tape the wall edges if you have not already. The finish is slightly less smooth but still very acceptable for a rental.
The thing that saves 3 hours is the half-and-half method: remove only the doors (not the cabinet boxes), paint the boxes while the doors are drying flat, and reassemble in the right order. Most people either remove everything (and spend an hour taping the wall edges of boxes) or paint everything in place (and end up with brush drips on the wall behind the hinges).
The 30-Day Scratch + Grease Test — What Actually Held Up
Paint on cabinets is easy. Paint that survives 30 days of actual kitchen use is harder.
My cabinet test conditions: 2-person household, daily cooking, a gas stove that throws grease particles four feet, and a dishwasher that vents steam directly under the upper cabinets. After 30 days I checked four things:
Scratch test: Ran a coin across a high-touch cabinet edge near the stove. No visible mark. The Advance enamel has a hard finish that does not mark from coins, keys, or the corner of a pan.
Grease test: Sprayed cooking oil on a lower cabinet door. Wiped with a damp microfiber after 10 minutes. Came off cleanly. No staining, no softening of the finish. The water-based alkyd enamel is genuinely grease-resistant once fully cured (2-3 weeks).
Steam test: Ran the dishwasher with the door open. Steam billowed up directly under the upper cabinets for a full cycle. No bubbling, no peeling, no discoloration.
Color check: The white I chose was Benjamin Moore "White Dove" in Advance satin. After 30 days of normal kitchen lighting, no yellowing, no fading. White-painted cabinets do yellow slightly over years, but satin formula yellows slower than semi-gloss, and water-based formulas yellow slower than oil-based.
The single weak spot was the cabinet door directly next to the stove handle. That door got bumped with the cast iron handle every time I pulled a pan. After 30 days it had a small scuff mark at the height of the handle. Easily retouched with a foam brush and a small amount of leftover topcoat. Took 90 seconds.
3 "Stainless Steel" Looks That Cost Less Than $50
If you want to push the kitchen one more step without painting the walls or replacing the appliances, here are three options for the cabinet face frames that read as "stainless steel" without the cost of real stainless.
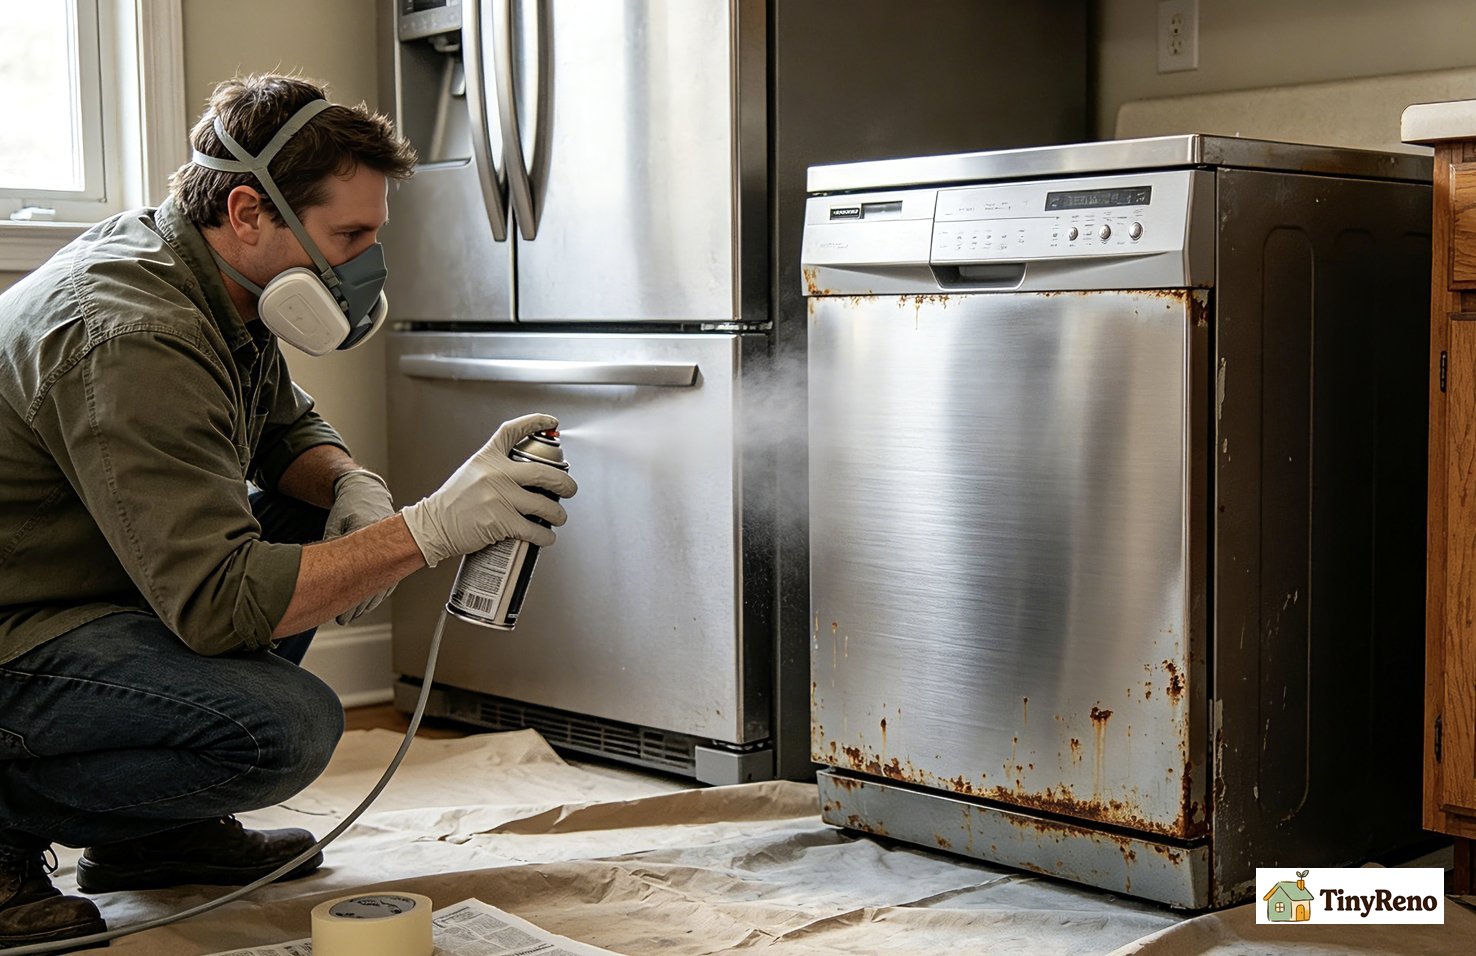
Option 1 — Stainless-look appliance paint ($22). Rust-Oleum makes a "Stainless" finish spray that goes on appliances, but it also works on cabinet end panels. Three light coats over your painted white base, and the end panels read as a continuous stainless strip that ties the fridge and dishwasher together visually.
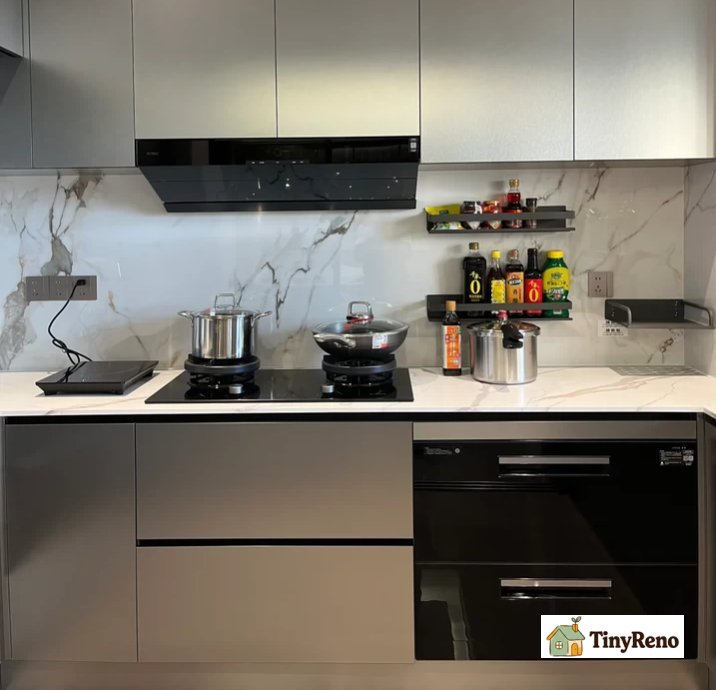
Option 2 — Brushed nickel contact paper ($18 for a 26-foot roll). 3M and a handful of Amazon brands sell a metallic-finish contact paper that genuinely looks like brushed nickel when applied to a flat surface. Cut to the size of your cabinet face frame strips, apply with a credit card to smooth bubbles. Removable in 5 years if the adhesive leaves residue — usually pulls clean with a hair dryer.

Option 3 — Real stainless trim (under $50 total). McMaster-Carr and architectural supply shops sell 1-inch stainless steel flat bar by the foot. Cut to length with a hacksaw, drill mounting holes, screw to the cabinet face as a horizontal accent strip below the upper doors. Looks intentional, holds up forever, removable with a drill.
I have done all three. Option 1 is the easiest. Option 3 looks the most upscale. Option 2 is the only one that fails the 30-day test — at the 90-day mark the edges of the contact paper started lifting near the dishwasher steam.
When This Hack Is Not Worth Doing
I will be honest about the cases where painting rental cabinets is the wrong move.
Do not paint if your cabinets are thermofoil or laminate with a printed wood pattern. Thermofoil is a vinyl film vacuum-sealed to MDF. Paint does not bond well to it — even with bonding primer, the thermal expansion difference causes peeling within a year. If you press the cabinet door with your thumb and it has a slight give, it is probably thermofoil. Skip the paint and replace the doors instead (much more expensive, not a renter-friendly move anyway).
Do not paint if you are in the last 90 days of your lease. The 2-day method assumes you will live with the result long enough to amortize the weekend. If you are moving in 8 weeks, save the $147 and just live with the oak.
Do not paint if your cabinets are MDF with visible water damage or swelling at the sink base. The structural problem is bigger than paint can solve. Painting swollen MDF traps moisture and accelerates the failure. The cabinet needs replacement, not paint.
Do not paint if the kitchen has no ventilation. The KILZ Adhesion primer and the Advance enamel are both low-VOC, but they still need airflow to cure properly. If your kitchen has no window and no exhaust fan, the dry times in this guide will be doubled and the finish will be softer.
For every other rental kitchen with builder-grade oak cabinets, this method is the best $147 I have ever spent on a space I do not own. The cabinets still looked freshly painted when I moved out two years later. The landlord did not mention them on the walkthrough. The deposit came back in full.
That last line is the one that matters most for a renter. Everything else is just paint.
Discussion (0)
Sign in to join the discussion