

The water stain on my bedroom ceiling showed up about two weeks after I moved in. There had been a slow plumbing leak in the unit above mine that nobody noticed for a while. By the time it appeared as a yellow patch the size of my fist on the popcorn texture, the leak had already been fixed, but the stain stayed.
My first thought was that the whole ceiling needed to come down. Every article I found on popcorn ceiling repair seemed to start with "scrape off all the texture and start over," which sounds like a weekend I do not have, and in a rental I do not want to spend. I called my landlord, expecting the worst.
What I learned instead is that popcorn ceiling damage is one of the easiest surfaces to patch invisibly. The texture itself is designed to hide imperfections. A localized repair, done in the right order with the right materials, blends into the surrounding ceiling without anyone noticing. The whole job, including the time I spent staring at the can of spray texture wondering if I was about to make it worse, took about three hours spread across two afternoons.
What popcorn ceiling actually is
Popcorn ceiling, sometimes called acoustic ceiling or cottage cheese ceiling, was the dominant ceiling treatment in American apartments and houses from the 1960s through the late 1980s. It is a spray-on mixture of polystyrene or acrylic beads in a thick binder, applied over drywall or plaster. When dry, it creates a rough, multi-peak texture that hides taping seams, small cracks, and uneven drywall work.
The same rough quality that made it popular in new construction is what makes it easy to patch. The texture is already uneven, so a small repair sits inside an already uneven field. Eye and brain do not lock onto the patch the way they do on a smooth wall.
The downsides of popcorn ceiling are real. The texture catches dust and cobwebs. It absorbs light, which makes rooms feel dimmer than they would with a flat ceiling. And in buildings constructed before the 1980s, the texture may contain asbestos, which turns a five-dollar patch into a regulated project. More on that in a moment.
Step 1: Identify the damage and its source
Before touching anything, I figured out what I was looking at and where it came from.
Water damage shows up as a yellow or brown patch, sometimes with a defined edge where the water pooled, sometimes with drips radiating outward. The texture directly under the stain may feel soft or crumbly if it has been wet for a long time. The source is almost always above: a bathroom, a kitchen, a roof, or a plumbing line.
Smoke damage shows up as a more uniform yellow tint over a wide area, not as a single defined patch. Texture is usually intact.
Impact damage shows up as a missing chunk of texture with the underlying drywall visible. Common cause is moving furniture, a kid with a stick, or a ladder slipped the wrong way.
My patch was water. The source had been fixed by the landlord two weeks before I noticed, and the spot was dry to the touch. If the source had not been fixed, no amount of patching would have helped, because the leak would have kept soaking the patch from behind. Always confirm the source is resolved before you patch.
Step 2: Gather what you actually need
The shopping list is short and the items are easy to find at any hardware store.
- A 5-in-1 painter's tool or a stiff putty knife for scraping loose texture.
- A can of Homax popcorn ceiling patch spray. One can is around twelve dollars and covers a few square feet, which is far more than most patches need. Get the water-based version. It sprays more cleanly and cleans up with soap and water.
- A small can of stain-blocking primer. Zinsser B-I-N is the shellac-based standard and what I used. Kilz Original is the latex alternative with less smell. Either works. A quart is about twelve to fifteen dollars and is more than enough.
- A small foam or short-nap roller for the primer.
- A step stool or short ladder, plus drop cloths for the floor.
- Safety glasses and a dust mask. The texture particles fall into your eyes and lungs easily. This is not optional.
Total cost for everything was under forty dollars. The single biggest item was the texture spray, which is also the only item I could not have substituted.
Step 3: Scrape the loose material
The Homax spray needs a clean, hard surface to bond to. Loose or crumbly texture on top of the stain has to come off first.
I held the putty knife at a low angle and gently scraped the discolored area, working from the outside of the patch inward. The goal was not to expose the drywall underneath if I could avoid it. The texture that was still well-bonded to the ceiling could stay. The texture that flaked off with a light touch had to go.
I stopped scraping as soon as the knife met firm resistance. Going further than that risks gouging the drywall paper, which then needs its own repair and adds an extra step.
This is also the step where a dust mask and eye protection earn their keep. The texture falls in a fine rain, and the small flakes that drift down are exactly the size that lands in eyes and gets inhaled. I laid a drop cloth on the floor below the patch so cleanup was a matter of folding the cloth into the trash rather than chasing ceiling dust around the room.
Step 4: Prime the stain
This is the step most DIY popcorn ceiling repair guides skip, and it is the difference between a patch that disappears and a patch that slowly bleeds back through.
Stain-blocking primer is formulated to seal water marks, smoke residue, and other discoloration so they cannot migrate up through the topcoat. Regular primer does not. I learned this the hard way years ago on a different ceiling, where I used a regular primer over a water stain and within six months the yellow was back, faintly but visibly, in the exact shape of the original patch.
I poured a small amount of Zinsser B-I-N into a tray and used a short-nap roller to apply a thin coat over the entire scraped area, extending about two inches beyond the stain on every side. The extra margin gives the texture spray a surface to grip at the edges where the patch meets the existing ceiling.
The primer went on white and dried in about an hour in my unit. The smell was strong for that first hour but cleared once I opened a window. B-I-N dries fast, which is convenient when you are standing on a stepladder looking up.
Step 5: Spray the texture
This is the part I had been dreading, because it felt like the kind of thing you only get right on the third try, and the ceiling is not a place you want to learn by doing.
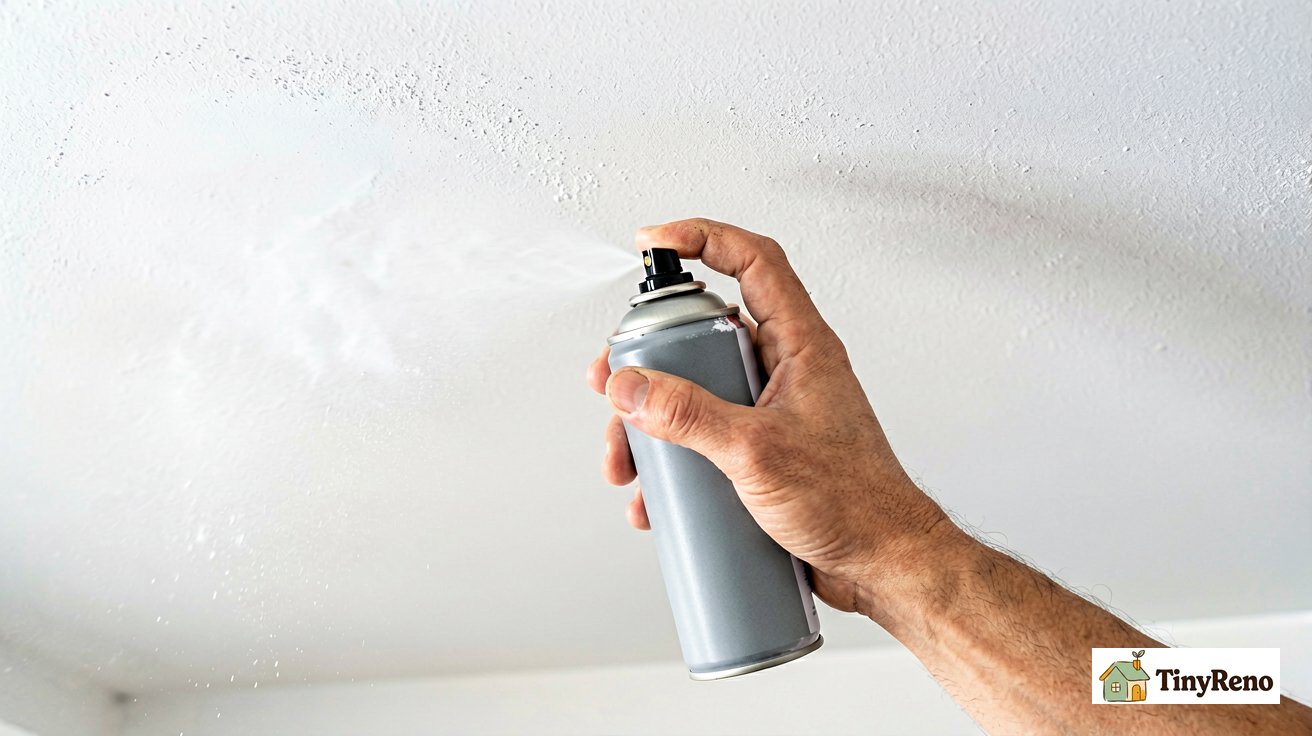
The first thing the can instructions told me, and the first thing I would tell anyone, is to practice on cardboard first. I set a flattened box on a chair at the same height as the patch and sprayed a few passes. The first pass was too heavy, leaving wet clumps. The second pass was too far away, producing a sandy mist that barely landed. The third pass, around eighteen inches from the box with a steady medium-speed motion, gave me a dense, even texture that looked roughly like the surrounding ceiling. That was the pass to replicate on the actual ceiling.
For the real patch, I held the can at arm's length, slightly off to the side so the spray would land at an angle rather than straight down (straight down packs the texture too densely). I made two light passes, waiting about thirty seconds between each so the first pass could tack up before the second added more volume.
The trick that took me three cardboard tries to figure out is that popcorn texture wants to be built up in layers, not laid on thick. Heavy passes slump and look wet and obvious. Light passes blend into the existing texture because each one adds a few more peaks without filling in the valleys.
Step 6: Blend the edges
Even with careful spraying, there is usually a visible line where the new texture meets the old. The fix is almost embarrassingly simple.
Within five minutes of the last spray pass, while the texture was still slightly tacky, I took a clean dry brush and lightly tapped along the edge of the patch. The brush picked up small bits of overspray from the new texture and deposited a few of them onto the bare edge of the old texture. That blended the line in a way that no amount of careful spraying can do on its own.
After that, I left the ceiling alone for twenty-four hours. Popcorn texture dries slowly because of all the binder, and touching it before it is cured will leave finger marks that show up under raking light.
How to tell if the patch is invisible
From across the room, my patch disappeared within an hour. Up close, in normal room light, I could find it only by remembering exactly where I had scraped.
The real test was done the next morning. I turned off the overhead light, closed the curtains, and held a flashlight flat against the ceiling, aimed away from me. The light raked across the texture in a way that makes any difference in height obvious. Where the patch had been, the texture profile looked like the surrounding ceiling. Where I had over-sprayed and left a denser patch, the light cast a slightly different shadow that I could see but that nobody walking through the room would notice.
If you can see the patch in normal lighting from across the room, the texture is too low in spots. A second very light spray pass fixes that. If you can see it only in raking flashlight light, leave it alone. The ceiling looked at normal viewing angles will be fine.
When not to DIY this
Three cases where a popcorn ceiling patch is not a renter-friendly DIY job.
Buildings built before 1980 may have asbestos in the texture. Asbestos is only dangerous when disturbed, but scraping it releases fibers into the air. If you live in an older building and are not certain the ceiling has been tested or abated, do not scrape. In most US states a licensed asbestos inspector has to test the material before any disturbance. Many local health departments offer low-cost testing.
Large water damage, more than a few square feet, often hides mold growth behind the texture. A small stain is one thing. A ceiling that sags or has a wider dark area needs a professional assessment, not a patch.
Damage where the source is ongoing. If the leak is still active, no patch will hold. The ceiling will keep wetting, the texture will keep failing, and the patch will end up a visible scar on top of a worse problem. Confirm the source is fixed before you patch. In a rental, that confirmation needs to come from your landlord in writing.
The honest summary
Popcorn ceiling patch is one of the most underrated renter-friendly repairs because the texture itself is built to hide mistakes. The whole job cost me under forty dollars, took about three hours across two days, and left a patch that I cannot find without a flashlight and a memory of where I was standing.
For renter damage that has to be repaired before move-out to protect the deposit, this is one of the few ceiling fixes where the cheap DIY path looks indistinguishable from a professional patch. The trick is the order: confirm the source is fixed, scrape loose material only, prime with a stain blocker, and build the texture up in light passes. The can of spray texture is the only part that cannot be substituted with something you probably already have around the apartment.
Two months after I patched my ceiling, the upstairs neighbor had a smaller leak. The stain came back about a quarter of the size of the original. I repeated the same process in forty minutes. The deposit, when I eventually moved out, came back in full.
Discussion (0)
Sign in to join the discussion