

The first room I ever painted on my own was a small home office with cream walls that I'd grown to hate. I grabbed a brush, picked the trim to start with because it felt easiest to reach, and told myself I'd work my way up. By Saturday afternoon I had glossy white baseboards, a partly painted ceiling, and a slow-dripping mess of white blobs sliding down the walls I'd only just rolled. The "wait until it's dry" advice I'd ignored meant I spent Sunday sanding drips off the walls before I could prime them again. Two coats of ceiling paint, three coats of wall paint, and one lost weekend later, I learned the only lesson paint really teaches you: gravity is part of the formula.
That lesson is the entire reason paint order exists. The order most of us end up using — ceiling first, then walls, then trim — isn't some pro's quirk. It's what happens when you respect the way paint falls, drips, and dries.
The order that actually works
For a normal interior room with a brush and roller (no sprayer), the sequence is:
- Ceiling
- Walls
- Trim (baseboards, window casings, door frames)
Every step goes top to bottom within itself too. On the ceiling, you cut in along the wall edges first, then roll the middle. On the walls, you cut in along the ceiling line, corners, and trim first, then roll. On the trim, you brush from top of the casing down to the baseboard.
If you remember nothing else, remember that last bit: the heaviest drips fall downward, so the surface that's supposed to end up on top is the one you paint first. Reverse it and you'll be redoing your work for a week.
Prep is 60% of the job, not 30%
Most guides treat prep like an intro paragraph. After watching my own paint jobs and helping with a few friends', I'd put it closer to two-thirds of the total work. Here's what actually happens on a Saturday morning before any paint comes out:
- Move furniture to the center and cover it. If you can get it out of the room, get it out of the room.
- Take off outlet covers, switch plates, and the smoke alarm cover (don't paint over it — paint kills the sensor).
- Run painter's tape along the ceiling line where it meets the walls, and along the trim where it meets the walls. The trick most people miss: tear short pieces, maybe 6 to 8 inches at a time. Long strips stretch and wrinkle, and a wrinkled edge prints wrinkles into your paint line.
- Lay a real canvas drop cloth, not a plastic sheet. Plastic gets slippery underfoot. Canvas also absorbs the drips instead of letting your shoes track them across the carpet on the way out.
I rushed prep on a bathroom once because I thought "it's a small room." I spent the next three hours scraping dried paint specks off the tile. Prep doesn't shorten the project; it shortens the cleanup, which is what determines whether the project feels like a weekend or a month.
Step 1: Ceiling — cut in first, then roll
Start with the ceiling because anything that falls off it lands on surfaces you haven't painted yet. Two tools do this job:
- A 2-inch angled sash brush for the edges.
- A 9-inch roller with a half-inch nap on an extension pole.
Cut in a 2 to 3 inch band along the entire perimeter where the ceiling meets the walls. The angled brush makes this much easier than a straight one because the bristles fit into the corner. Don't try to get it perfect on the first pass — the roller will overlap this band slightly anyway.
Then roll the middle. Work in sections about 3 feet by 3 feet. Start at the corner farthest from the door and work your way out, so you don't paint yourself into a corner with a wet roller. Roll in a slow W or M pattern, then fill in the gaps without lifting the roller. Lifting leaves texture marks that show up the moment the light hits them at an angle.
For ceilings over 9 feet, the extension pole matters more than the brush. Climbing a ladder with a loaded roller is how most DIY ceiling jobs end with a hand tremor and a stripe down the wall. Set the pole length so the roller sits flat on the ceiling with your arms slightly bent, not reaching.
Let the ceiling dry until it's not tacky to a light touch — usually 1 to 2 hours depending on humidity. If you press a fingertip and it feels cool or sticky, give it more time. The ceiling doesn't have to be cured; it just has to be able to take a brush stroke along the edge without lifting.
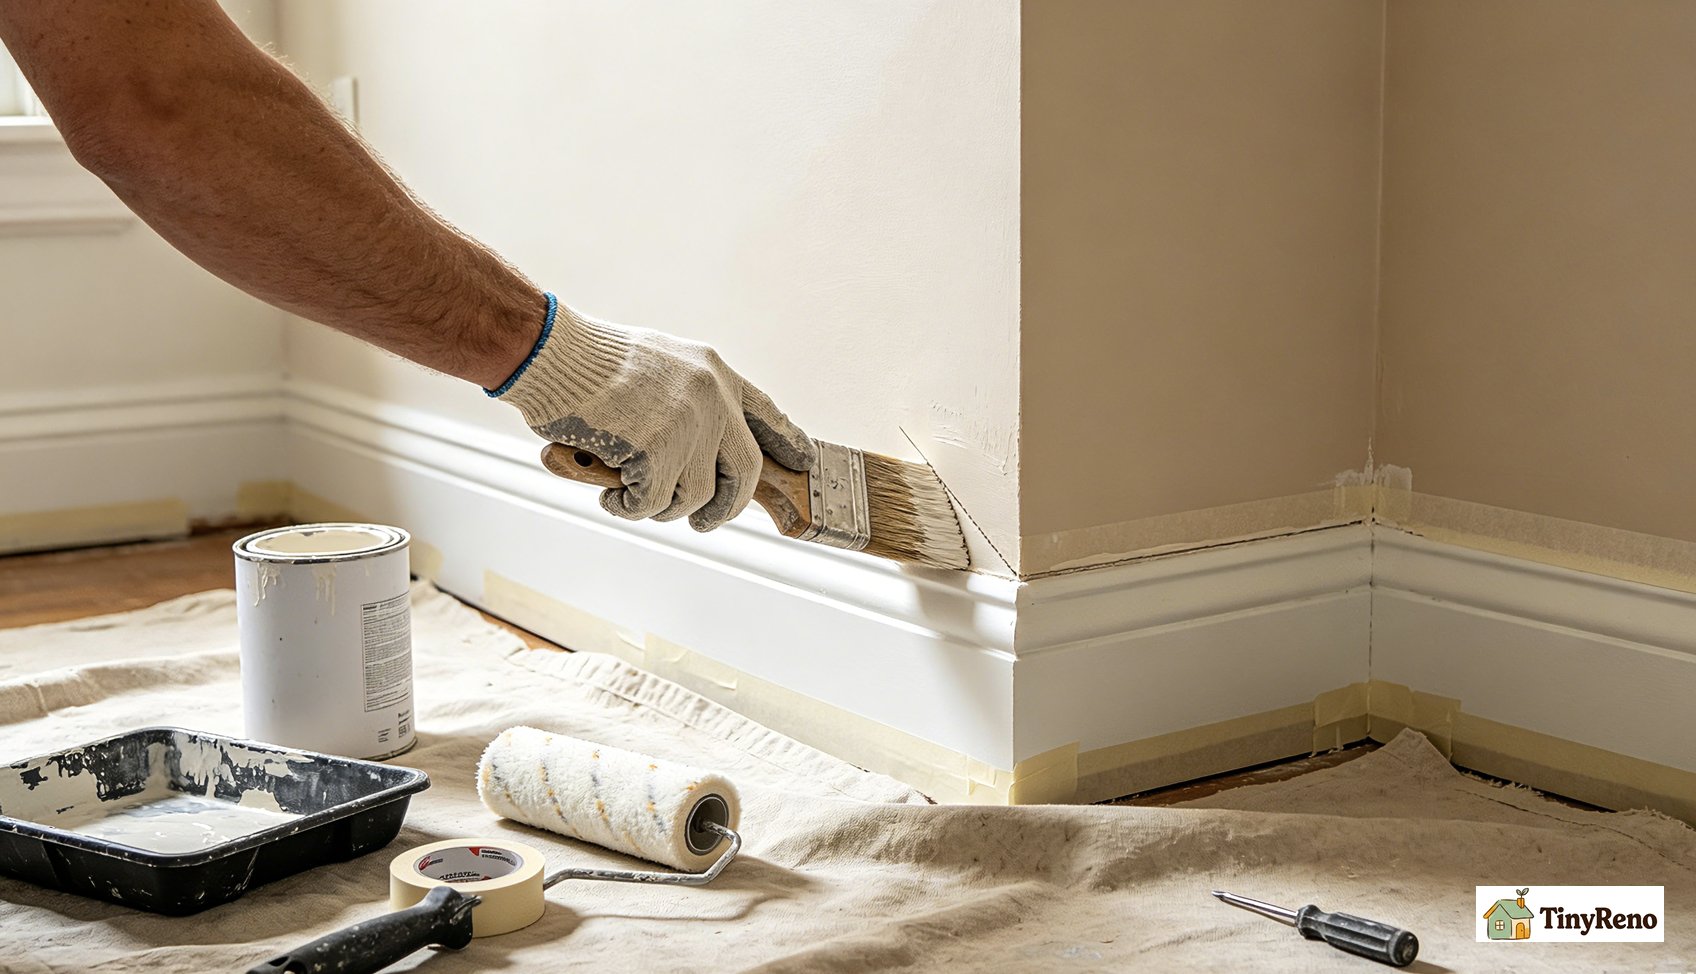
Step 2: Walls — three cuts, then roll
Walls look simpler than ceilings but they're where the sequence breaks down for most people. The reason: a roller can't get within 2 inches of anything it would smudge. So before the roller ever touches the wall, three cuts need to happen.
- Top edge: along the ceiling line. Use the same angled brush, loaded but not dripping. A loaded-but-not-dripping brush is one you've tapped against the inside of the can twice, not one you've dragged across the rim.
- Bottom edge: along the baseboards.
- Corners: inside corners especially. Outside corners can be rolled carefully with the roller tip, but inside corners need a brush or you'll leave a hollow.
Once those three bands are down, you can roll the open wall. Same W-then-fill pattern as the ceiling. Same direction across the room, same overlap onto your wet cut-in band while it's still wet — that's how you avoid a visible line where brush meets roller.
Most walls need two coats. The mistake I keep making is rushing the second one. Even when the wall feels dry to touch, the paint underneath is still off-gassing. If you roll a second coat too soon, the first coat can re-wet and lift, leaving streaks that look like roller marks but are actually the first coat sliding around. Two to four hours between coats is the realistic window in most homes. Humid days push it longer; dry winter air can shorten it.
Step 3: Trim — last, slowest, most patient
Trim is the smallest area but it takes the longest per square foot. The reason isn't skill, it's prep. Each piece of trim usually gets taped, caulked if there are gaps, and brushed with a 1.5 or 2 inch sash brush in long, steady strokes.
Do not — under any circumstance — try to roll trim with a mini roller to save time. Mini rollers leave a stipple texture that looks completely different from brushed trim, and you'll see every wall socket and door frame for the rest of the time you live there.
The other trap: painting trim before the walls are fully dry. If you brush the baseboard while the wall paint is still soft, the wet bristles will drag wall paint down onto the baseboard and you'll have a faint colored smear at the joint. This is the issue I see most often in fresh DIY paint jobs, and almost nobody catches it until they move a piece of furniture six months later and the light hits it right.
Two details I've learned the hard way:
- Leave a 1 to 2 millimeter gap at the bottom of the baseboard if you have carpet. Brush up to that line, no further. Paint on carpet is paint you don't get back.
- Pull the painter's tape while the trim paint is still slightly tacky, not fully cured. Fully cured paint can tear at the edge if the tape bonded to it. Tacky paint peels cleanly off the tape and leaves a sharper line.
The thing most guides won't tell you about "trim first"
If you've watched a few YouTube painters and noticed some of them swear by painting the trim first, then masking it off, then painting the walls — they're not wrong, but they're solving a different problem than you are.
The "trim first, mask, then walls" method is a spray-paint method. With a sprayer, you can lay a perfect coat on the trim without ever touching it with a brush, then mask it cleanly and blow wall paint across the room. With a brush and roller, masking trim for a roller pass is a recipe for fuzzy edges, paint bleeding under the tape, and three hours of cleanup. Stick with trim last unless you actually own a sprayer and know how to mask a room in under an hour.
When the order changes
The ceiling → walls → trim rule covers maybe 80% of rooms. The other 20% falls into a few patterns:
- One accent wall in a small room. Paint the accent wall first, then the three remaining walls. If you paint the light walls first and then go to the dark accent wall, your roller picks up dark pigment and streaks the light walls at every overlap. This is the single most common mistake I see in bold-color bedrooms.
- You're repainting trim only. Skip the ceiling and walls entirely. Just tape carefully, brush the trim, and pull the tape while tacky.
- You're patching a small area. Forget the sequence. Cut in the patch, feather the edges, let it dry, then roll a slightly larger area to blend.
- You're working in a humid bathroom. Run a fan and a dehumidifier. Order doesn't change, but the gaps between coats need to roughly double. Bathroom paint that looks dry on the surface can stay soft underneath for hours.
What the time actually looks like
A 12 by 12 bedroom with one window, one door, and standard 8-foot ceilings, painted solo with a brush and roller:
- Prep: 3 to 4 hours
- Ceiling, two coats: 2 to 3 hours of painting, plus drying time
- Walls, two coats each: 4 to 6 hours of painting, plus drying time
- Trim, two coats: 2 to 3 hours
- Cleanup and tape pull: 1 hour
Realistically that's two and a half days if you let the paint cure between steps, longer if you have interruptions. Most "paint a room in a day" articles are written by people with sprayers, helpers, or a tolerance for a messy finish. I don't have any of those.
The thing that actually decides the result
Order is the skeleton. What decides whether the room looks like a pro did it or like a first-timer did it is the waiting. The brush stroke that ruins a wall almost always happens because someone went back to "touch up" a spot before the previous stroke was dry. The drip on the baseboard almost always happens because someone painted trim before the wall paint had finished off-gassing. The visible lap line on the ceiling almost always happens because someone rolled a new section onto one that had started to skin over.
If you take one thing from this: before each new step, ask yourself if the last step is truly dry — not just dry to a touch, but dry enough that a new brush stroke won't lift what you already laid down. Most paint jobs don't fail because the order was wrong. They fail because someone got impatient at the seam between two steps.
Pick up the brush. Start at the ceiling. And then — and this is the hard part — wait.
Discussion (0)
Sign in to join the discussion